“OFF ROAD” / “ON ROAD” MODE
Selecting the “O Road” mode enables you to use all of the ash and strobe
features that you have programmed to use for certain switches (in the
“Switch Feature Options” menu).
Selecting the “On Road” mode disables all the ash and strobe features.
Switching to “On Road” will change ALL switches currently in ash or
strobe mode to solid on.
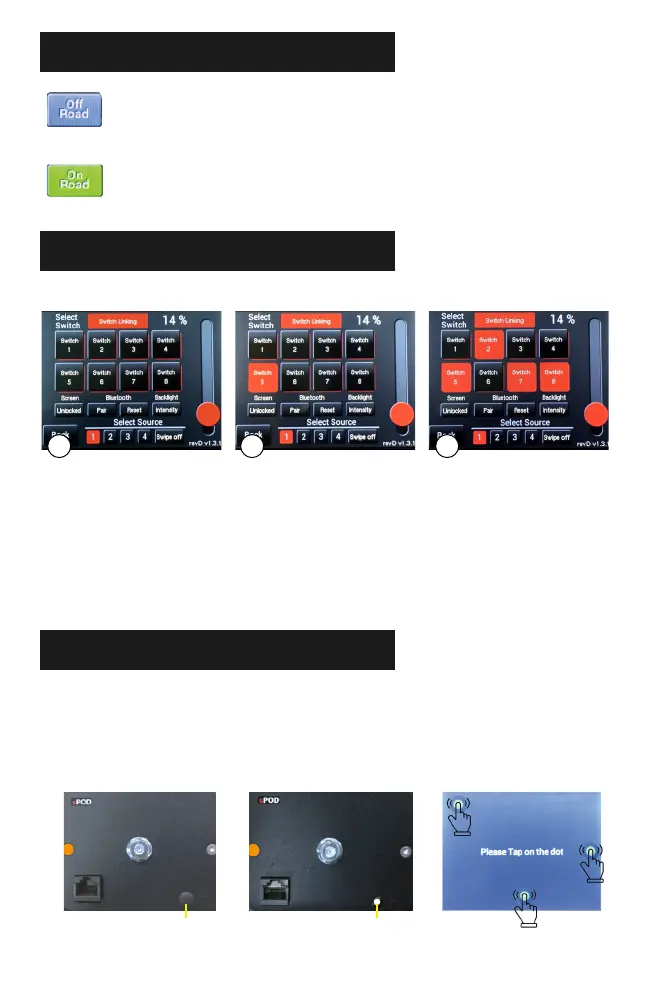
SWITCH LINKING
In the “Switch Programming Selection Screen,” start by pressing “Link.” NOTE: Strobe
function must be turned o before you go back into the setting to disable it. If it’s left on,
then the strobe function will not be disabled.
Press on any switch to program it as the master switch.
Press on all switches you wish to link the master switch. Then press “Link” and “Back.” NOTE:
You can still use all grouped switches individually but turning on the master switch will turn
on all switches in the group.
1
2
3
The Link option allows you to turn on multiple switches with one master switch.
PLEASE BE SURE TO ABIDE BY YOUR
STATE LAWS WHEN USING FEATURES
SUCH AS STROBE AND FLASH.
CALIBRATION
Use a small athead screwdriver to pull o the small plug. This will expose the calibration
button on the back.
While touchscreen is plugged in, press the white calibration button that is inside the access
hole.
Follow the instructions on the screen, pressing the screen where shown. Repeat as required
for desired results.
Replace the plug when nished.
1
2
3
4
IF TOUCHSCREEN EVER GOES INTO SLEEP MODE, PRESS THE UPPER LEFT CORNER OF THE SCREEN.
Calibration ButtonPlug
21 3