Pressing ‘ENTER’ will toggle display between one of the
displays described above and the numeric value read for that
particular display. Pressing ‘UP’will scroll through the menu
from ‘SUPH to ‘POSN’, etc. Pressing ‘DOWN’ will scroll
through the menu the opposite way.
When in ‘POSN’, press and hold ‘UP’ button and ‘ENTER’
button simultaneously for 5 seconds to put the controller in
manual valve position. The number of steps open will be dis-
played and the 1000’s digit will blink. Pressing the ‘UP’ but-
ton will open the valve 1000 steps. Pressing the ‘DOWN’
button will close the valve 1000 steps. Pressing the ‘ENTER’
button will change the flashing digit from 1000’s digit to the
100’s digit. Pressing the ‘UP’ button will open the valve 100
steps. Pressing the ‘DOWN’ button will close the valve 100
steps. Pressing the ‘ENTER’ button will change the flashing
digit from 100’s digit to the 10’s digit. Pressing the ‘UP’ but-
ton will open the valve 10 steps. Pressing the ‘DOWN’
button will close the valve 10 steps. Pressing the ‘ENTER’
button will change the flashing digit from 10’s digit to the 1’s
digit. Pressing the ‘UP’ button will open the valve 1 step.
Pressing the ‘DOWN’ button will close the valve 1 step.
Pressing the ‘ENTER’ button will change the flashing digit
from 1’s digit to the 1000’s digit. Press and hold ‘UP’ button
and ‘ENTER’ button together for 5 seconds to put the con-
troller in normal control. The digits will stop blinking.
When in ‘SHSP’, press and hold ‘UP’ button and ‘ENTER’
button for 5 seconds to enable the superheat set point to be
changed. The set point is displayed and the 100’s digit will
blink. Pressing the ‘UP’ button will increase the set point by
100 degrees. Pressing the ‘DOWN’ button will decrease the
set point by 100 degrees. Pressing the ‘ENTER’ button will
change the flashing digit from 100’s digit to the 10’s digit.
Pressing the ‘UP’ button will increase the set point by 10
degrees. Pressing the ‘DOWN’ button will decrease the set
point by 10 degrees. Pressing the ‘ENTER’ button will
change the flashing digit from 10’s digit to the 1’s digit.
Pressing the ‘UP’ button will increase the set point by 1
degree. Pressing the ‘DOWN’ button will decrease the set
point by 1 degree. Pressing the ‘ENTER’ button will change
the flashing digit from 1’s digit to the 100’s digit. Press and
hold ‘UP’ button and ‘ENTER’ button together for 5 seconds
to save the set point. The digits will stop blinking.
When in ‘MOPD’, pressing and holding ‘UP’ button and
‘ENTER’ button for 5 seconds will enable the Maximum
operating suction pressure set point to be changed. The set
point is displayed and the 100’s digit will blink. Pressing the
‘UP’ button will increase the set point by 100 PSI. Pressing
the ‘DOWN’ button will decrease the set point by 100 PSI.
Pressing the ‘ENTER’ button will change the flashing digit
from 100’s digit to the 10’s digit. Pressing the ‘UP’button will
increase the set point by 10 PSI. Pressing the ‘DOWN’ but-
ton will decrease the set point by 10 PSI. Pressing the
‘ENTER’ button will change the flashing digit from 10’s digit
to the 1’s digit. Pressing the ‘UP’ button will increase the set
point by 1 PSI. Pressing the ‘DOWN’ button will decrease
the set point by 1 PSI. Pressing the ‘ENTER’ button will
change the flashing digit from 1’s digit to the 100’s digit.
Press and hold ‘UP’button and ‘ENTER’button for 5 seconds
to save the set point. The digits will stop blinking.
When in ‘CTSP’, pressing and holding ‘UP’ button and
‘ENTER’ button for 5 seconds will enable the cut out suction
pressure set point to be changed. The set point is displayed
and the 100’s digit will blink. Pressing the ‘UP’ button will
increase the set point by 100 PSI. Pressing the ‘DOWN’ but-
ton will decrease the set point by 100 PSI. Pressing the
‘ENTER’ button will change the flashing digit from 100’s
digit to the 10’s digit. Pressing the ‘UP’ button will increase
the set point by 10 PSI. Pressing the ‘DOWN’ button will
decrease the set point by 10 PSI. Pressing the ‘ENTER’ but-
ton will change the flashing digit from 10’s digit to the 1’s
digit. Pressing the ‘UP’ button will increase the set point by 1
PSI. Pressing the ‘DOWN’ button will decrease the set point
by 1 PSI. Pressing the ‘ENTER’button will change the flash-
ing digit from 1’s digit to the 100’s digit. Press and hold ‘UP’
button and ‘ENTER’ button for 5 seconds will save the set
point. The digits will stop blinking.
NOTE: ‘CTSP’ set point is used to help stop nuisance, low
suction pressure trips of the compressor. If the suction pres-
sure goes below this set point, and the superheat is above the
superheat set point, the valve will keep opening until the suc-
tion pressure is above this set point or the superheat is below
its set point. The controller will start controlling superheat
from this valve position. If the superheat is below its set point
and the suction pressure is below this set point, the controller
will change this set point to 12 PSI below whatever the cur-
rent suction pressure is. This is not saved. If power is lost,
the original saved set point is again used.
When in ‘CALP’ or ‘CALT’, the numeric display shows the
PSI or degrees to be either added or subtracted from that par-
ticular sensor, depending if the reading is negative or positive.
Pressing and hold ‘UP’ button and ‘ENTER’ button for 5 sec-
onds will enable that sensor to be calibrated. The CAL num-
ber is displayed and the 10’s digit will blink. Pressing the
‘UP’ button will increase the CAL number by 10 PSI or
degrees. Pressing the ‘DOWN’ button will decrease the CAL
number by 10 PSI or degrees. Pressing the ‘ENTER’ button
will change the flashing digit from 10’s digit to the 1’s digit.
Pressing the ‘UP’ button will increase the CAL number by 1
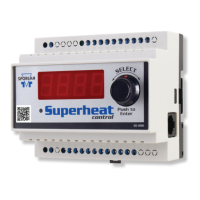
Remote Panel
Display
 Loading...