This document is an instruction manual for a Sports Afield Gun Safe, providing comprehensive guidance on its operation, maintenance, and security features. The safe is designed to protect valuables, important documents, and keepsakes, with a focus on durability and security.
Function Description
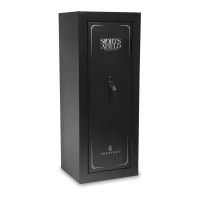
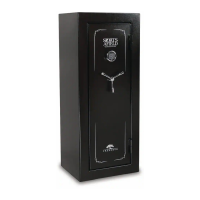
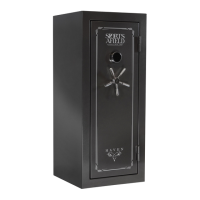
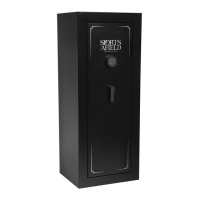
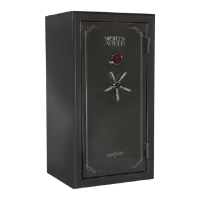
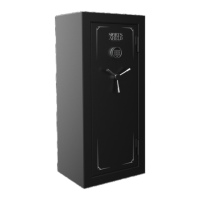
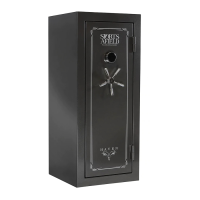
The Sports Afield Gun Safe serves as a secure storage unit for firearms and other valuables. It features a robust locking mechanism, which can be either a general electronic lock (E-Lock) or an ESL5 UL E-Lock, depending on the model. Some models also include an anti-theft alert alarm system for enhanced security. The safe is designed with various internal components such as top shelves, gun racks, center dividers, and side shelves to aid in organizing contents. It also incorporates dead bolts, active locking bolts, and a heat expanding fire seal for protection against fire and forced entry. Certain models may also include cold smoke and water seals for additional protection.
Usage Features
The manual outlines detailed instructions for first-time opening, battery installation, and security code setup for different E-Lock types.
- First-Time Opening (General E-Lock): Users are instructed to locate override keys, gently remove the electronic keypad by rotating it counter-clockwise, and insert the key into the keyhole in the locking ring, turning it clockwise from 9 to 1 o'clock to unlock. A single spoke, found in a plastic bag, is then attached to the spindle hub and turned clockwise to retract the locking bolts and open the door. Remaining spokes for the handle are found inside the safe and threaded into the spindle hub.
- First-Time Opening (ESL5 UL E-Lock): These safes do not come with override keys and must be opened using the E-Lock. Users press the 'C' key followed by the preset factory code (123456#). A successful entry is indicated by two beeps and a green light. The door is opened by rotating the spindle hub clockwise. Spindle handles are then threaded into the respective holes on the spindle hub.
- First-Time Opening (Sanctuary Series): Override keys are located in a plastic bag. The E-Lock is removed by sliding it upwards from the mounting screws. The circular keyhole is located, and the key is inserted and turned. A single spoke is attached to the spindle hub and turned clockwise to open the door. Remaining spokes are found inside the safe.
- Battery Installation (General E-Lock): Requires 4 x AA alkaline batteries, located in a plastic bag with the manual. The battery compartment is on the interior of the door towards the upper hinge. Batteries must be inserted with correct polarity. A red and green light illuminating simultaneously upon button press indicates low battery.
- Battery Installation (ESL5 UL E-Lock): Requires a 9V alkaline battery. The battery compartment is under the keypad; the keypad is rotated up to the left to release it from the locking ring. The 9V battery is snapped to the connector, and the keypad is reinstalled. A series of 8 beeps indicates a low battery.
- Battery Installation (Sanctuary Series): Requires 4 x AA alkaline batteries. The battery compartment is on the backside of the E-Lock. Batteries must be inserted with correct polarity. The E-Lock is replaced by aligning keyhole slots with mounting screws and sliding downward. Red and yellow lights illuminating simultaneously indicate low battery.
- Security Code Setup (General E-Lock): The safe comes with a preset factory code (159#). Users must reprogram the safe with a new 3 to 8 digit security code. For Haven Series, the keypad needs to be woken up by pressing any number before entering the preset code. For other models, the preset code is entered directly. With the door open and active bolts extended (by rotating the handle counter-clockwise), the small copper cap near the battery compartment is unscrewed, and the reset button is pressed. While the yellow light is on, the new security code (3-8 digits) is entered, followed by the '*' symbol to confirm. The new code should be tested at least three times before closing the door. Incorrect entries three times lead to a 20-second lockout, and three additional failed attempts result in a 10-minute lockout.
- Security Code Setup (ESL5 UL E-Lock): The safe comes with a preset factory code (123456#). With the door open, the detent rod (near the hinges) is pressed, and locking bolts are extended by turning the handle counter-clockwise. The 'C' key is pressed, then the '#' key, followed by the last known 6-digit code (or preset factory code). The new 6-digit security code is then entered, followed by the '#' key, and re-entered for confirmation. The new code should be tested at least three times before closing the door. To wake up the system, the 'C' key must be pressed before entering any codes.
- Security Code Setup (Sanctuary Series): To program a new 3 to 8 digit security code, press the '0' button six times followed by the '' symbol. Then, enter the preset factory code (159#) (or the last security code if changing). While the yellow light is on, enter the new code followed by the '' symbol, and re-enter for confirmation. The new code should be tested at least three times before closing the door. Incorrect entries three times lead to a 20-second lockout, and three additional failed attempts result in a 10-minute lockout.
- Quiet Mode (General E-Lock): To mute, enter [*633]. To un-mute, enter [*66].
- Quiet Mode (ESL5 UL E-Lock): To mute, press [C#], then [80#], then [1#]. To un-mute, press [C#], then [80#], then [0#].
- Quiet Mode (Sanctuary Series): To mute, enter [*633]. To un-mute, enter [*66].
- Resetting to Factory Presets (Sanctuary Series): If the security code is forgotten, contact customer service for a unique reset code. To reset, press the '0' button six times followed by the '' symbol. Enter the 8-digit reset code followed by the '#' symbol. While the yellow light is on, enter the new 3 to 8 digit security code followed by the '' symbol, and re-enter for confirmation. The new code should be tested at least three times before closing the door.
- Anti-Theft Alert Alarm System: Available on certain models. To activate, press [*00]. The alarm sounds for 20 seconds if tampered with. Entering the security code or using the override key stops the alarm. To re-activate, press [*00].
- Shipping Skid Removal: For safes with shipping feet, the box is lifted off after removing strapping. For safes without shipping feet, the box is carefully removed with assistance to stabilize the safe. For Maximum Security Series safes, four lag bolts securing the safe to the skid from the inside are removed using a wrench or 9/16" (14mm) socket. The safe is then tilted to remove the pallet.
- Moving Your Safe: Safes are heavy and awkward; professional assistance is recommended. Considerations for placement include lower levels for fire protection, securing to the floor for burglary protection and stability, and an isolated area away from children. A dolly is recommended for moving. The safe should be installed adjacent to a side wall, flat against the wall and floor, and in a dry area. A moisture/protective barrier is recommended for concrete floors. Shimming may be needed if the safe is unlevel.
- Securing Your Safe: The safe must be bolted to the floor to prevent tipping and enhance security. Tools needed for concrete surfaces include a drill/hammer drill, 1/2" drill bit, wrench/11/16" (17mm) socket, and hammer. Four black caps on the safe floor are removed to access bolt-down holes. Pilot holes are drilled in the floor, plastic anchoring plugs are inserted, and anchor bolts are threaded through the safe and tightened. Metal washers should sit on top of rubber washers (if included) and be compressed to prevent water entry. For Maximum Security Series safes, hardware is not provided, and users should consult a local retailer for appropriate fastening hardware.
- Loading Your Safe: Guns should rest securely against cutouts in gun racks. Documents and heat-sensitive items should be stored at the bottom for fire protection. Ammunition should be stored separately. Nothing should put pressure against the door when closed. Heavier items should be stored on the floor or away from the middle of shelves, especially for models without reinforced shelving.
- Keeping Safe Dry: A moisture/protective barrier between the safe and concrete floor is recommended. Installing the safe in a climate-controlled area is highly recommended. In humid areas, an internal dehumidifier and/or desiccants are encouraged, ensuring they do not directly contact the safe walls.
Maintenance Features
- Hinges and Internal Mechanism: These components are permanently lubricated and require no maintenance. Opening the door panel may void the warranty, and customer service should be consulted before doing so.
- Locking Bolts: Occasionally, active locking bolts may need lubrication. With the door open, extend the bolts completely and wipe a small amount of oil/lubricant around each bolt.
- Cleaning: Use a soft, non-abrasive cloth (lint-free polishing cloths recommended) to clean the safe surface. Do not use paper towels, as they may scratch the finish. Water is often sufficient, but an ammonia-free window cleaner can be used. Metal polishes or solvents should not be used.
- Obtaining Lost Keys: To request replacement override keys, contact customer service with all registration information available.
The manual emphasizes the importance of reading all information and following safety rules carefully, as failure to do so will void the warranty. It also advises against forcing the safe open if difficulty is encountered, as this can jam the lock and require a technician, potentially leading to a claim denial. Registration of the safe online is encouraged to expedite customer service for any problems or challenges.