Do you have a question about the SPORTS AFIELD SA30SM and is the answer not in the manual?
Emphasizes reading and following all safety rules before operating the gun safe to avoid voiding the warranty.
Warns that tipping the safe can cause death or serious injury, especially to children, and stresses securing it.
Advises careful reading of information before operating the Sports Afield Safe and not locking manuals/keys inside.
Highlights that safe bodies are heavy, requiring two people and proper installation to avoid injury or death.
Recommends following laws, not storing loaded firearms, and educating children on firearm dangers.
Register your Sports Afield safe online at www.saproducts.com for expedited assistance and issue resolution.
Details essential information like purchase date, model, serial, and retailer name for record-keeping and technical assistance.
Warns safes are heavy and unstable; use caution and a second person to prevent tipping and injury during unboxing.
Inspect the safe for shipping damage before accepting delivery and contact the carrier immediately if damage is found.
Find override keys and single handle spoke in the plastic bag on the front of the safe.
Insert the handle spoke into a threaded opening and twist clockwise until it locks into place.
Insert the override key into the keyhole and turn clockwise from 12 to 3 o'clock to unlock.
Turn the handle clockwise to open the safe door, then return handle to start position to retract bolts.
Place safe in lower levels for fire protection and out of sight for burglary protection.
Use a dolly and take precautions to protect flooring. Check doorway fit and avoid direct contact with wet floors.
Install safe flat against walls/floor. Use shims if the safe is unlevel to prevent door issues.
Use barriers on concrete floors, ensure climate control, and use dehumidifiers/desiccants to prevent rust/mildew.
Lists necessary tools (drill, wrench, hammer) and hardware (bolts, anchors, washers) for securing the safe.
Drill pilot holes of appropriate size and depth into the floor surface for anchor bolts.
Insert anchor plugs into pilot holes and secure the safe by threading anchor bolts through bottom holes.
Ensure rubber washer is compressed correctly to prevent water entry into the safe during floods.
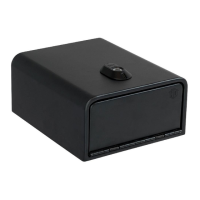
Remove lock face, insert 9V battery correctly, and ensure keypad beeps for successful installation.
Plug the E-lock cable into the connector on the lock face; it only fits one way.
Align and turn lock face clockwise until it clicks, then install handle spokes by turning them clockwise.
Wake keypad, enter default code (1-5-9-#) to unlock in default mode.
Find the brass cap on the inside of the door, unscrew it, and press the reset button.
Enter a 3-8 digit code followed by [*] while the yellow LED is illuminated.
Wake keypad, enter new code followed by [#] to confirm. A green light indicates success.
Confirm code multiple times. Understand lockout procedures for incorrect entries.
Use backup keys or contact customer service with proof of purchase if you are locked out.
A red light on the keypad indicates low batteries. Replace batteries immediately.
Enter code [* 633] to mute E-Lock sounds for silent access.
Enter code [* 66] to turn audible sounds back on.
Find the battery box on the interior side wall and slide the cover upward to remove.
Install 4 AA batteries into the box with correct polarity, then slide the cover back on.
Store heat-sensitive items at the bottom, ammunition separately, and avoid pressure on the door.
Place guns securely in rack cutouts to prevent accidental tipping when the door is closed.
Hinges and mechanisms are permanently lubricated; opening door panels may void the warranty.
Covers fire, forced entry, attack, flood, and defective parts for the lifetime of the original owner.
Excludes loss of contents, consequential damages, and is limited to US/Canada. Proof of purchase required.
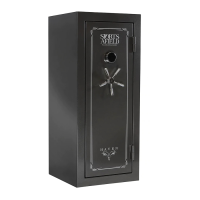
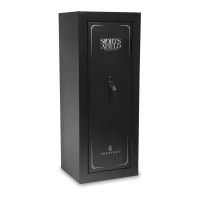
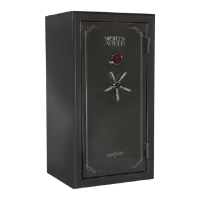
| Brand | SPORTS AFIELD |
|---|---|
| Model | SA30SM |
| Category | Safes |
| Language | English |