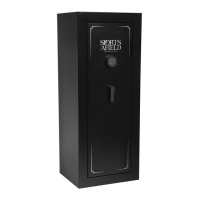
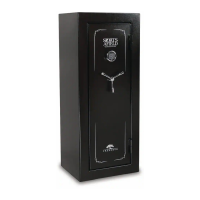
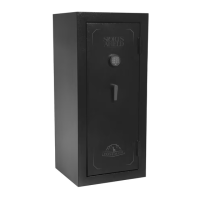
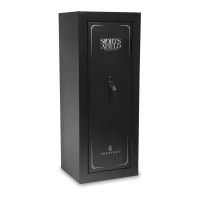
This document is an instruction manual for the Sports Afield Instinct Series gun safes, covering models SA5532INS, SA5529INS, SA5525INS, SA5520INS, and SA5516INS. It provides comprehensive guidance on the safe's features, setup, operation, and maintenance, emphasizing safety and proper usage to ensure the warranty remains valid.
Function Description:
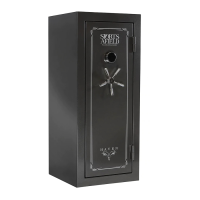
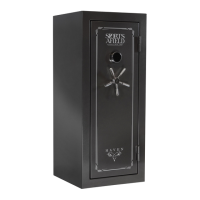
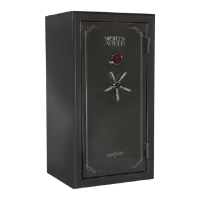
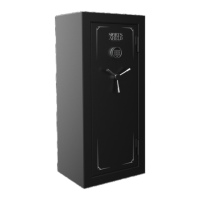
The Sports Afield Instinct Series safes are designed to secure valuables, important documents, and firearms. They feature a robust construction with a programmable E-Lock for electronic access and an override key entry for manual access. The safes are equipped with internal storage solutions, including adjustable shelves and gun racks, to organize contents efficiently. Fire seals are integrated to protect against fire damage, and bolt-down holes allow for securing the safe to the floor, enhancing burglary protection and stability.
Important Technical Specifications:
- Locking Mechanism: Programmable E-Lock with a 3 to 8 digit security code.
- Power Source: 1x9V alkaline battery for the E-Lock.
- Override Access: Manual override key entry (located underneath the keypad).
- Construction: Heavy-duty safe body and door.
- Internal Storage: Adjustable shelf rails, fully wrapped adjustable shelves, and gun racks.
- Security Features: Active locking bolts, fire seal.
- Mounting: Bolt-down holes for securing to a concrete surface (hardware provided: anchor bolts, fender washers). Requires a hammer drill, 1/2" drill bit, wrench/11/16" (17mm) socket, and hammer for installation.
- Dimensions/Weight: Safes are described as "extremely heavy" and "awkward to handle," requiring a minimum of two people for installation and movement. Specific dimensions and weight are not provided in the manual but are implied to be substantial.
Usage Features:
- Opening the Safe:
- Locate override keys (found in a plastic bag on the safe's front).
- For SA5529INS models, install the single spoke into the central hub.
- Insert the override key into the keyhole on the backer plate and turn clockwise from 12 to 3 o'clock.
- Turn the drop handle counter-clockwise (clockwise for SA5529INS) to open the door.
- Return the handle to its starting position to extend bolts and remove the key.
- E-Lock Installation:
- Remove the lock face from its box.
- Install one 9V alkaline battery into the battery compartment on the back of the lock face, ensuring correct polarity. The keypad will beep upon successful installation.
- Plug the E-Lock cable into the back of the E-Lock; the connector is keyed to fit only one way.
- Align the lock face to the backer plate on the safe door and turn clockwise until it clicks into place.
- For SA5529INS models, install the two remaining handles into the central hub's threaded openings.
- Security Code Setup (Non-Illuminated E-Locks):
- Enter the preset factory code
[1 5 9 #]. The right light will turn green, and the handle can be turned to activate bolts. Return the handle to lock bolts out.
- Locate the brass reset button on the inside of the safe door, unscrew the cap, and press and release the button. The yellow (left) light on the E-Lock will illuminate.
- While the yellow light is illuminated, enter a new 3 to 8 digit security code followed by
[*]. The keypad will beep twice. Re-enter the new code followed by [#]. The keypad will flash yellow, beep twice, then flash green.
- With the door open, confirm the new code by entering it followed by
[#]. Two beeps and a green light indicate success.
- Important: Do not close the safe door until the new code has been confirmed at least 3 times. Incorrect code entry 3 times results in a 30-second lockout; 3 additional failed attempts lead to a 5-minute lockout.
- Low Battery Warning: The E-Lock illuminates the red light (center) when any button is pressed on the keypad, indicating low battery. Batteries should be replaced immediately. Always test new batteries; a red light indicates they are not fully charged.
- E-Lock Quiet Mode:
- To mute the E-Lock sounds, enter the code
[* 6 3 3].
- To turn the sound back on, enter the code
[* 6 6].
- Gun Rest Installation:
- Locate gun racks and pre-drilled drywall anchors on the back and side walls.
- Insert bolts into the gun rack's pre-drilled holes, through the drywall anchor, to secure the rack.
- Standoffs (for scoped firearms) clip into holes on top of the gun rest to provide additional clearance from cabinet walls. They can be removed by pulling up and twisting.
- Safe Placement:
- Place in lower levels of the home, away from highly combustible materials, for fire protection.
- Secure to the floor for burglary protection and stability.
- Choose a convenient, discreet location (closet, office, basement, bedroom).
- Install adjacent to a side wall with minimal space, flat against the wall and floor. Remove baseboard/wall trim if necessary.
- Ensure the safe is in an isolated, dry area, not in direct contact with a wet floor. Use a moisture/protective barrier on concrete floors.
- Shim the bottom if the safe is unlevel to prevent the door from swinging open or closed too quickly.
- Loading the Safe:
- Store documents or heat-sensitive items at the bottom for fire protection.
- Store ammunition separately.
- Avoid placing items that put pressure on the door when closed.
- Store heavier items on the floor or reinforced shelving.
- Ensure guns rest securely in gun rack cutouts to prevent tipping.
Maintenance Features:
- Hinges and Internal Mechanisms: Permanently lubricated and maintenance-free. Opening the door panel may void the warranty; consult customer service experts before attempting.
- Keeping the Safe Dry:
- Place a moisture/protective barrier between the safe and concrete floor.
- Install in a climate-controlled area (heat in winter, cooling in summer).
- In high humidity or fluctuating temperature areas (garages), use an internal dehumidifier and/or desiccants to protect contents from rust or mildew.
- Internal dehumidifiers should not be in direct contact with side or back walls.
- Skid Removal and Securing:
- Remove four bolts securing the safe to shipping skids using a wrench or 11/16" (17mm) socket.
- With a second person stabilizing, tilt the safe to the left and pull the right-side skid away.
- Carefully lower the safe to the floor and repeat for the remaining skid.
- Warning: Ensure the door is closed and locked before removing skids.
- Securing to Floor:
- Open the safe door, remove four black caps on the floor to access bolt-down holes.
- Drill pilot holes in the floor (using a hammer drill and 1/2" concrete drill bit for concrete).
- Insert plastic anchoring plugs into pilot holes.
- Thread anchor bolts through the safe's bolt-down holes and ratchet down tightly.
- Ensure the metal washer sits on top of the rubber washer and is compressed to prevent water entry.
- Replace black caps.
- Warning: Always have a second person stabilize the safe when securing to the floor to prevent tipping.
Warranty:
A lifetime warranty is provided to the original owner by SA Consumer Products, Inc. It covers damage from fire, forced entry, forced attack, natural flood, defective parts, paint, or lock. If a replacement safe is deemed necessary, freight costs are covered. The warranty is limited to the safe itself and excludes loss of contents or consequential damages. It requires proof of registration and sales receipt, is valid only in the United States and Canada, and is contingent on using the safe as specified in the manual. Repairs are in-home if possible; factory replacements are shipped freight prepaid, curbside delivery.