EasyManua.ls Logo

SPT SD-6502SS - User Manual

SPT SD-6502SS
12 pages
Print Icon
To Next Page IconTo Next Page
Loading...
Installation
Instructions
IMPORTANT
The dishwasher
MUST be installed to allow for future removal from
the enclosure if service is required.
If you received a damaged dishwasher, you should
immediately contact your dealer or builder.
FOR YOUR SAFETY
Read and observe all CAUTIONS and WARNINGS
shown throughout these instructions. While performing
installations described in this booklet, gloves, safety
glasses or goggles should be worn.
BEFORE YOU BEGIN
Read these instructions completely and
carefully.
IMPORTANT
Observe all
governing codes and ordinances.
Note to Installer – Be sure to leave these instructions
for the consumer’s and local inspector’s use.
Note to Consumer – Keep these instructions with your
Owner’s Manual for future reference.
Skill Level – Installation of this dishwasher requires
basic mechanical and electrical skills. Proper
installation is the responsibility of the installer.
Product failure due to improper installation is not
covered under the Appliance Warranty.
Completion Time – 1 to 3 Hours. New installations
require more time than replacement installations.
READ CAREFULLY.
KEEP THESE INSTRUCTIONS.
WARNING
To reduce the risk of electrical shock, fire,
or injury to persons, the installer must
ensure that the dishwasher is completely
enclosed at the time of installation.
If you have an installation problem, contact your
dealer or installer. You are responsible for providing
adequate electrical,exhaustingand otherconnecting
facilities.
PUB NO.29-5955 7/14 MC
Dishwasher
Model number:
SD-6501SS
SD-6501W
SD-6502SS
SD-6502W
Question and Answer IconNeed help?

Do you have a question about the SPT SD-6502SS and is the answer not in the manual?

Overview

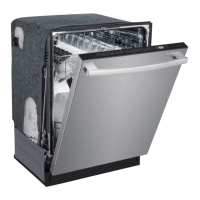
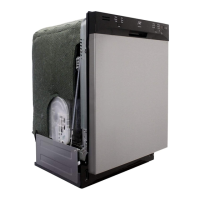
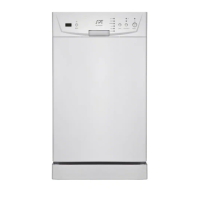
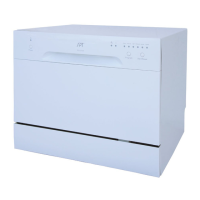
This document provides installation instructions for SPT dishwashers, specifically models SD-6501SS, SD-6501W, SD-6502SS, and SD-6502W. It covers everything from initial preparation and safety warnings to electrical and plumbing connections, leveling, and a final wet test.

Function Description:

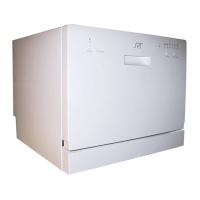
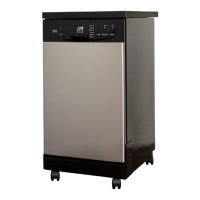
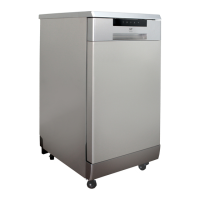
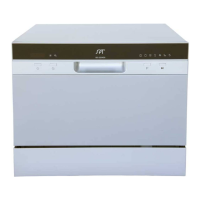
The SPT dishwasher is designed for cleaning dishes and is intended for permanent installation under a countertop in a kitchen. It requires connections to a hot water supply, a drain line, and an electrical power source. The installation process emphasizes proper leveling, secure mounting, and adherence to local codes and ordinances to ensure safe and efficient operation.

Important Technical Specifications:

  • Model Numbers: SD-6501SS, SD-6501W, SD-6502SS, SD-6502W.
  • Installation Time: 1 to 3 hours (new installations may take longer).
  • Rough Cabinet Opening Dimensions:
    • Depth: At least 24 inches.
    • Height: 34 inches minimum to 35 inches maximum.
    • Width: 24 inches.
  • Corner Clearances: When installed into a corner, allow a minimum of 2 inches clearance between the dishwasher and adjacent cabinet, wall, or other appliances.
  • Door Opening Clearance: Allow a minimum of 25-5/8 inches clearance from the front of the dishwasher for door opening.
  • Drain Hose Length: Must be no more than 10 feet for proper drainage. If a longer hose is required, an additional 42 inches can be added for a total of 10 feet.
  • Drain Connection Height:
    • If using an air gap, the waste tee or disposer connection must be at least 18 inches above the floor to prevent siphoning.
    • If using a high drain loop, it must be at least 32 inches above the floor.
  • Electrical Requirements:
    • Voltage: 120V, 60 Hz.
    • Circuit: Individual, properly grounded branch circuit.
    • Protection: 15 or 20 ampere circuit breaker or time delay fuse.
    • Wiring: 2-wire with ground.
    • Power Cord Length (if used): Recommended 54 inches minimum to 64 inches maximum.
    • Electrical Cable Extension: Must extend a minimum of 24 inches from the rear wall for direct connections.
  • Hot Water Line:
    • Tubing: No less than 3/8 inch O.D. copper tubing.
    • Extension: Must extend forward at least 18 inches from the rear wall.
    • Water Heater Temperature: Adjust for 120°F to 150°F (minimum 120°F for best wash performance).
    • Supply Line Pressure: 20-120 PSI.
  • Hole Sizes for Cabinet Penetration:
    • Drain Hose: 1-1/2 inch diameter (for cabinet wall).
    • Electrical Cable: 1-1/2 inch maximum diameter (for cabinet wall).
    • Water Line: 1-1/2 inch diameter (if separate hole is used).

Usage Features:

  • Door Balance Adjustment: The door springs can be adjusted to ensure the door remains open or closed as desired, preventing it from tipping forward or closing unexpectedly. This is crucial for safe loading and unloading.
  • Leveling Legs: Four adjustable leveling legs allow the installer to precisely level the dishwasher, which is essential for proper dish rack operation and wash performance.
  • Mounting Options: The dishwasher can be secured to the countertop using two methods:
    • Method 1 (Wood Countertops): Uses longer brackets inserted into slots, bent to secure to the tub, and then screwed into the underside of the countertop.
    • Method 2 (Granite, Marble, or Drill-Sensitive Countertops): Involves removing tub caps, driving wood screws through side holes into the cabinet frame, and then reinstalling the caps. This method is recommended if the gap between the control panel and screws is less than 10mm.
  • Drain Hose Connection: The molded end of the drain hose is designed to fit 5/8", 3/4", or 1" diameter connections on an air gap, waste tee, or disposer. It can be cut to the required size.
  • Power Cord vs. Direct Wire: The dishwasher can be direct-wired or connected via an optional power cord kit (WX09X70910).
  • Future Removal: The dishwasher is designed to be installed in a way that allows for future removal from the enclosure if service is required.
  • Access to Connections: Electrical connections are located on the right front of the dishwasher for accessibility.
  • Drain Plug Removal: A critical maintenance check during installation is to ensure the disposer drain plug is removed if connecting the drain line to a disposer. Failure to do so will prevent the dishwasher from draining.
  • Leak Checks: The installation process includes multiple steps for checking leaks:
    • After connecting the water supply, check for leaks and tighten connections if needed.
    • During the wet test, check for leaks under the dishwasher and around the door.
    • Check drain lines for leaks when the dishwasher is draining.
  • Kink Prevention: Instructions emphasize ensuring that water supply and drain lines are not kinked or in contact with other components to prevent noise and ensure proper water flow and drainage.
  • Debris Flushing: The hot water line should be flushed before connection to clean out debris, which helps prevent future clogs or issues.
  • Insulation Blanket Check: If equipped, the tub insulation blanket should be positioned correctly to avoid bunching or interfering with door springs.

SPT SD-6502SS Specifications

General IconGeneral
BrandSPT
ModelSD-6502SS
CategoryDishwasher
LanguageEnglish

Related product manuals