At Home SPX Reformer Owner’s Manual14
black blue red black black
red red blue red red red white blue red red
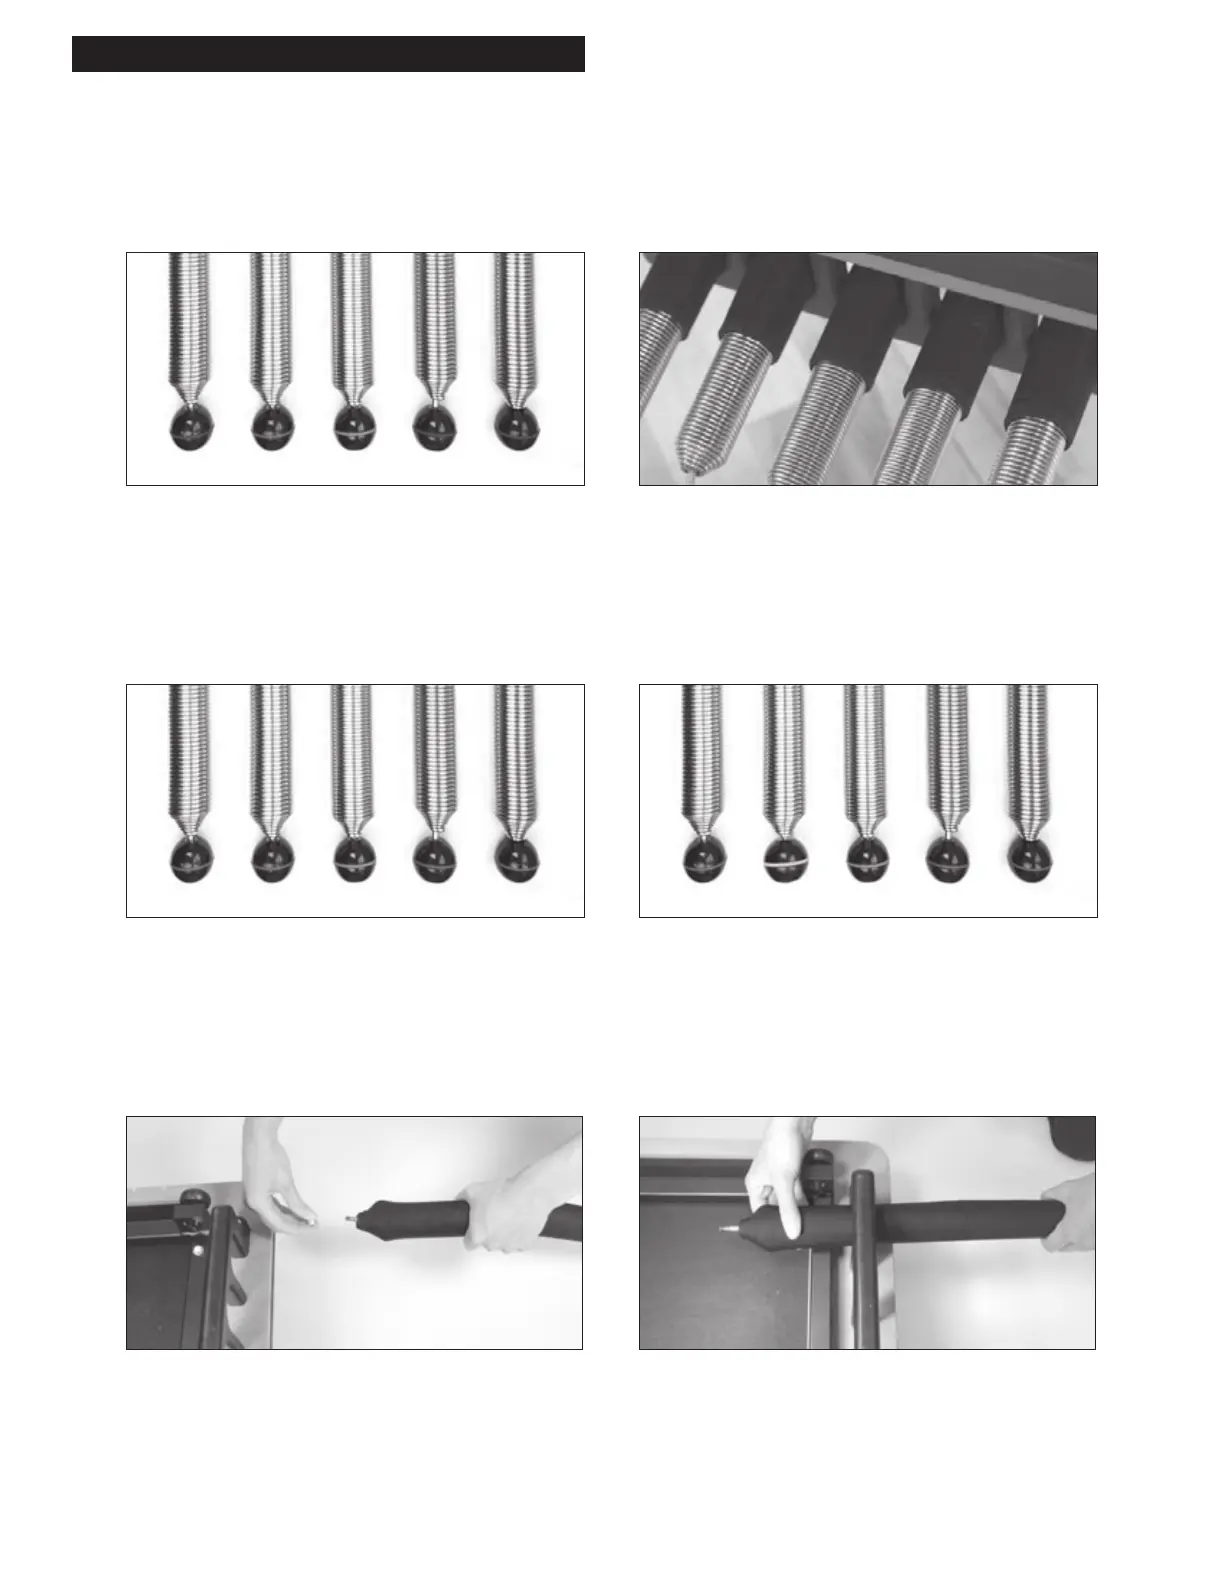
Replacing the Springs
Power Up Spring Package
3 × 125%, 1 × 100%, 1 × 50% arrange as follows:
Place the red (100%) spring in the center, and the blue
(50%) spring to one side. Place black (125%) springs in
theremainingpositions.
Traditional Spring Package
4 × 100%, 1 × 50% arrange as follows:
Place the blue (50%) spring in the center and two red (100%)
springs on either side.
NOTE: Spring sleeves are required for proper function
of the Reformer if it features a molded spring holder.
High-Precision Spring Package
3 × 100%, 1 × 50%, 1 × 25% arrange as follows:
Place the blue (50%) spring in the center, and the white
(25%)spring to one side. Place red (100%) springs in
remainingpositions.
1. Starting with spring #1 from your spring package,
removenylon locknut from bolt end of spring.
2. Start at one end of the carriage. Thread bolt end of spring #1
through first hole of plastic spring holder.
Determine desired replacement spring package.
Springs balls are color-coded. Black = 125%, Red = 100%, Blue = 50%, White = 25%
NOTE: SPX
®
Reformers arrive with the Traditional Spring Package.
MAINTENANCE & REPLACING PARTS