In Access Point mode you can click the red Device Configuration link and have access to most of the main
control settings of the Herpstat just as if you were physically using the device.
Note: You will not have access to the email and other web related options while in Access Point
mode. Those options will be available in the full Admin once the Herpstat has connected to your
home network. It is important that when in the web menu you do not use the browser back button.
After making changes click the Submit button at the bottom of each page.
Once you have configured the device you can select the Wi-Fi SSID of your home router and enter your home
router’s password. Then click Submit. If you wish to not use Wi-Fi then select the No Wi-Fi option. If a
network is selected the Herpstat will attempt to connect to it when you hit Submit. At this point you will need to
reconnect your phone / tablet / computer to your normal home network Wi-Fi connection. You can then access
the Herpstat through its IP address. After exiting the menu press the minus button until you see the Wi-Fi
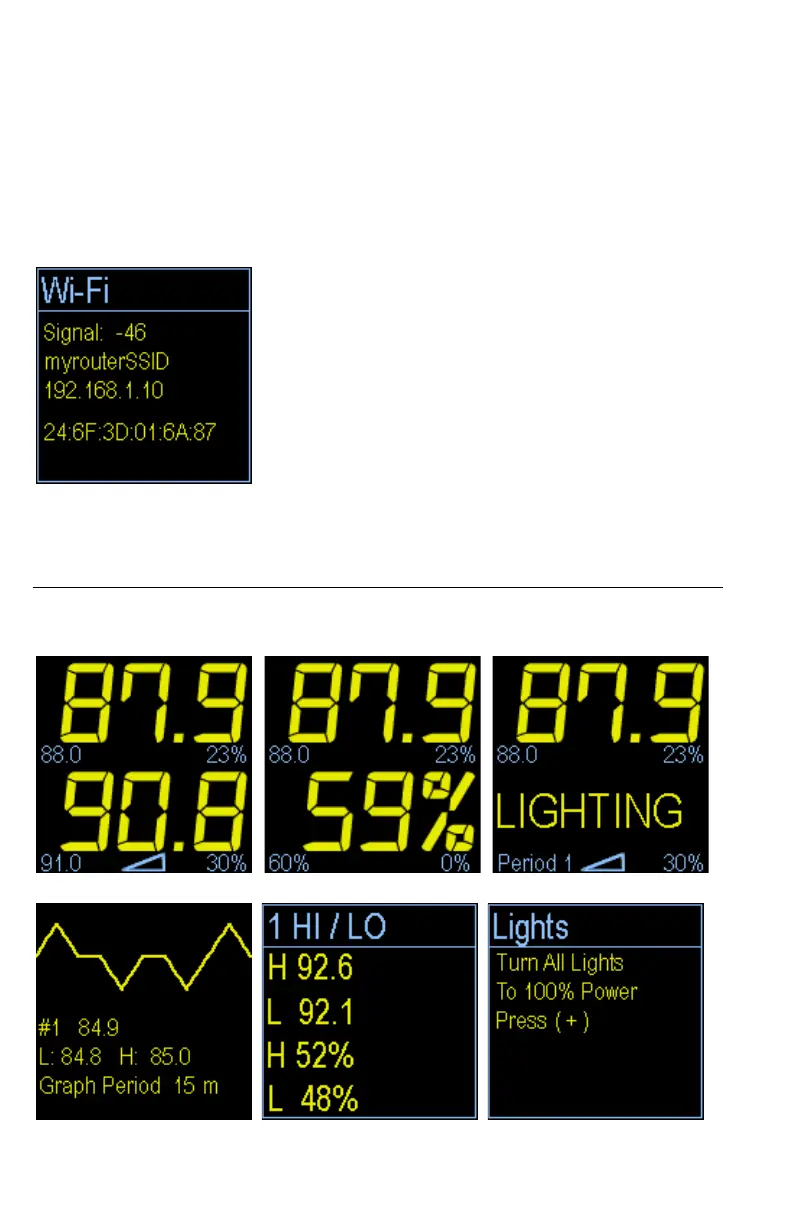
information.
Enter the IP address shown on your display in your web browser to access the full web interface. The default
password for the full web interface is:
spyderadmin (all lowercase)
The Display
In normal operation the Minus button will toggle between the available displays while the Plus
button will activate special features of that display. Holding the Enter button will activate the menu
system.
Temperature display. Temperature + humidity display. Temperature + Lighting display.
History Graph. High / Low display. Force lights on option.