Get-Started
9
SSL 2+ User Guide
Selecting SSL 2+ As Your DAW's Audio Device
If you have followed the Quick-Start / Installation section then you are ready to open up your favourite DAW and start creating.
Included in the SSL Production Pack are copies of Pro Tools | First and Ableton Live Lite DAWs but you can of course use any DAW
that supports Core Audio on Mac or ASIO/WDM on Windows.
No matter which DAW you are using, you need to ensure that SSL 2+ is selected as your audio device in the audio preferences/
playback settings. Below are examples in Pro Tools | First and Ableton Live Lite. If you are unsure, please refer to your DAW's User
Guide to see where these options can be found.
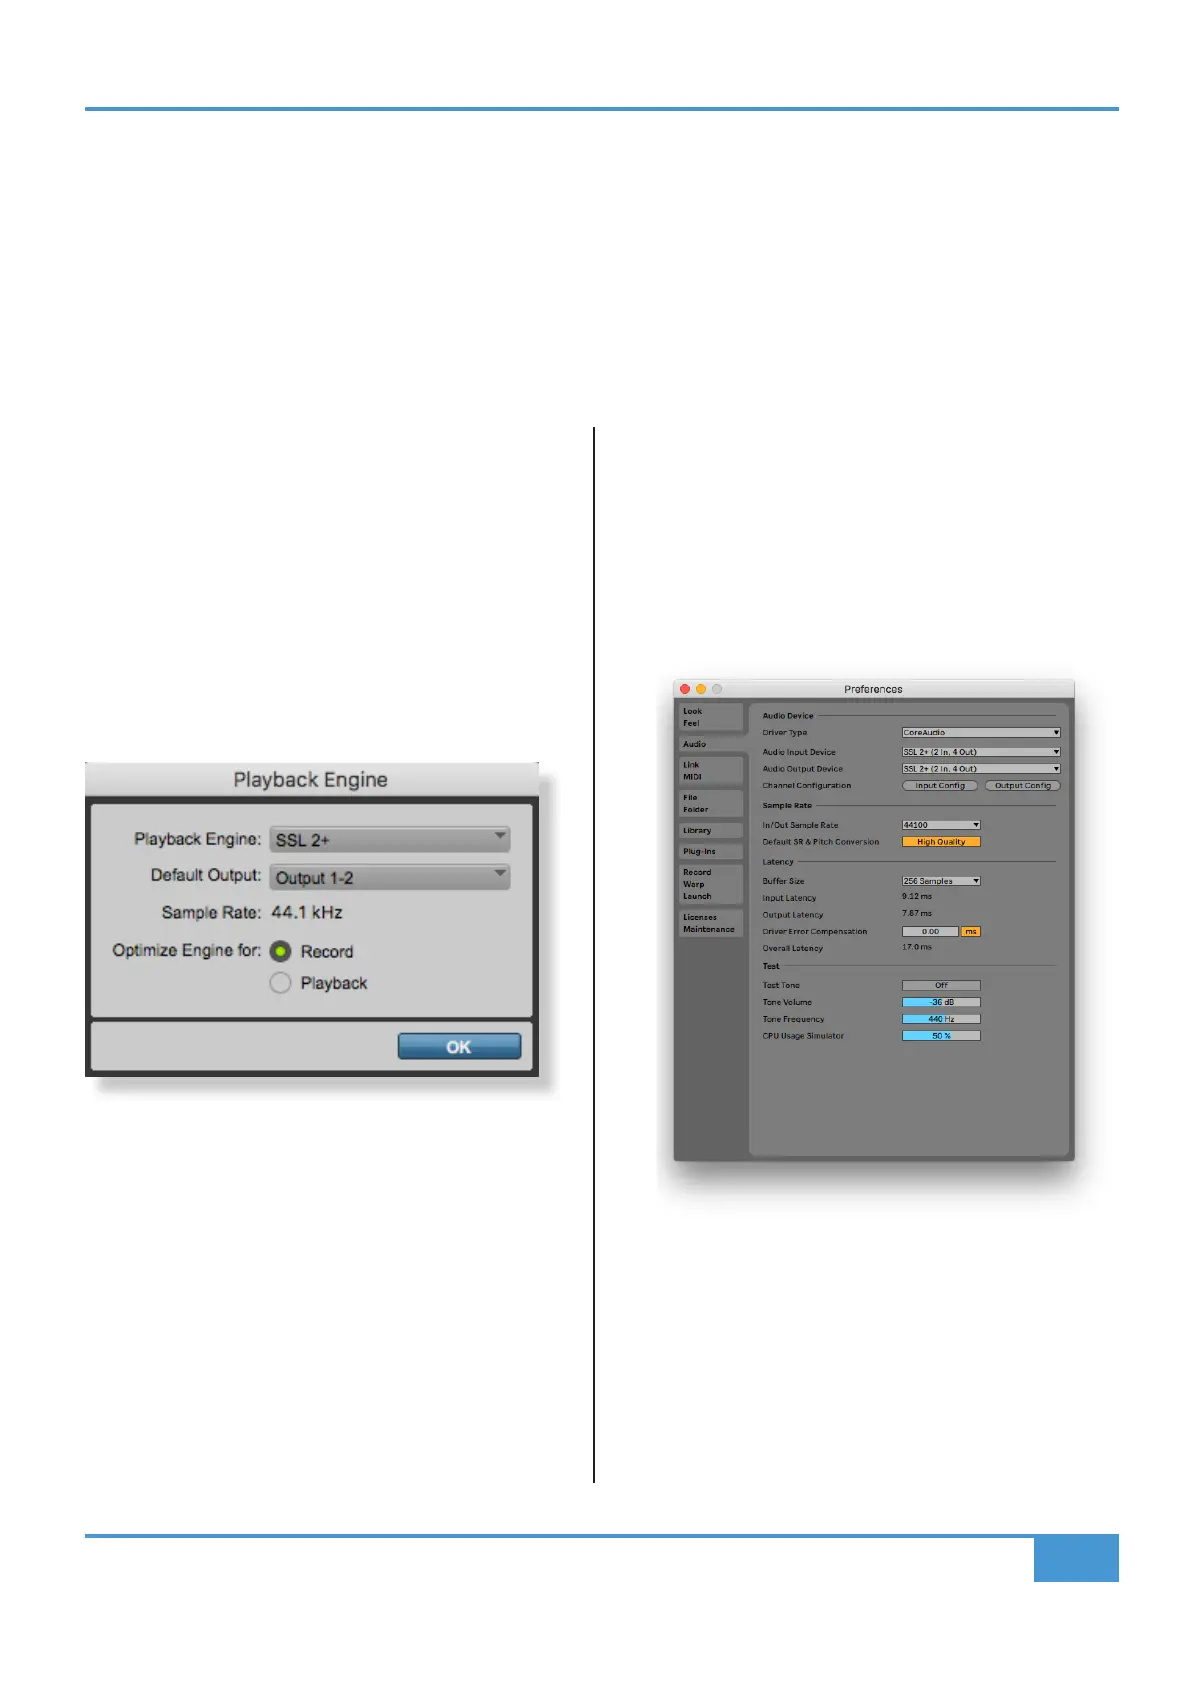
Pro Tools | First Setup
Open up Pro Tools | First and go to the 'Setup' menu
and choose 'Playback Engine...'. Make sure that SSL 2+
is selected as the 'Playback Engine' and that 'Default
Output' is Output 1-2 because these are the outputs that
will be connected to your monitors.
Note: On Windows, ensure that 'Playback Engine' is set to
'SSL 2+ ASIO' for the best possible performance.
Ableton Live Lite Setup
Open up Live Lite and locate the 'Preferences' panel.
Make sure that SSL 2+ is selected as the 'Audio Input
Device' and 'Audio Output Device' as shown below.
Note: On Windows, ensure that the Driver Type is set to
'ASIO' for the best possible performance.