13
GB
3.
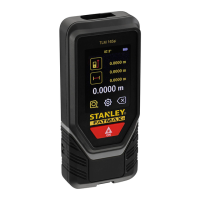
Click the desired unit of measure.
• 0'00" 0/00
• 0" 0/00
• 0'00" ft
• 0.00 in
• 0.0000 m
4.
Click to return to the previous screen.
Choosing the Tool Position
By default, distances are measured from the bottom
of the tool to a wall or object (Figure
F
3
). To
measure distances from a different tool location, follow
these steps.
1.
On the touchscreen, select (Figure
C
4
).
2.
Select the tool position.
• To measure from the top of the tool
(Figure
F
1
), click .
• To measure from the tripod connection on the
tool (Figure
F
2
), click .
• To measure from a corner or another hard-to-
reach location with the endpiece flipped open
at the bottom of the tool (Figure D 1 ), click
(Figure F 4 ) to measure from the end of
the endpiece.
3.
Click to return to the previous screen.
Taking Measurements
Measuring Distance
1.
Point the tool's laser (Figure
A
1
) toward a wall
or object, and not toward anyone's eyes.
2.
Press (Figure
A
3
) to turn the tool on and
display the red laser dot.
3.
Make sure the tool position setting (Figure
E
4
)
is correct for taking the measurement.
4.
If is not already displayed as the current
function (Figure
E
5
), click the current function
icon and then select from the list of functions
(Figure
G
1
).
5.
Point the tool's laser (Figure
A
1
) toward
the wall or object whose distance you need to
measure (Figure B 1 ).
6.
Press to measure the distance from the tool
to the wall or object.
7
At the bottom of the screen, view the current
measurement (Figure
B
2
).
To take a new measurement, press to move the
current measurement up to the previous line on the
screen. Then repeat steps 3-6.
Adding 2 Measurements
You can add two measurements to get a total
measurement of the two distances (Figure
I
).
1.
Point the tool's laser (Figure
A
1
) toward a wall
or object, and not toward anyone's eyes.
2.
Press (Figure
A
3
) to turn the tool on and
display the red laser dot.
3.
Make sure the tool position setting (Figure
E
4
)
is correct for taking the measurement.
4.
If is not already displayed as the current
function (Figure
E
5
), click the current function
icon and then select from the list of
functions (Figure
G
1
).
5.
Select + to indicate that you want to add
measurements.
6.
Point the tool's laser toward the first wall or object
whose distance you need to measure
(Figure
I
1
).
7.
Click to measure the distance from the tool to
the wall or object.
8.
Point the tool's laser toward the next wall or object
(Figure
I
2
).
9.
Press to measure the distance and add it to
the previous measurement.
10.
View the total of the two measurements at the
bottom of the screen (Figure I 3 ).

 Loading...
