UnitFailstoJump-Start
USB Power Port will not power appliance
LED Area Light does not come on
Portable Compressor will not inflate
securely inserted into connector (chuck) on all other inflatables.
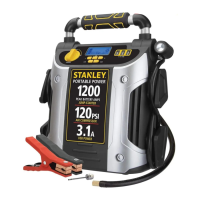
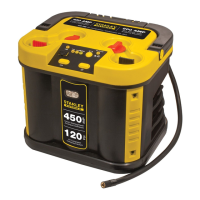
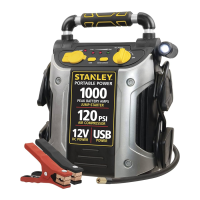
SPECIFICATIONS
instantaneous
, 5 seconds 300A
Battery Type: Maintenance-free, sealed lead acid, 12 volt DC, 19aH
Area Light: 1 long-life white LED
4. Turn on the Compressor Power Switch.
5. Check pressure with the pressure gauge.
6. When desired pressure is reached, open thumb latch and remove the SureFit™ nozzle connector from the valve stem.
7. Turn off Compressor Power Switch.
8. Allow unit to cool before storing away.
9. Store compressor hose and tire fitting in storage compartment.
Inflating Other Inflatables Without Valve Stems
Inflation of other items requires use of one of the adapters (nozzles).
1. Select the appropriate adapter nozzle.
2. Lift the thumb latch on the SureFit™ nozzle, insert the adapter (i.e. needle) into the SureFit™ nozzle connector and close
thumb latch.
3. Insert adapter (i.e., needle) into item to be inflated.
IMPORTANT NOTE: Small items such as volleyballs, footballs, etc. inflate very rapidly. Do not over-inflate.
5. Remove adapter.
6. Switch the Compressor Power Switch off.
7. Allow unit to cool before storing away.
8. Store compressor hose and tire fitting in storage compartment.
WARNING: TO REDUCE THE RISK OF INJURY OR PROPERTY DAMAGE: FOLLOW ALL SAFETY INSTRUCTIONS FOUND IN
THE“SPECIFICSAFETYINSTRUCTIONSFORCOMPRESSORS”SECTIONOFTHISINSTRUCTIONMANUAL.
CARE AND MAINTENANCE
All batteries lose energy from self-discharge over time and more rapidly at higher temperatures. When the unit is not in use, we
recommend that the battery is charged at least every 30 days.
Never submerge the unit in water. If the unit gets dirty, gently clean the outer surfaces of the unit with a soft cloth moistened with a mild
solution of water and detergent.
There are no user-replaceable parts. Periodically inspect the condition of adapters, connectors and wires.
Battery replacement/disposal
BATTERY REPLACEMENT
The battery should last the service life of the unit. Contact manufacturer for any information you may need.
SAFE BATTERY DISPOSAL
Contains a maintenance-free, sealed, non-spillable, lead acid battery, which must be disposed of properly. Recycling is
required, contact your local authority for information. Failure to comply with local, state and federal regulations can
result in fines, or imprisonment.
WARNINGS:
in injury or fire).
12 volt DC charger plug fuse replacement (optional accessory)
The fuse in the plug end of the 12 volt DC charger protects the adapter’s charging circuit. If the 120 volt AC charger operates, but the DC
charging adapter does not, then this fuse may be opened (blown).
To replace the fuse:
1. Unscrew the end cap of the DC plug (counterclockwise).
2. Remove spring center contact and fuse.
3. Check fuse with a continuity checker.
4. If blown, locate a replacement 8 amp volt fuse.
5. Replace the fuse, spring, contact and end cap.
TROUBLESHOOTING
Unit will not charge
J5C09_ManualENSP_031113.indd 8-9 3/11/2013 11:27:14 AM
Discover a comprehensive collection of battery chargers and jump starters on our website.
 Loading...