14
• The laser tool should be checked regularly to ensure
its accuracy, especially for precise layouts.
Horizontal Check
1.
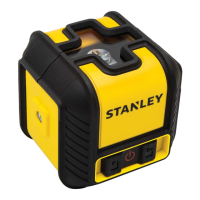
Mount the laser tool in its horizontal position
(Figure Ⓐ ①) on a tripod 5m from a wall, with the
front of the laser tool facing the wall (Figure Ⓝ ①).
2.
Power ON the laser tool in Self-Levelling Mode
(Figure Ⓜ ①).
3.
Wait 5 seconds for the laser tool to Auto-Level and
make sure the rotary laser beam is rotating.
4.
Where the laser line appears on the wall, mark
point D
1
(Figure Ⓝ ①). If available, use a detector
to more easily locate the beam.
5.
Turn the laser tool 180° on the tripod. The back
of the laser tool should now be facing the wall
(Figure Ⓝ ②).
6.
Where the laser line appears on the wall, mark
point D
2
(Figure Ⓝ ②).
7.
Measure the vertical distance between points D
1
and D
2
(Figure Ⓝ ③).
• If the distance between D
1
and D
2
is < 2.0mm,
calibration is not required. You can continue
using your laser tool.
• If the distance between D
1
and D
2
is ≥2.0mm,
you must have your laser tool calibrated at an
authorized Stanley service center. To locate
your nearest Stanley service center, go to
www.2helpU.com.
8.
Turn the laser tool 90° so the left side faces the
wall (Figure Ⓝ ④).
9.
Repeat steps
4.
through
7.
for the sides of the
laser tool.
Vertical Check
1.
Mount the laser tool in its vertical position
(Figure Ⓐ ②) on a level tripod 1m from a wall that
is at least 2m high, with the left side of the laser
tool facing the wall (Figure Ⓞ ①).
2.
Power ON the laser tool in Manual Mode
(Figure Ⓜ ②).
3.
Where the rotary laser beam appears on the oor
1m from the wall, mark point A (Figure Ⓞ ①):
4.
Where the rotary laser beam, the oor, and the wall
all meet, mark point B.
5.
Where the rotary laser beam appears 2m up the
wall, mark point D
1
.
6.
Turn the laser tool 180° on the tripod. The right
side of the laser tool should now be facing the wall
(Figure Ⓞ ②).
7.
Move the level tripod to align the rotary laser beam
with points A and B.
8.
Where the laser beam appears on the wall 2m
above the oor, mark point D
2
(Figure Ⓞ ②).
9.
Measure the horizontal distance between points D
1
and D
2
(Figure Ⓞ ②).
• If the distance between D
1
and D
2
is < 1.2mm,
calibration is not required. You can continue
using your laser tool.
• If the distance between D
1
and D
2
is ≥1.2mm,
you must have your laser tool calibrated at an
authorized Stanley service center. To locate
your nearest Stanley service center, go to
www.2helpU.com.
Plumb Up Dot Accuracy Check
1.
Mount the laser tool in its horizontal position
(Figure Ⓐ ①) on a tripod in a room with a ceiling
that is at least 7.5m higher than the tripod height
(Figure Ⓟ ①).