Propane fuel is highly flammable and under pressure.
- Do not store in temperatures over 120°F.
- Never use a flame to check for leaks. Use soapy water.
- Keep out of the reach of children at all times.
- Keep cylinders upright with cylinder base equipped
for proper vapor withdrawal.
- The smell of gas indicates a leak. Close valve and check for
leaks by brushing soapy water on all joints. There is a leak if
bubbles appear. Tighten the joint until the bubbles quit.
- Always check all connections for dirt or damage
before assembling.
- Do not leave grill unattended while in use.
- If grill is stored indoors, detach and leave the
cylinder outdoors.
CAUTION
- FOR OUTDOOR USE ONLY.
- Supply plenty of fresh air when using the grill.
Do not obstruct the flow of combustion air or ventilation air.
- Do not use as a space heater.
- Grills produce heat. Keep grill away from burnable materials.
Do not place the grill any closer than 24” to combustibles.
- Use a flat, level support surface where the grill is safe
from accidental tipping.
- Use only 16.4 oz. propane cylinders marked per
USDOT-39 or TC CAN/CSA B339 standards.
- Use only with propane fuel
- Use only the regulator included with your grill.
Do not attempt to alter.
WARNING
WARNING
1. Read and follow these instructions carefully before assembly or use.
2. Failure to follow these instructions could result in death. Serious bodily injury and/or property loss.
3. For household outdoor use only. Not for commercial use.
4. The consumer should retain them for future use.
D
E
G
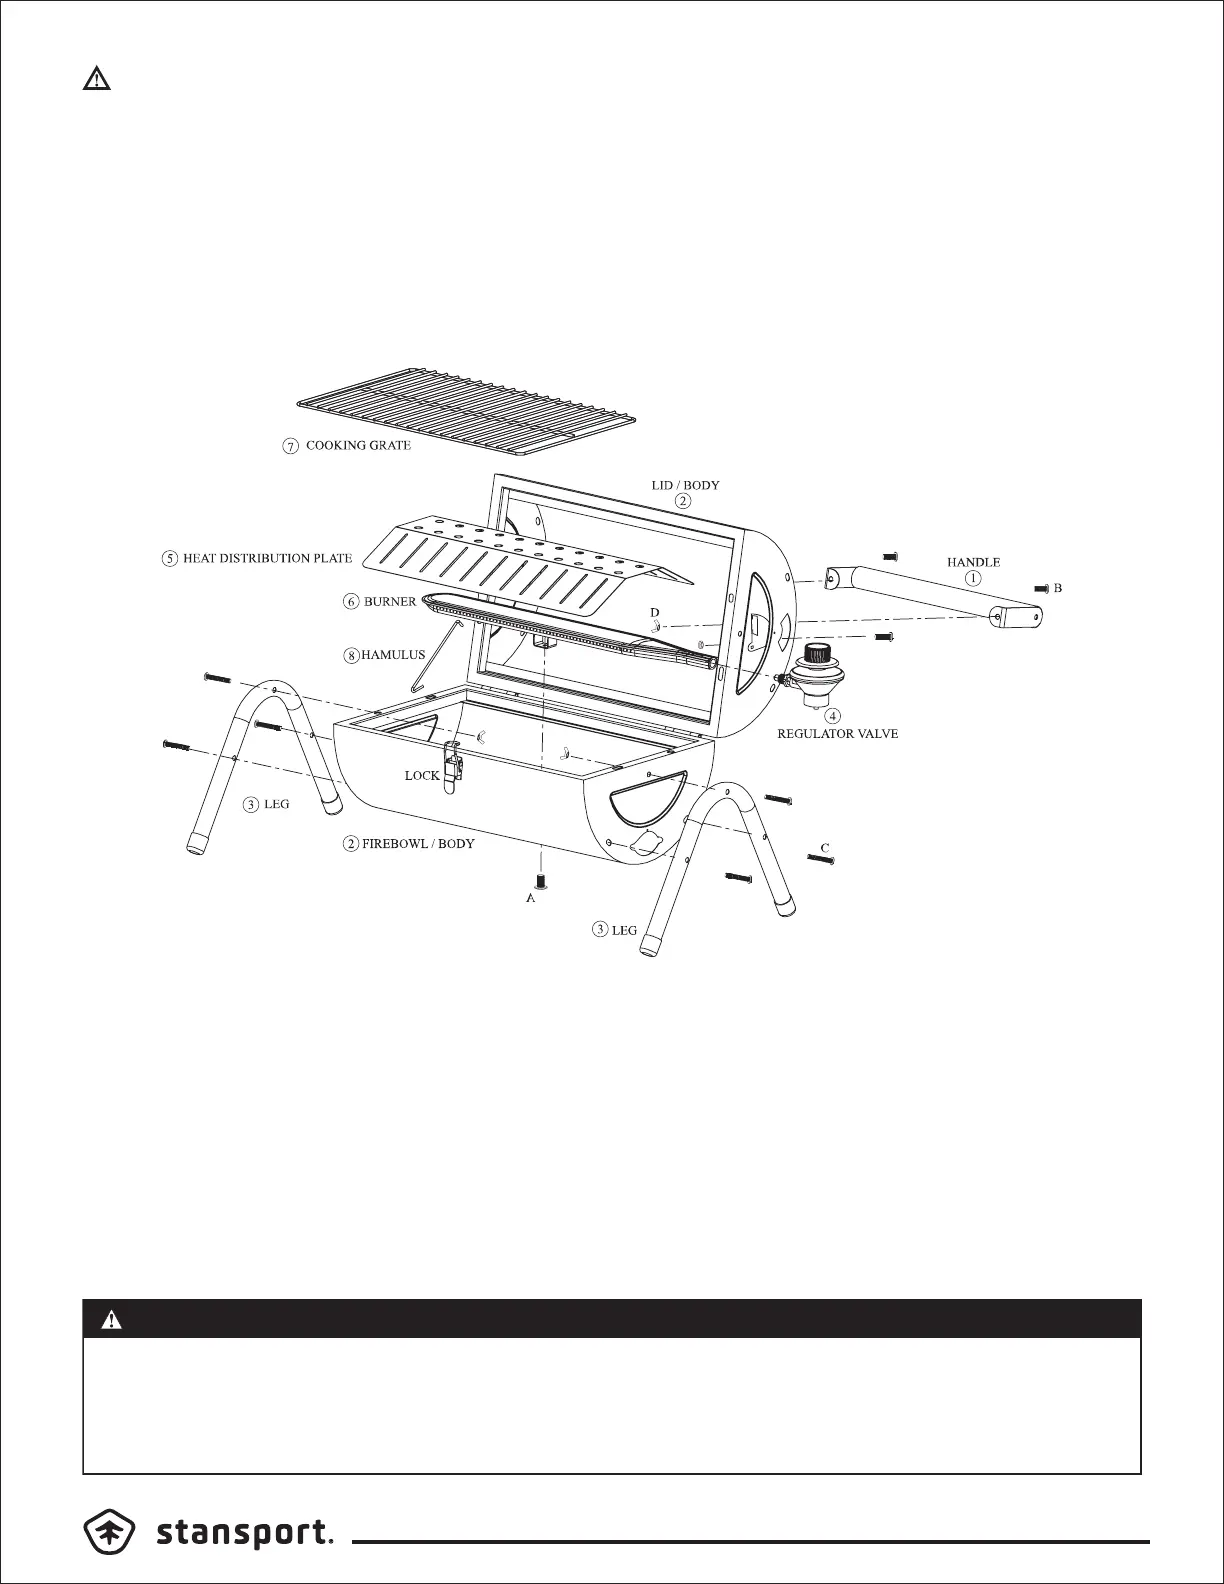
ASSEMBLY STEPS
CAREFULLY UNPACK AND CHECK ALL PARTS
a. Install the handle (1) to the lid (2) using 2pcs screws (B) and 2pcs nuts (D).
b. Install the vent doors (G) to the side of the lid (2) using 2pcs screws (H) and 2 pcs nuts (E).
c. Install the legs (3) to the fire bowl (2) using 6pcs screws (C) and 6pcs nuts (D).
d. Insert the burner (6) through the hole on the left side of the fire bowl, attach the screw
(A) from the bottom and tighten the burner.
e. Turn the regulator valve (4) and tighten with the burner.
f. Place the heat distribution plate (5) on the burner.
g. Place the cooking grate (7) on position.
BURNER SCREW
LEG SCREW
HANDLE SCREW
H VENT SCREW
2801 East 12th Street, Los Angeles, CA 90023
 Loading...