6
CLEANING INSTRUCTIONS
- IMPORTANT -
Stainless steel may corrode if not cleaned properly.
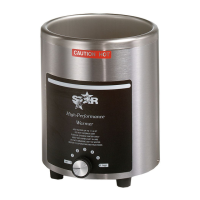
Clean and dry the heated bowl inside the warmer every night. Use a soft cloth and mild soap
to keep exterior surfaces bright and shining. To keep the inside surface of the bowl clean, use
S.O.S. or Brillo pads as often as necessary. Do not use detergents, strong abrasives or metal
scouring pads on exterior surface of warmer.
CAUTION
DO NOT IMMERSE IN WATER AT ANY TIME.
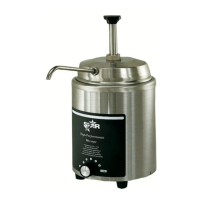
PUMP CLEANING
Before using and at least daily, disassemble the pump and wash all parts.
To disassemble pump:
1. Unscrew nut-cylinder. Pull pump-plunger from pump chamber.
2. Unscrew knob from plunger assembly and disassemble.
3. Unscrew nut-sleeve-tube from dispense tube. Remove cover from pump assembly.
4. Remove pin "U" from pump assembly and disengage dispense tube from pump
chamber.
5.
Remove balls from pump chamber.
6. Wash all parts thoroughly in hot soapy water and rinse thoroughly. Use 18" long brush
to clean inside of dispensing tube. Reassemble pump. When reassembling pump, wet
o-ring with edible vegetable oil, then reassemble. Make sure all parts are in their proper
place.
SANITIZING PUMP ASSEMBLIES
It is recommended that the pump assembly be sanitized after routine disassembly and
cleaning. Prepare a 200 ppm quaternary solution (similar to Pro-Quat 103). Immerse all
pump parts in this solution for at least 60 seconds, remove and let air dry.
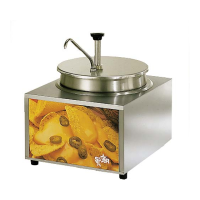
PRIMING PUMP
Two (2) strokes of the pump plunger are necessary to initially prime and vend thick food
products.
CAUTION
FAILURE TO DO THE FOLLOWING CAN CAUSE A BROKEN "O" RING TO BE
PUMPED OUT WITH THE FOOD BEING VENDED.
If pump does not dispense product properly, remove plunger assembly from pump and make
sure the plunger "o" ring is in place on the pump plunger. If the "o" ring is missing disassemble
the pump parts and make certain the "o" ring is not in the pump plunger tube, pump chambers
or vend tube before replacing "o" ring.
MAINTENANCE AND REPAIRS
Contact the factory, a service representative or a local service company for service or required
maintenance.