DISASSEMBLY / MAINTENANCE
8
OPERATION
5. Place the drywall panel on the Cradle, with the outer side of the panel (the good side) facing the cradle.
Carefully lean the panel on the Crossarms, being careful not to damage the edges of the panel.
6. If the panel will be installed on a at ceiling, tilt the Cradle back to its horizontal position and lock in place
with the Tilt Pin. If the panel will be installed on a side wall or sloped ceiling, leave the Cradle tilted.
7. Check to see that the panel is secure and balanced.
8. Lower the Cradle if needed, and release the Caster Locks.
9. Carefully roll the Hoist near to the position where the panel will be installed.
10. When at the appropriate location, apply the Caster Locks.
CAUTION: Lock the Locking Casters to prevent the Hoist from rolling
after it is in position.
Raising the Panel
1. Crank the Winch Wheel clockwise to raise the panel slightly, then
stop, checking that the Brake is functioning properly.
2. Once you have determined that the Brake is functioning properly,
resume raising the panel to the desired height.
Lowering the Cradle
1. Install the drywall panel correctly before lowering Cradle.
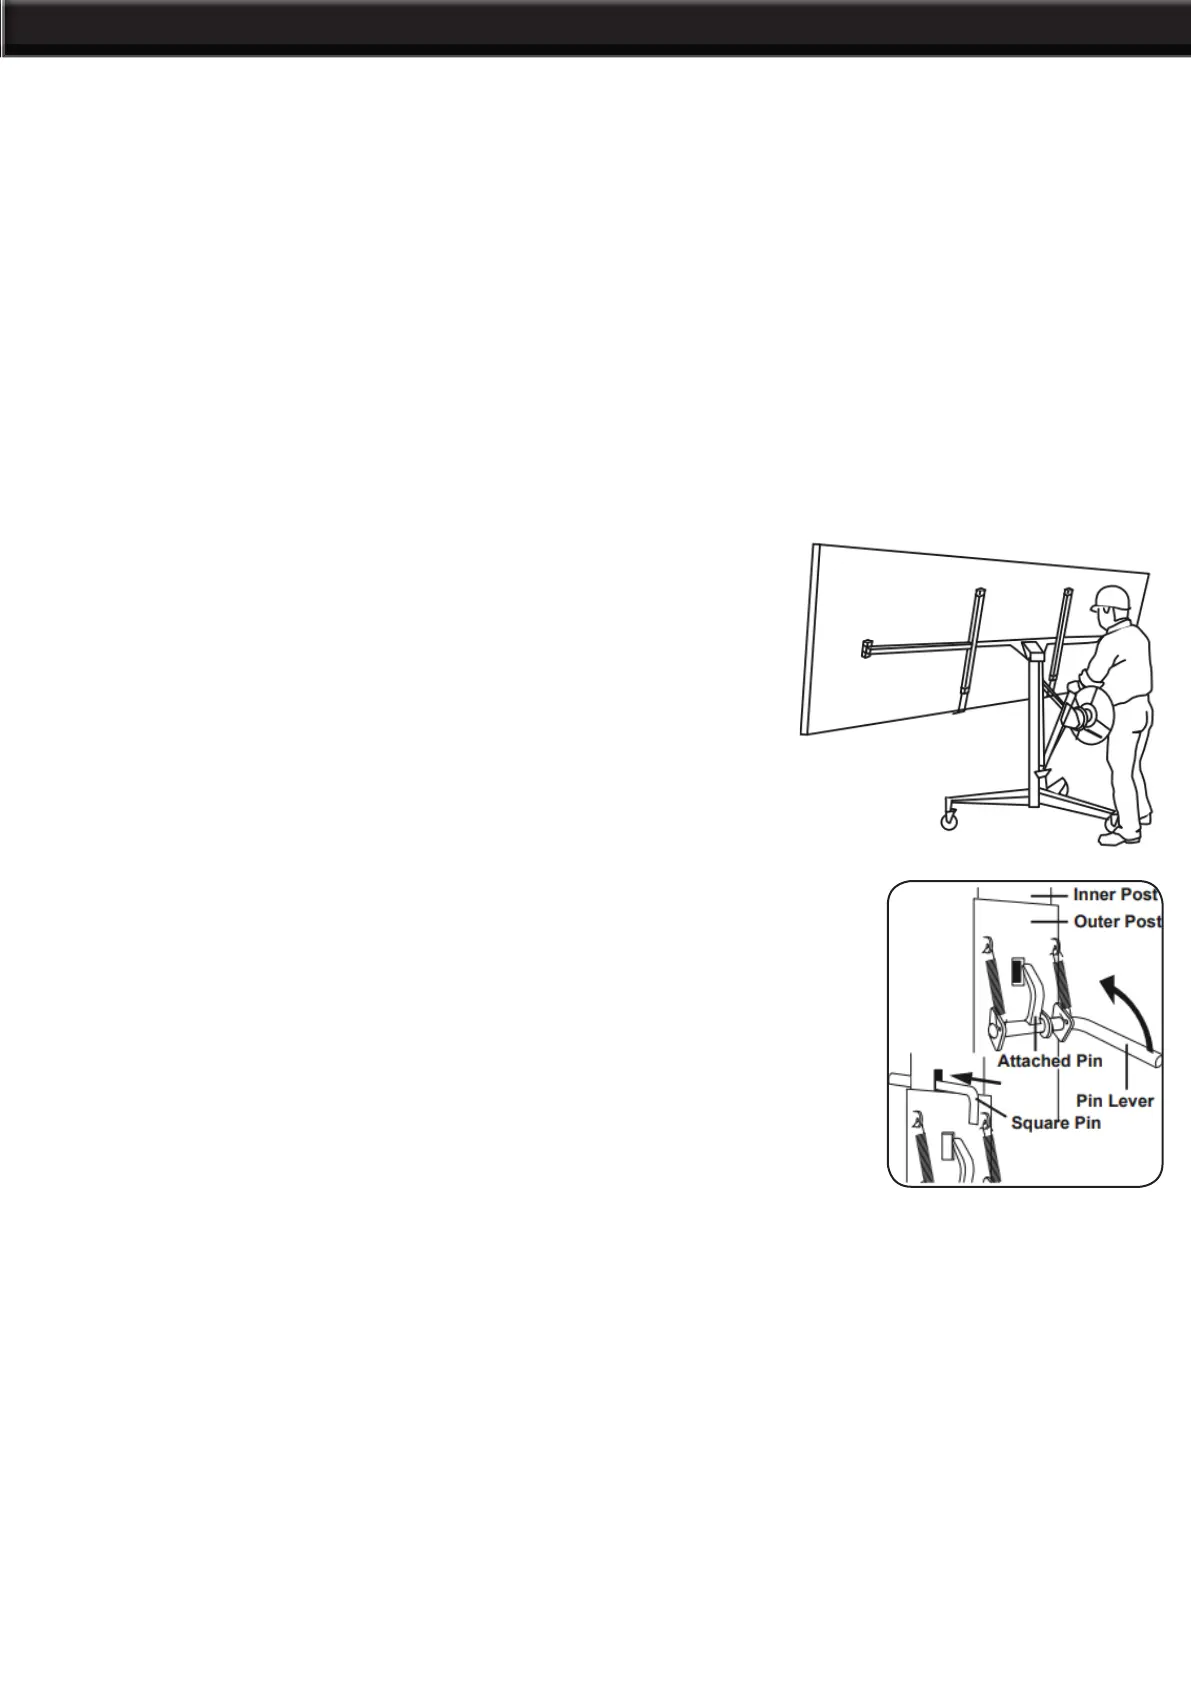
3. Raise the Telescoping Assembly so that the holes of the inner post
align with the Attached Pin opening, then lock in place with the Pin
Lever, or, slide the Square Pin through the Inner Pin holes above the
Outer Post.
2. Push and hold the Winch Wheel slightly forward to support the weight of the Cradle.
3. Release the Pin with the Pin Lever (see Figure S), then operate the Brake Handle with your left hand and
rotate the Winch Wheel counterclockwise with your right hand to lower the Cradle.
CAUTION: DO NOT release control of the Wheel Handle as the Hoist is lowering or the Cradle may lower
forcefully and cause injury.
4. After each use, lower the Cradle completely and clean all surfaces of the Hoist with a clean cloth.
 Loading...