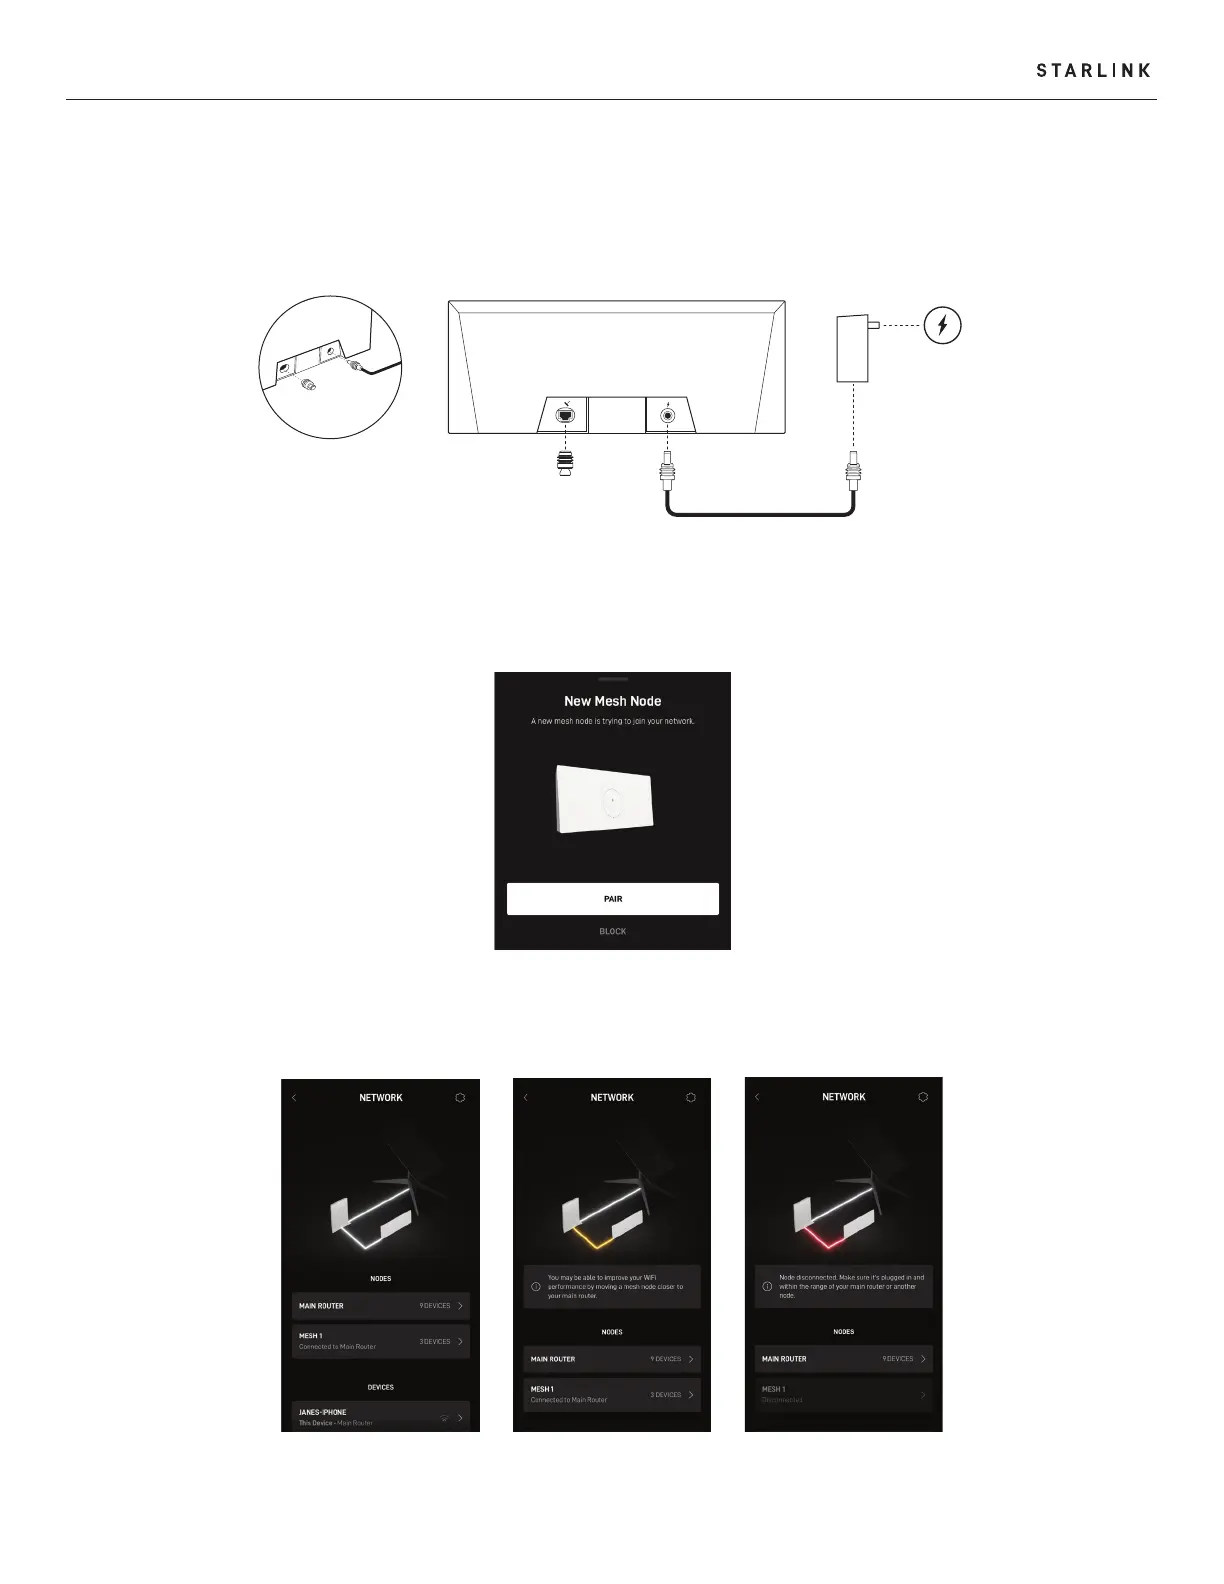
4. Plug the Router into a power outlet using the power cable and power supply.
5. Open the Starlink App. Wait 1-2 minutes for a "PAIR NEW MESH NODE" notification to appear in the App.
6. Click "PAIR". This node will begin connecting on the NETWORK screen. Connection will take about 1-2 minutes.
7. Upon connection, the node will appear on the NETWORK screen in the App.
support.starlink.com
8. You are now connected! The light on the Gen 3 Router should be solid white, and you can use the Starlink App
to customize additional settings, check your connection, and more.
White Line | Connected Yellow Line | Poor Signal Red Line | Disconnected
GEN 3 ROUTER SETUP GUIDE (STANDARD GEN 2 KITS)
 Loading...