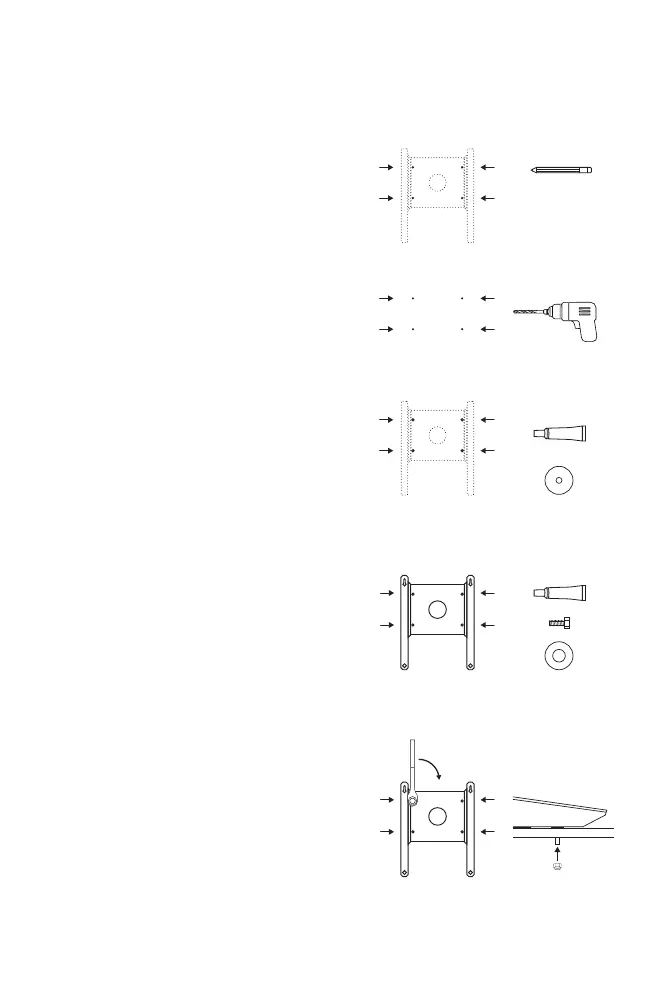
3. Place rubber sealing washers over
holes followed by mount. Liberally apply
silicone sealant to ll holes on mount.
4. Install a washer on each of four machine
screws and apply silicone sealant to threads.
Insert the four machine screws to mount and
pre-drilled holes.
5. Install a washer and nut on each machine
screw and tighten. Use the 7/16” socket and
wrench to tighten screws to snug plus 1/4
turn; do not overtighten.
1. Using the Wedge Mount as a guide, mark the four corner
hole locations with the pencil and remove mount.
2. Drill four 1/4” (6.5 mm) holes through the surface
at the marked locations. Remove burrs around
holes and make sure the surface is free of debris.
INSTALLATION
Option 1 – Machine Screws and Nuts
 Loading...