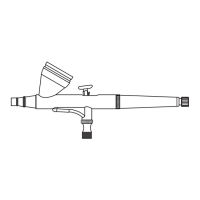
SET UP & OPERATION
1. Connect 1/8” PS end of hose to the airbrush, the other end to the compressor.
2. Add airbrush paint into the cup, and make sure it is a milky consistency. If not, add proper
thinner to dilute.
3. Turn on the compressor.
4. Pre-installed dual action function: press the push button for air only, then pull back for paint.
Pull back further for more paint.
5. Single action function: unscrew dual action air valve counterclockwise and install single
action air valve set clockwise. Air is released continuously from the airbrush. Pull back the push
button for paint.
CAUTION: DO NOT flick the push button or lift your finger before returning to the starting
position in front.
Basic cleaning tips BETWEEN color change and AFTER each session:
1. Mix proper cleaner with remaining paint in cup using the brush.
2. Dump out the mixed solution.
3. Spray cleaner through the airbrush until the spray is clear.
Thorough cleaning as needed:
1. Mix proper cleaner with remaining paint in cup using the brush.
2. Dump out the mixed solution.
3. Block the opening in front of needle cap with a paper towel, add cleaner, press and pull back
the push button to create back bubbling. This cleans the entire paint passage.
4. Repeat Step 3 as needed, then spray cleaner through until the spray is clear.
WARNING: DO NOT remove the nozzle.
CAUTION: DO NOT allow paints to sit idle in the cup.
CAUTION: Use ONLY airbrush paints and proper airbrush cleaner/thinner.
CLEANING