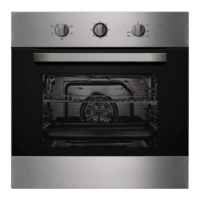
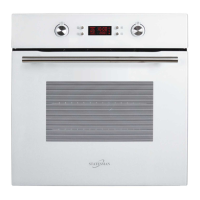
This document is an instruction manual for the Statesman BSF60WH / BSF60SS Built-In Electric Fan Oven. It provides essential information for installation, safe operation, maintenance, and troubleshooting of the appliance.
Function Description:
The Statesman BSF60WH / BSF60SS is a built-in electric fan oven designed for various cooking functions. It features a fan-assisted oven for even heat distribution, a grill function for browning and crisping, and a defrost function. The oven is equipped with a mechanical timer to set cooking durations and a thermostat control to adjust the temperature. An oven light is included to monitor cooking progress without opening the door.
Usage Features:
The oven offers several cooking modes accessible via the function control knob:
- Oven Light: Illuminates the oven cavity, allowing users to view food without opening the door.
- Defrost Function: Circulates air at room temperature, enabling quicker thawing of frozen food. This function is ideal for preparing frozen items for cooking.
- Grill Function: Activates the inner grill elements, which cycle on and off to maintain the set temperature. For optimal grilling results, food should be placed on the top shelf, ensuring it does not touch the grill elements.
- Fan Assisted Grilling: Combines the grill function with the fan to ensure even heat distribution, which can be beneficial for more uniform grilling.
- Fan Assisted Oven: A fan located in front of the oven element distributes hot air throughout the oven cavity. This ensures even cooking, making it perfect for cooking on multiple levels simultaneously.
The oven is operated using three control knobs:
- Mechanical Timer: This knob allows users to set a desired cooking time. Once the set time elapses, the timer will turn off the oven. Users should refer to their food cooking guide for appropriate timings.
- Function Control: This knob selects the desired cooking mode (e.g., oven light, defrost, grill, fan-assisted grill, fan-assisted oven).
- Thermostat Control: This knob sets the desired temperature for cooking. When the oven is not in use, it is recommended to set this control to "0".
For cooking, the manual provides several guidelines:
- Always pre-heat the oven, especially for baking, and wait until the operating indicator light switches off before placing food inside. If pre-heating is skipped, cooking times should be extended by at least 10 minutes.
- Ensure frozen foods are thoroughly thawed unless the packaging specifies otherwise.
- Remove any unnecessary accessories from the oven before cooking.
- Place cooking trays in the center of the oven, leaving gaps between shelves for air circulation.
- Avoid opening the oven door unnecessarily; use the internal light to monitor progress.
- Keep the oven door closed during all cooking functions, including grilling.
- Do not use aluminum baking foil when grilling, as its high reflectivity can damage the grill element.
- Never line the base of the oven with aluminum foil or place pans directly on the oven base; always use the wire shelves.
- Exercise caution when opening the oven door to avoid contact with hot parts and steam. Always use an oven glove when removing cookware.
- Keep children away from the oven during use.
- When cooking dishes with alcohol, be mindful that alcohol evaporates at high temperatures and can cause a fire; follow recipe guidelines carefully.
- Avoid using sealed food containers or glass jars, as heat buildup can cause them to shatter.
The oven comes with accessories including two wire shelves for roasting and grilling, and one universal pan for cooking large quantities of food or collecting fat/spillage and meat juices.
Shelf positioning is designed for safety and ease of use:
- Oven shelves and baking trays are inserted between side rails at any level.
- The oven shelf has a safety stop to prevent accidental withdrawal. To fully insert the shelf, lift it slightly to bypass the stops.
- To remove a shelf, gently pull it outwards until it stops, then lift the front slightly to bypass the safety stops and withdraw it completely.
Maintenance Features:
The manual outlines several maintenance procedures to ensure the longevity and safe operation of the oven:
General Cleaning and Maintenance:
- Always disconnect the appliance from the mains power supply before any maintenance or cleaning.
- Set all controls to the OFF position and allow the unit to cool down before cleaning.
- Clean the surface of the unit with a damp cloth, soft brush, or fine sponge, then wipe dry. For heavy soiling, use hot water with a non-abrasive cleaning product.
- For cleaning the oven door glass, avoid abrasive cleaners or sharp metal scrapers, as these can scratch and damage the glass.
- Never leave acidic substances (like lemon juice or vinegar) on stainless steel parts.
- Do not use a high-pressure cleaner for cleaning the unit.
- Baking pans can be washed with mild detergent.
Ventilation:
- After cooking, if the cavity temperature exceeds 70°C, the cooking fan will continue to operate for 15 minutes. This is normal and not an indication of a fault.
Bulb Replacement:
- The oven lamp has a high-temperature resistance (240V~25W).
- Before replacing the bulb, disconnect power from the mains outlet or switch off the circuit breaker.
- Unscrew the covering glass, replace the bulb with a new one of the same specification, and then screw the covering glass back in place.
- It is crucial that the appliance is removed from the mains power supply before attempting to remove or replace the lamp to avoid electric shock.
Removing the Oven Door for Cleaning:
- The oven door can be removed for easier cleaning.
- The hinges (A) have two bolts. By raising both movable bolts (B), the hinges (A) will be released from the oven housing.
- Grip the sides of the door at the center, incline it slightly at a 15° angle, and gently pull it away from the oven cavity.
- To replace the door, slide the hinges back into their slots and open the door fully.
- Important Safety Note: Do not attempt to disengage the hinge locks while the door is removed from the oven, as the hinge springs could release and cause personal injury. Do not lift or carry the oven door by its handle.
- When cleaning the door, ensure it is supported at all times and placed on soft padded material.
Removing the Side Racks for Thorough Cleaning:
- To clean the oven thoroughly, the side racks may need to be removed.
- First, remove the oven shelves and the enamel baking tray.
- Unscrew the bolt at the bottom of each rack with a screwdriver, then unhook each side rack at the top and pull them away from the cavity.
- To reassemble, hook the upper struts into the relevant holes in the cavity and then secure the lower bolts.
Disposal of Old Electrical Appliances:
- The European Directive 2002/96/EC on Waste Electrical and Electronic Equipment (WEEE) mandates that old household electrical appliances must not be disposed of with normal unsorted municipal waste.
- These appliances must be collected separately to optimize material recovery and recycling, reducing environmental and health impacts.
- The "wheeled bin" symbol on the product indicates this obligation. Consumers should contact their local authority or retailer for information on correct disposal.