Installing the 2015 Front Splitter:
1. Center the splitter so that it lines up where the belly pan used to be.
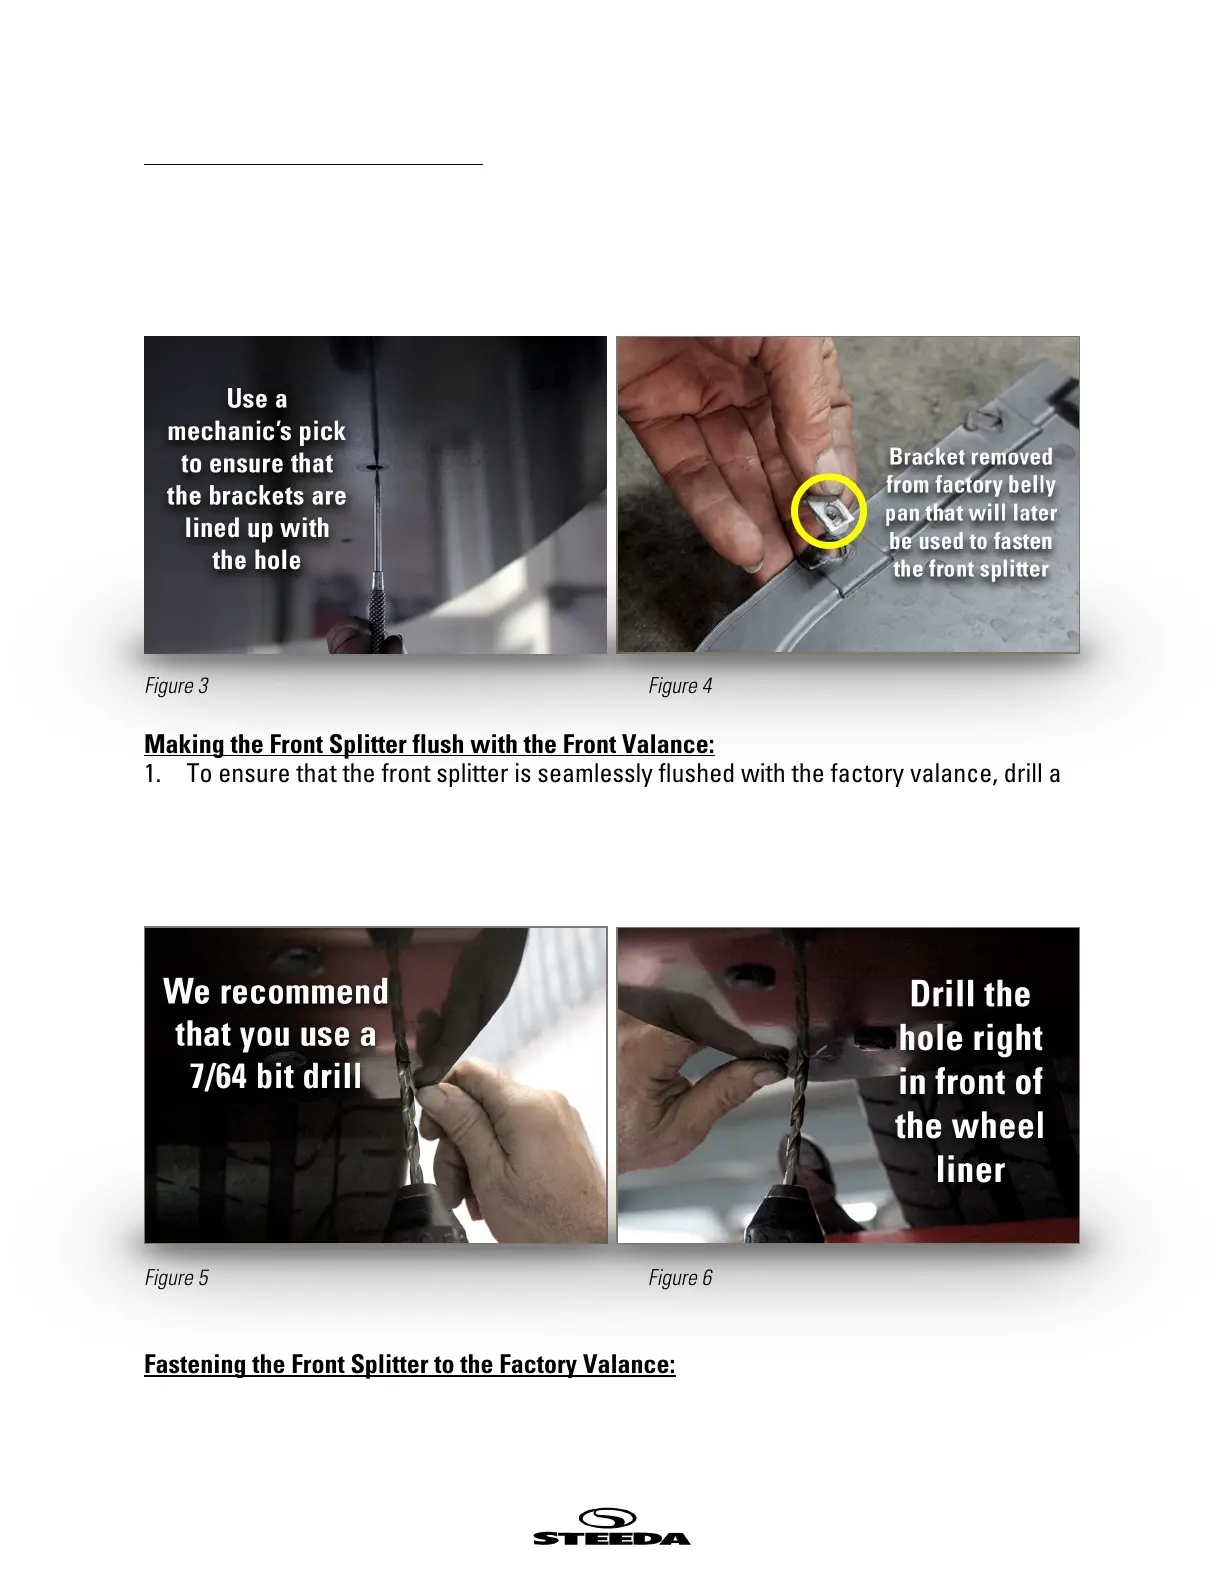
2. By using a mechanic’s pick, center the brackets in the hole. (Figure 3)
3. Loosely fasten the nuts and bolts in place.
4. Once you’ve centered the splitter and lined it up with the factory valance, tightly
secure all of the bolts.
Figure 3 Figure 4
!
Making the Front Splitter flush with the Front Valance:
1. To ensure that the front splitter is seamlessly flushed with the factory valance, drill a
hole through the front splitter and factory valance close to where a previously drilled
hole is located on the splitter in front of the wheel liner. This eliminates the gap
between the front splitter and the factory valance. (Figure 5 & 6)
2. Repeat this on the opposite side.
Figure 5 Figure 6
!
!
Fastening the Front Splitter to the Factory Valance:
1. Grab a bracket, bolt, and nut that was previously used to secure the belly pan to now
fasten the splitter to the valance through the hole you’ve just drilled. (Figure 4)