199
FR
ES
PT
IT
EL
PL
RU
KZ
UA
RO
EN
FR
ES
PT
IT
EL
PL
RU
KZ
UA
RO
EN
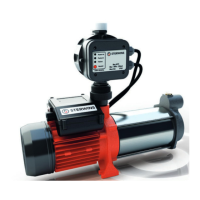
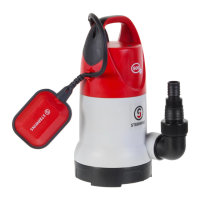
Pump net weight 11.9 Kg
4800 L/h
Maximum delivery pressure 4.5 bar
Maximum Suction height 45m
Max. water temperature 35°C
Tube connector Ø1’’ 25 mm
IP Class IPX4
Guaranted sound power level 90 dB(A)
4. ASSEMBLY
WARNING! The product must be fully assembled before
operation! Do not use a product that is only partly assembled
or assembled with damaged parts! Follow the assembly
instructions step-by-step and use the pictures provided as a
visual guide to easily assemble the product !
4.1 UNBOXING
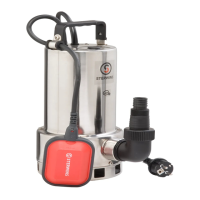
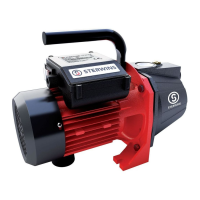
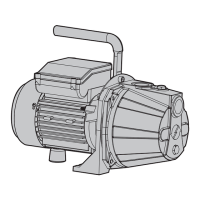
1. ON/OFF switch
2. Connector caps
3. Discharge connector (output)
4. Drainage plug
5. Suction connector (input)
6. Power cord
7. Handle
Filling plug
x 4
8.
7
3
1
6
8
5
4
• Do not use any sharp tool (cutter, knife...) when unboxing, you may damage the
product.
• When unboxing, take the pump with the carrying handle (7)
• Do not use the power cord to lift, carry or transport the machine.
• Do not scrape the power cord across sharp edges and ensure that it does not get
pressed.
4.2 INSTALLATION
Tightly screw the pump illustration
2.2
DANGER! Risk of injury due to electric shock.
Warning! Do not plug in before installation is fully completed !
CAUTION ! Always wear safety glasses and gloves during
installation.
Intlet connection illustration
it with appropriate tool.
• As a basic principle, we recommend using:
foreign bodies.
- A suction-hose set with suction hose and an intake valve with a strainer (in order to prevent long
priming periods).
• If you cannot obtain a suction-hose set, please purchase :
- an 25 mm (1”) intake hose
- an intake valve with a strainer
- 2 hose clamps 2 standard adapters (one for the intake line, one for the discharge line) and assemble the
suction-hose set yourself using a standard adapter and a clamp et un collier de serrage.
4.3 FIRST USE
WARNING ! Read the « SAFETY INSTRUCTION » section at the
beginning of this manual including all text under subheading
therein before using this product.
Setting up your pump
• Remove the connectors caps from the connectors and store them.
12
FR
ES
PT
IT
EL
PL
RU
KZ
UA
RO
EN
4.1 UNBOXING
6
8
9
1
7
3
5
4
10
11
12
2
x2
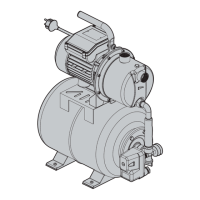
1. ON/OFF switch
2. Connector caps
3. Discharge connector (output)
4. Drainage plug
5. Suction connector (input)
6. Pressure control
7. Outlet
8. Inlet
9. Adaptor
10. Power cord
11. Handle
12. Filling plug
• Do not use any sharp tool (cutter, knife...) when unboxing, you
may damage the product.
• When unboxing, take the pump with the carrying handle (11)
• Do not use the power cord to lift, carry or transport the
machine.
• Do not scrape the power cord across sharp edges and ensure
that it does not get pressed.
4.2 INSTALLATION
Tightly screw the pump illustration
2.2
Attach the pump to a flat level surface with suitable screws and silent block if necessary.
DANGER! Risk of injury due to electric shock.
Warning! Do not plug in before installation is fully completed !
CAUTION ! Always wear safety glasses and gloves during
installation.
Suction hose illustration
2.3
Assemble the different elements together according to the illustration. In case screw are necessary : tight
it with appropriate tool.
• As a basic principle, we recommend using:
- A preliminary filter, in order to avoid unnecessary damage to the pump as a result of stones and solid
foreign bodies.
- A suction-hose set with suction hose and an check valve with a strainer (in order to prevent long
priming periods).
• If you cannot obtain a suction-hose set, please purchase :
- an 25 mm (1”) intake hose
- a check valve with a strainer
- 2 hose clamps 2 standard adapters (one for the suction hose, one for the discharge line) and assemble
the suction-hose set yourself using a standard adapter and a clamp.
Attach the lter to the wall. Make sure that the vibrations of the pump do not damage this
installation (exible connection is strongly recommended)
4.3 FIRST USE
WARNING ! Read the « SAFETY INSTRUCTION » section at the
beginning of this manual including all text under subheading
therein before using this product.
Pay particular attention using the machine for the first time : focus and dedicate all your attention to this
first use.
Setting up your pump
• Place the pump on flat firm surface to ensure safe operation.
• Remove the connectors caps from the connectors and store them.
Connecting the suction hose
• Screw the standard connectors onto the suction connector.
• Assemble the suction hose using a standard connector and clamp. Make sure the assembly is tight
enough as a leaking suction hose will draw in air instead of water.
• If the water is not so clear, add a filter between the suction connector and suction hose.
Risk of damage to the pump!
If without lter: unwanted particles (sand, stones, etc.) will
cause damages to the pump. Any damage caused in this way
will not be covered under our warranty
 Loading...