42
ENGLISH
EN
Original instructions for use
• Do not alter the engine’s regulator setting and do not race
the engine. The possibility of personal injury increases
when the engine is run at high revs.
• Never use the snow thrower near enclosures, cars,
windowpanes, slopes etc. without properly setting the
discharge chute deflector.
• Always keep children away from areas to be cleared. Get
another adult to keep the children under supervision.
• Do not overload the machine by driving it too fast.
• Take care when reversing. Look behind you before and
during reversing to check for any obstacles.
• Never point the discharge chute towards bystanders. Do
not allow anyone to stand in front of the machine.
• Disengage the auger when the snow thrower is to be
transported or is not in use Do not drive too fast on
slippery surfaces when transporting.
• Only use accessories that are approved by the machine’s
manufacturer.
• Never drive the snow thrower in bad visibility or without
satisfactory lighting.
• Always ensure you have a good balance and a tight grip
on the handle.
• Do not touch engine components because they are warm
during use. Risk of burn injuries.
2.4 MAINTENANCE AND STORAGE
• Tighten all nuts and screws so that the machine is in safe
working condition. Check the shear bolts regularly.
• Always use genuine spare parts. Non-genuine spare parts
can entail a risk of injury, even if they fit the machine.
• Never store the machine with petrol in the tank in
buildings where the fumes can come into contact with
open flames or sparks.
• Allow the engine to cool before putting the machine in
store.
• Before a long storage, check the instructions for
recommendations.
• Replace damaged warning and instruction stickers.
• Let the engine run a couple of minutes with the auger
connected after use. This prevents the auger from
freezing solid.
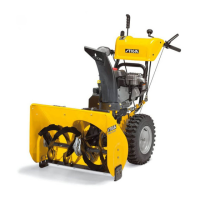
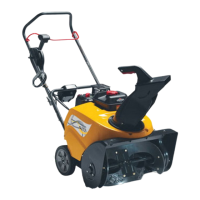
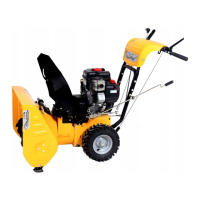
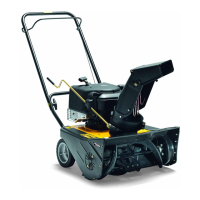
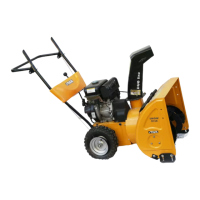
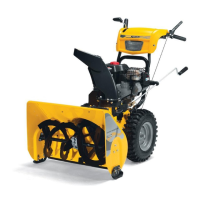
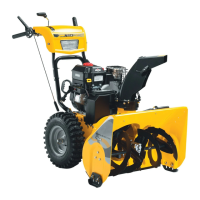
3 ASSEMBLY
Note: Instructions to the left and right sides start from the
driving position behind the snow thrower.
3.1 CONTENTS - OUTER PACKING
The packing contains:
- One snow thrower
- One discharge chute
- One set of instructions
- One assembly kit
In addition, the following are supplied:
- Chute clearing tool (F in fig. 7)
- Extra break bolts for spare
3.2 UNPACKING
1. Remove all loose items from the carton.
2. Cut the four corners of the carton and let the sides fall
down.
3. Unscrew the screws (B) that fasten the shoes to the
bedding. See fig. 1. (some models only)
4. Roll the snow thrower from the carton.
5. Cut the plastic tape holding the control wires on the
underside of the handle.
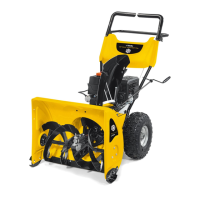
3.3 HANDLE, SEE FIG. 2
1. Loosen, but do not remove, the securing nuts in the upper
holes.
2. Fold up the upper part of the handle. NOTE! Make sure
the control wires do not jam.
3. Fit screws from the outside in the lower holes and
assemble with the following parts:
A Screws
D Lock nut
4. Tighten the four nuts.
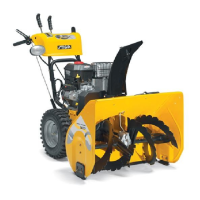
3.4 SNOW DISCHARGE CHUTE, SEE FIG. 3
1. Place the chute over the tabs on the chute ring.
2. Fit the screws (H) from the inside. Mount and tighten
only the two nuts (E and I). Wait with nut (F).
3. Fit the clamp (G) over the chute deflector wire and fit the
unit onto the rear screw (H). Mount and tighten the nut
(F).
4. Rotare the Chute fully left and right and check that the
wire is bending normally without any abnormal
stretching. Adjust the clamp (G) if necessary.
5. Check/tighten all the bolts and nuts on the flange.
3.5 GEAR LEVER, SE FIG. 4
Never actuate the gear lever with the engine
standing still. This will destroy the gearbox.
Set the gear lever in a suitable position to simple assemble
the ball-and-socket joint (L) into the hole in the lever (M).
Assemble the washer and tighten with the nut supplied.
3.6 CHECKING THE CONTROL WIRES
The control wires might need adjusting before using the
snow thrower for the first time.
See ADJUSTING THE CONTROL WIRES below.
3.7 TYRE PRESSURE
Check the air pressure in the tyres. Correct air pressure: 1.0
– 1.2 bar.
4 CONTROLS
See figures 7-10.
4.1 CHOKE (L)
Used when starting a cold engine:
1. The choke is open
2. The choke is closed (for cold starting)
 Loading...