20 Series 4144 Powerhead
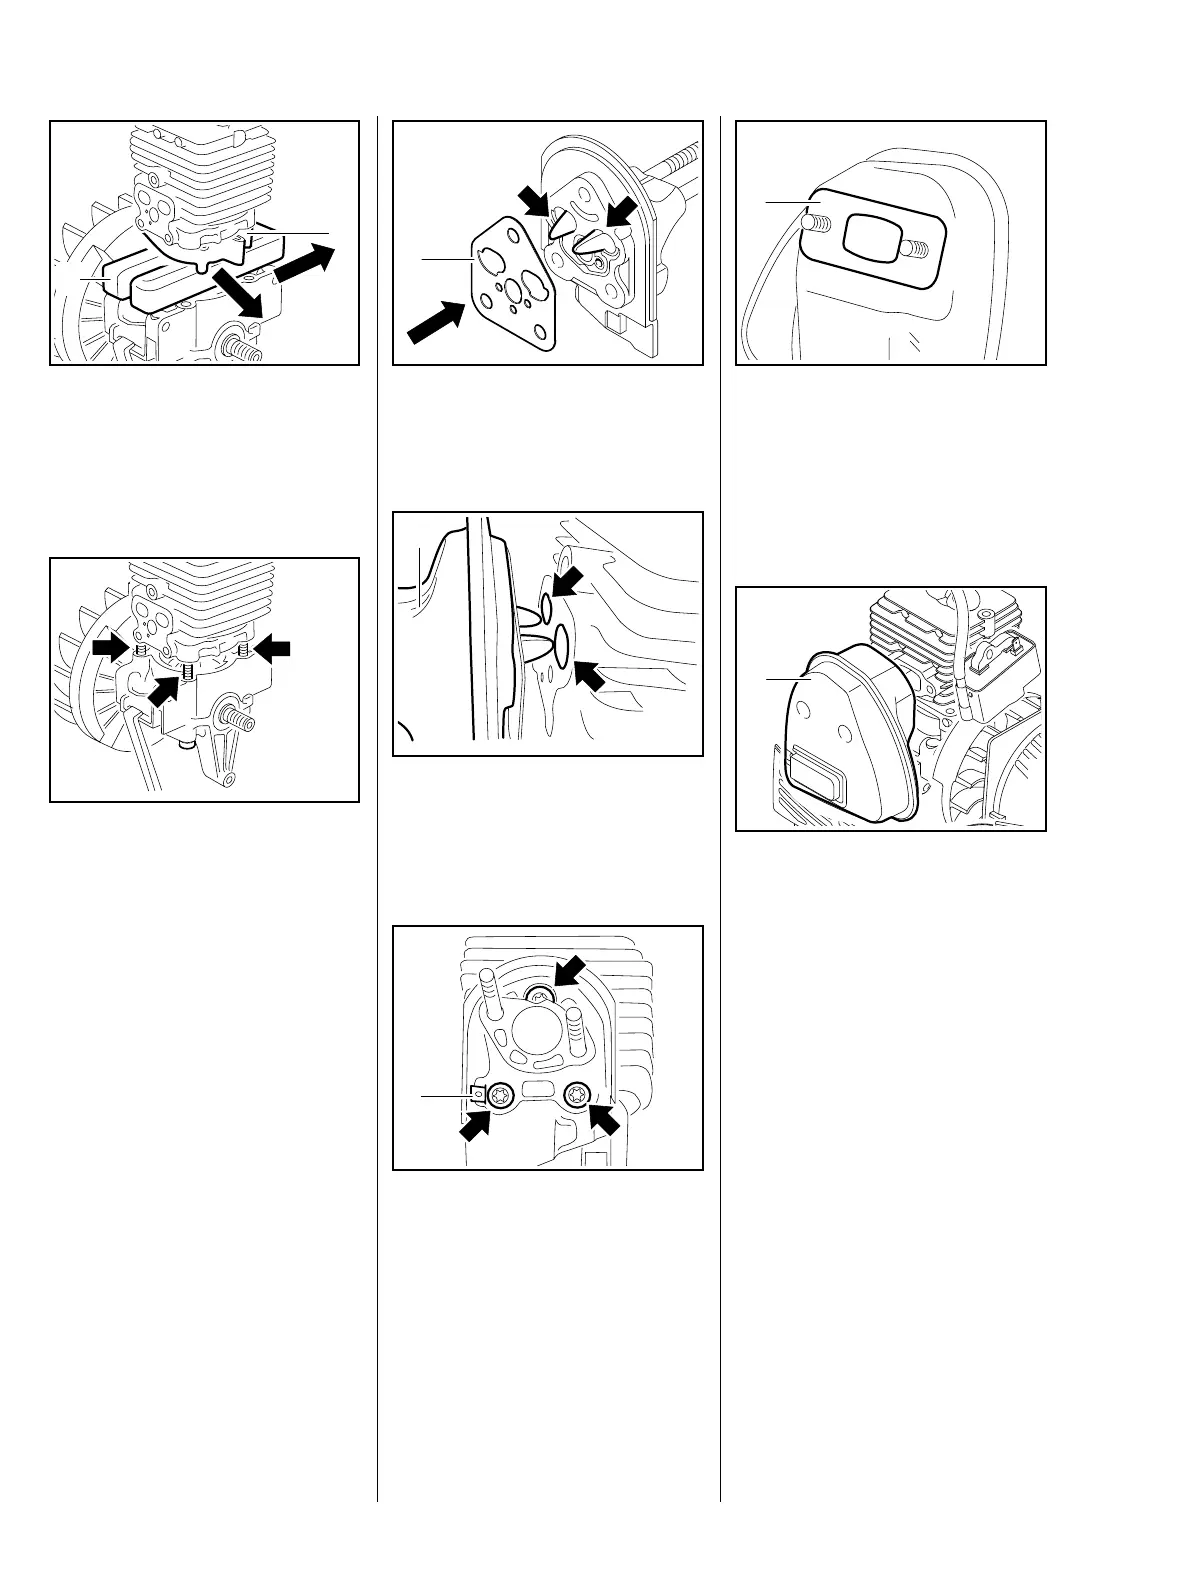
: Remove the clamping strap (1)
and wooden assembly block (2).
Make sure the cylinder gasket is
properly seated.
– Push the cylinder fully home.
: Insert the screws (arrows) to hold
the cylinder and gasket in
position.
– Tighten down the screws in an
alternate pattern.
– Remove the puller.
938RA043 TG
1
2
938RA044 TG
: Fit the new gasket (1) over the
guides (arrows) on the spacer
flange.
: Position the spacer flange (1)
with gasket against the cylinder
intake port so the guides engage
the openings (arrows).
– Fit the connector tag (1).
: Insert screws (arrows) and
tighten them down firmly.
545RA210 TG
1
296RA274 TG
1
938RA046 TG
1
Use a new exhaust gasket.
– Insert the screws.
: Push the exhaust gasket (1) over
the screws.
: Carefully place the muffler (1) in
position.
– Fit the screws with washers and
check correct position of exhaust
gasket again.
– Insert screws and tighten them
down firmly.
– Tightening torques, b 3.3
– Install the ignition module,
b 7.1.1
– Reassemble all other parts in the
reverse sequence.
545RA055 TG
1
545RA056 TG
1

 Loading...