SUPPORT@STOREITCOLD.COM
2020 © Store It Cold, LLC. 27 Rev 2020-8A. All Rights Reserved.
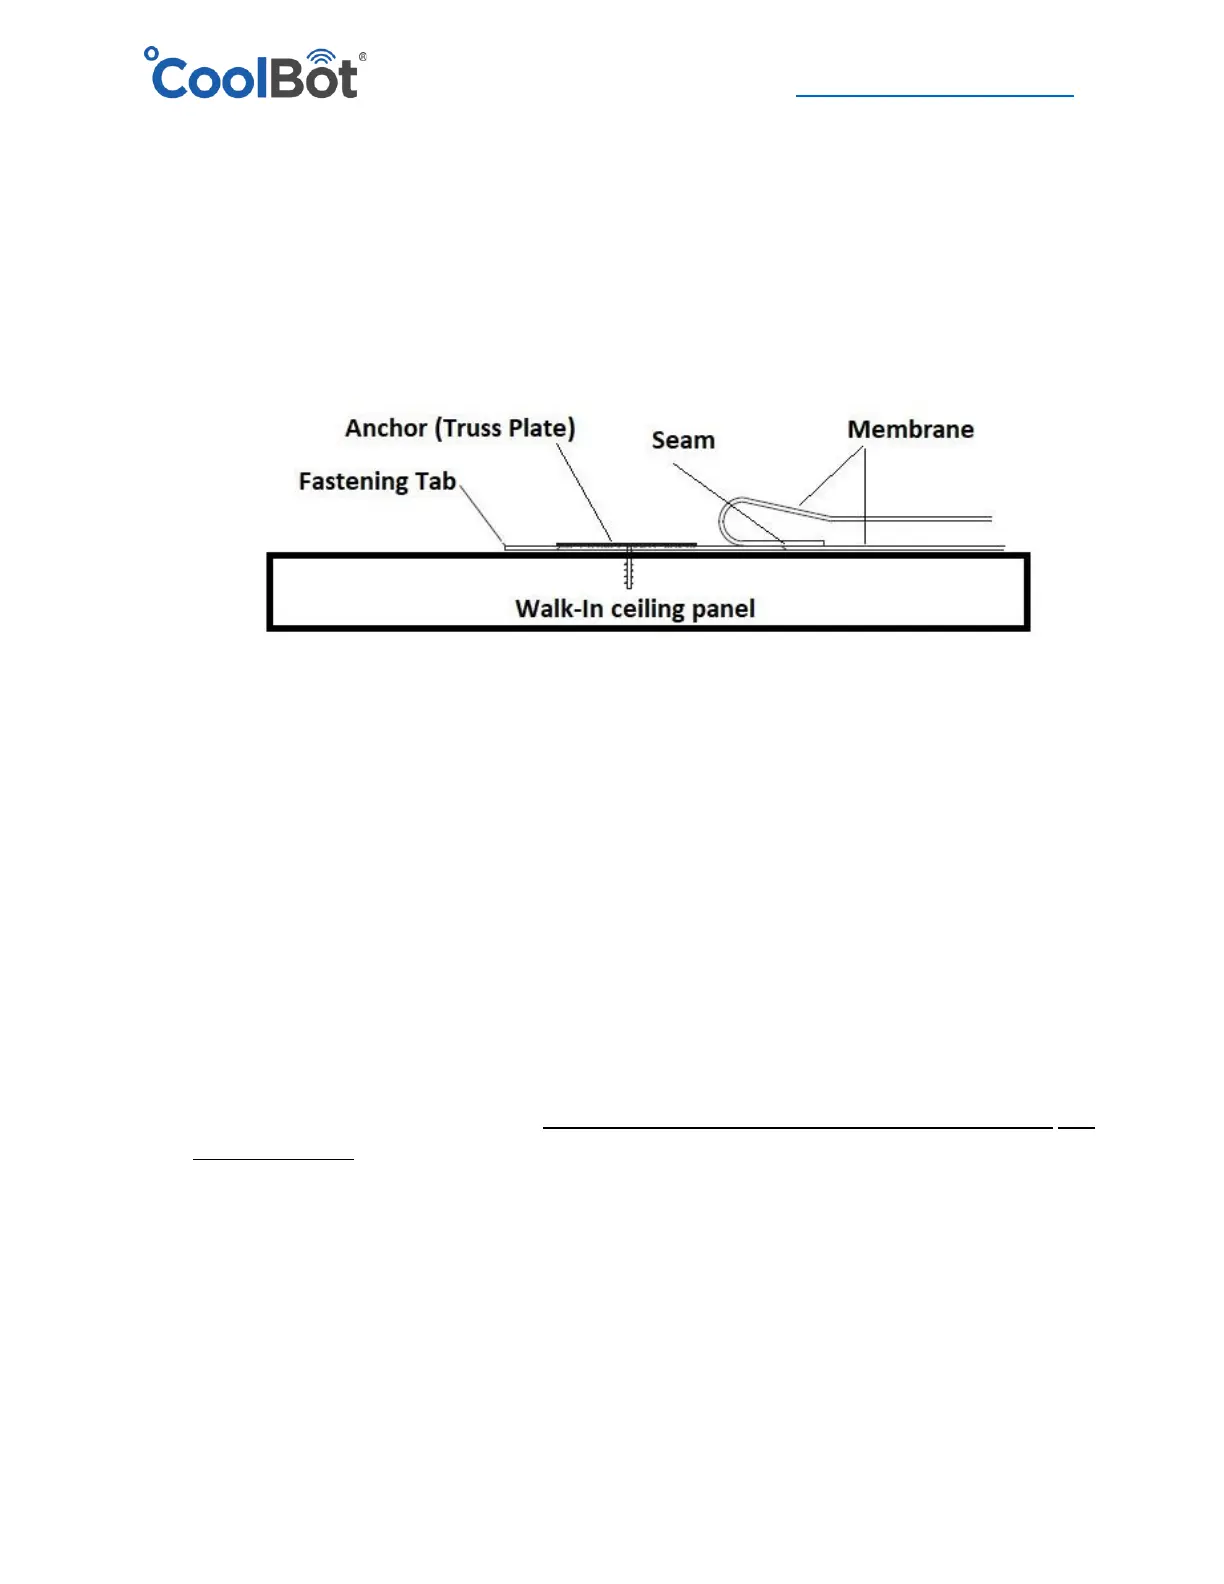
5. The fastening tab should be flat on the walk-in cooler ceiling panel. Begin your membrane
installation by anchoring the TRUSS PLATE along the fastening tab. Start 6” away from the
side of the cooler and space your anchors 12” O.C. Make sure that your last anchor is also no
closer than 6” from the other edge. Use the black long screws provided. Note: You are
screwing into the Fastening Tab and into the ceiling of the cooler but once you roll the rest of
the membrane it SHOULD cover the Tab (flap) and the anchors as well, leaving no exposed
screws or penetrations.
6. Continue to roll the membrane until the next Tab (seam) is exposed (if applicable). Making
sure that the membrane is taut and straight, install your second row of anchors (TRUSS
PLATE) along that Fastening Tab in a similar fashion as the first one. Remember, once the
membrane is rolled completely, the Tab will be covered and no anchors or screws will be
visible from the top.
7. Continue the same way installing horizontal rows of anchors in to every Fastening Tab making
sure your membrane is pulled tight each time.
8. Starting at the front of the cooler, pull down on the membrane and secure to the wall by
installing the trimming provided. Screw the trimming to the front side using the screws
provided in your installation kit.
IMPORTANT! Make sure the trim is level and below the seam in between the wall panel and
the ceiling panel. It’s important that this seam stays under the membrane.
9. Repeat the same process for the back side of the cooler.
10. After the front and back part of the membrane have been secured, proceed to one of the
sides of the cooler. Tuck the excess fabric at the front corner underneath the membrane to
create a nice fold. Pull down tight and start securing the membrane to the wall panels
following the same recommendations as before. Install the trimming at the same level as you