SUPPORT@STOREITCOLD.COM
2020 © Store It Cold, LLC. 26 Rev 2020-8A. All Rights Reserved.
5. After the membrane has been correctly installed and secured to the sides of your cooler, you
can trim with a utility knife the excess fabric below the trim if desired. This will give a cleaner
and more professional look but it is not necessary.
6. Caulk with silicone the top edge of the trimming bars for added protection.
7. Your cooler is now set up for outdoor use.
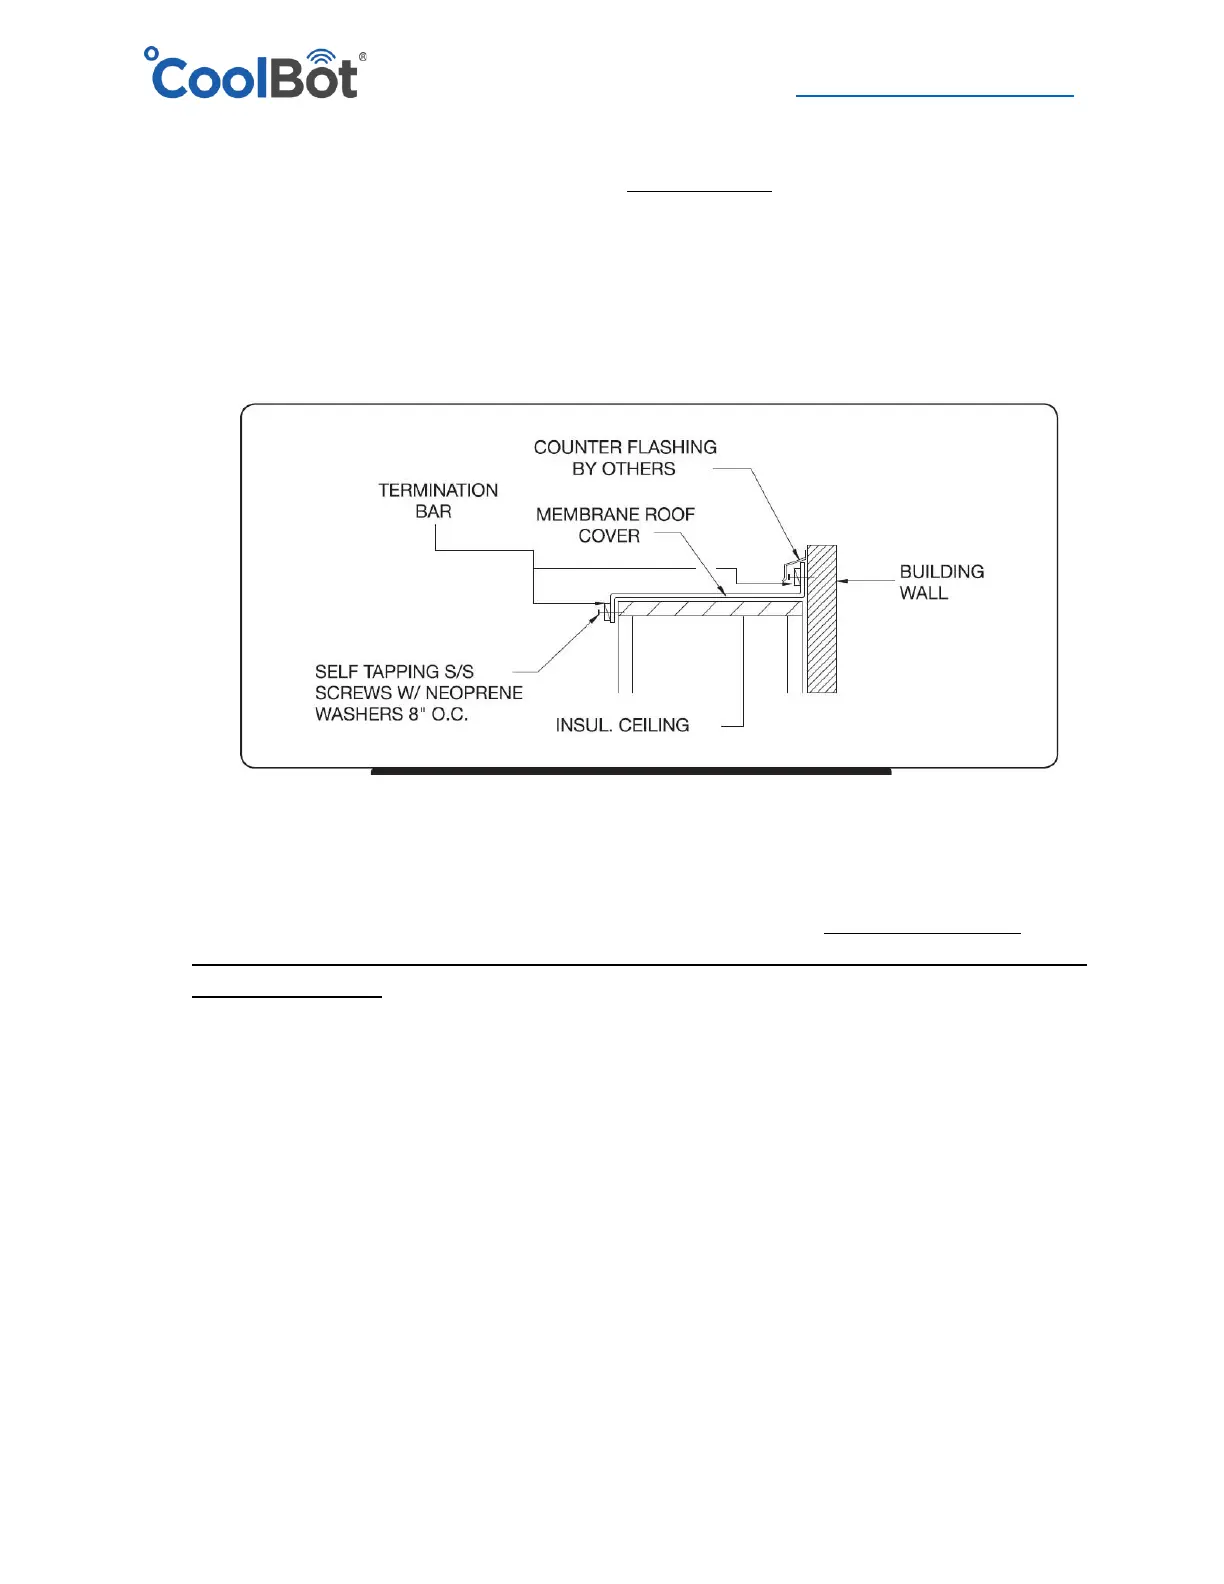
MEMBRANE INSTALLATION IF YOUR OUTDOOR COOLER IS 2” FROM A WALL
MEMBRANE INSTALLATION ON LARGE COOLERS - ONE SIDE MEASURING 10FT OR MORE
1. Extend your membrane on the roof of your walk-in with the soft smooth semi-glossy
textured side UP (overlapping seams DOWN). Ensure that it hangs approximately the same
amount on all sides. You should have the membrane hanging at least a 6” on each side of the
cooler. Don’t worry if it is too long, it can be trimmed after it’s installed in place.
2. Find the tabs (seams) on your membrane and ensure they are running parallel to one side and
at least 6” away from the closest edge of the cooler and that they are running perpendicular
to the other side. Note: Your membrane may only have one seam.
3. Once the membrane is centered on the roof, and seams have been located and checked for
distance from the edge (previous step), either fold or roll the membrane back towards the
center of the roof so the underside fastening tabs (under the seam) are exposed. The roll or
fold must be parallel to the membrane seams (tabs).
4. When you reach the first tab (closest and parallel to one side of the cooler) stop rolling or
folding.