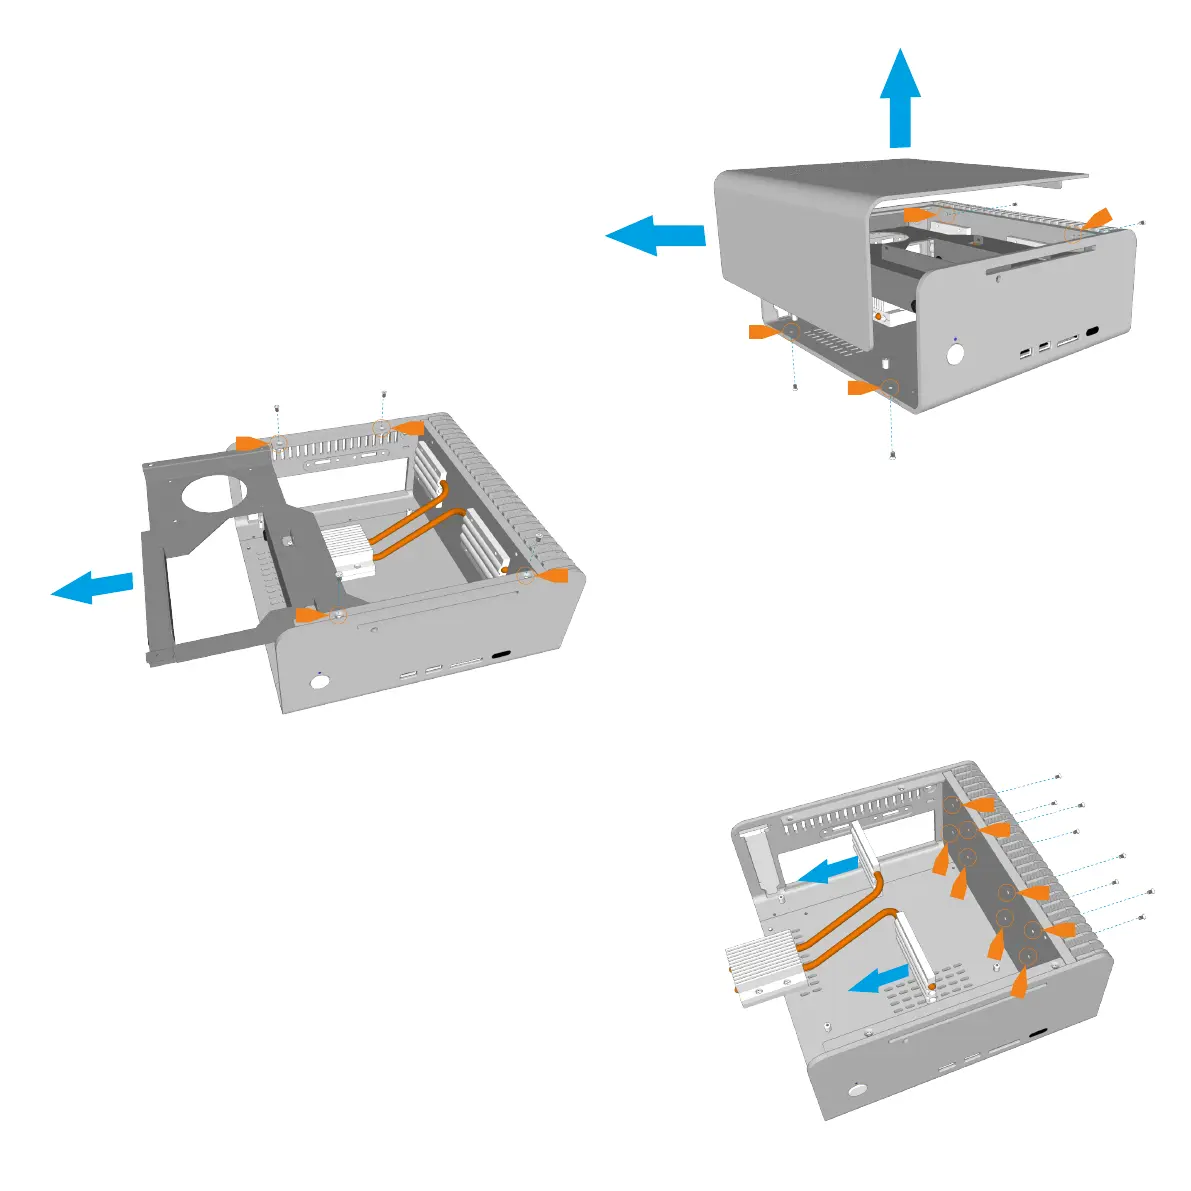
Removing the Top Panel
The top panel is held in place with 4 screws, 2 at
the bottom and 2 at the side. The side screws are
accessed between the gaps of the heatsink fins.
Remove the screws and slide the top panel away
from the chassis
Removing the HDD/ODD Cage
The HDD/ODD cage is held in place by 4 screws
which are all accessible from the top as shown.
Once all 4 screws are removed, slide the cage
out of the chassis.
Removing the CPU Cooler
The heat pipes are connected to the chassis
using 2 connector blocks which are held in place
with a total of 8 screws (4 for each block).
Unscrew all 8 screws which are accessible via
the gaps in between the heatsink fins.
P4 - PREPARING FOR ASSEMBLY