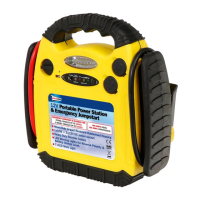
LED INDICATORS
LED’s illuminate when charging is in progress. RED LED indicates
charging, as the charging progresses the RED & YELLOW LED will light
simultaneously, The GREEN LED indicates charging complete. If no
charging cable is attached pressing the BATTERY CHECK button will give
an indication of the charging level. RED Indicates immediate charging is
required, YELLOW indictates
charge level is approaching low and should be recharge as soon as
possible, GREEN indicates a good charge and will operate most 12V
accessories. But the battery may not be FULL. To check this attach a
power cable and read the LED’s as above. When jump starting a vehicle
the RED/GREEN LED indicates correct (GREEN) or incorrect (RED)
connection of the crocodile clips. If the RED LED illuminates disconnect
immediately and re-connect correctly.
JUMSTARTING AN ENGINE
JUMPSTART MUST BE FULLY CHARGED TO JUMPSTART AN ENGINE.
MAKE SURE THE ROTARY BOOSTER CABLE SAFETY SWITCH IS IN THE “OFF” POSITION.
Do not attempt to Jumpstart an engine if the green light does not illuminate when you press the battery check button as this could
permanently damage the battery.
Turn off ignition and all accessories (lights, radio, header, air conditioning, etc.) in the vehicle with the weak battery that will not start.
Place vehicle in park and set hand brake.
For maximum power, turn off all switches on your Jumpstart system and disconnect any accessories plugged into the 12 Volt power outlet.
Check that vehicle is negatively grounded (most vehicles). Securely connect the red positive clamp to the positive (+) terminal of the
vehicle battery. Then, securely connect the black clamp to a grounding point on the vehicle such as the metal chassis frame, in the
engine compartment, as far away from the battery as possible. DO NOT connect it to the negative battery terminal. Make sure both
clamps have good contact. Check cable connection polarity indicator.
NOTE: DO NOT PLACE JUMPSTART WHERE IT COULD FALL WHEN VEHICLE STARTS UP. MAKE SURE THAT CABLES ARE ROUTED
AWAY FROM MOTOR FAN OR BELTS.
If indicator light is green, turn ratary switch to the “on” position and start your vehicle. If indicator light is red, reverse clip
connections before proceeding. Once vehicle starts, turn rotary switch to “off” position and disconnect black clamp first and then,
red clamp. Restore cables on Jumpstart System and recharge unit at first opportunity.
NOTE: WHEN STARTING VEHICLE, CRANK ENGINE IN 5-6 SECOND BURSTS. IF VEHICLE DOES NOT START UP WITHIN 2-3
ATTEMPTS, ALLOW THE JUMPSTART TO COOL FOR 3 MINUTES BEFORE ATTEMPTING TO START VEHICLE AGAIN. RETRY ONLY IF
BATTERY CONDITION IS SATISFACTORY.
WARNING: Do not turn rotary switch to “on” position if indicator light is red. Turn “on” only when light is green.
OPERATING WORKLIGHT
The Jumpstart System comes with a built-in worklight. The light is directly connected to the Jumpstart’s internal battery. Light will
operate for up to 40 hours from a fully charged battery. Turn off light when not required to conserve battery power.
USE AS A 12 VOLT DC PORTABLE POWER SUPPLY
The Jumpstart System is equipped with 2 x outlet sockets and can be used to operate most 12 volt auto accessories and appliances
(11 AMP maximum) equipped with a cigarette lighter plug. Simply lift up cover on socket and plug in appliance. Place power outlet
switch located opposite socket in the “on” position. Length of time appliance will operate will depend on condition of battery and
current draw of appliance. Periodically check battery status during operation and discontinue use immediately, if battery condition
falls to red level. Recharge unit as soon as possible and before further use.
Power outlet is protected by an interal circuit breaker to prevent damage to unit in case appliance has a short circuit or exceeds 11
AMPS. If circuit breaker is tripped, disconnect appliance and have it checked. Circuit breaker will automatically reset once it cools
down (approx. 15-20 minutes).
DO NOT PLUG A CIGARETTE LIGHTER INTO THE OUTLET OF THE JUMPSTART.
 Loading...