11
Section 2
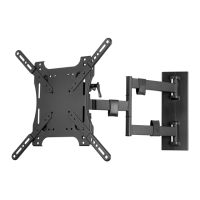
Wall Mount
Install Wall Plates
Warning: Tighten screws only until the ceiling plate is firmly attached. Do not overtighten.
Overtightening can damage the screws, greatly reducing their holding strength.
Mounting on Wood Studs/Pillar
If mounting on a single wood pillar, it must be at least 5.5"
wide. Otherwise, frame out two 2" × 4" studs spaced 8" apart.
The studs or pillar must be covered with no more than ½” of
plasterboard. Wall brackets include ST8×90 lag bolts for wood
joist installation.
Place the wall bracket drill template on the wall in the desired
location, with the arrow pointing up. Ensure that it is level, then
mark the locations to drill pilot holes for mounting.
Drill four holes into the joist(s) using a
3
/16" drill bit. Use a stud
finder to ensure that you drill into the center of the joists.
Place the wall plate in place, ensuring that the arrow points up.
Insert four lag bolts into holes through the wall plate to secure
plate to the wall. Tighten the lag bolts to secure the wall plate.
 Loading...