9
Insert the three set screws
into the holes at the bottom of the outer sleeve. Using the hex wrench,
tighten them fully and evenly to stabilize the pole.
Insert the Poles
Thread the poles into the ceiling plates and screw them in until they are firmly seated.
Insert the set screw and tighten firmly.
Connect the Utility Box to the Drop Poles
Some preparation makes installation much easier.
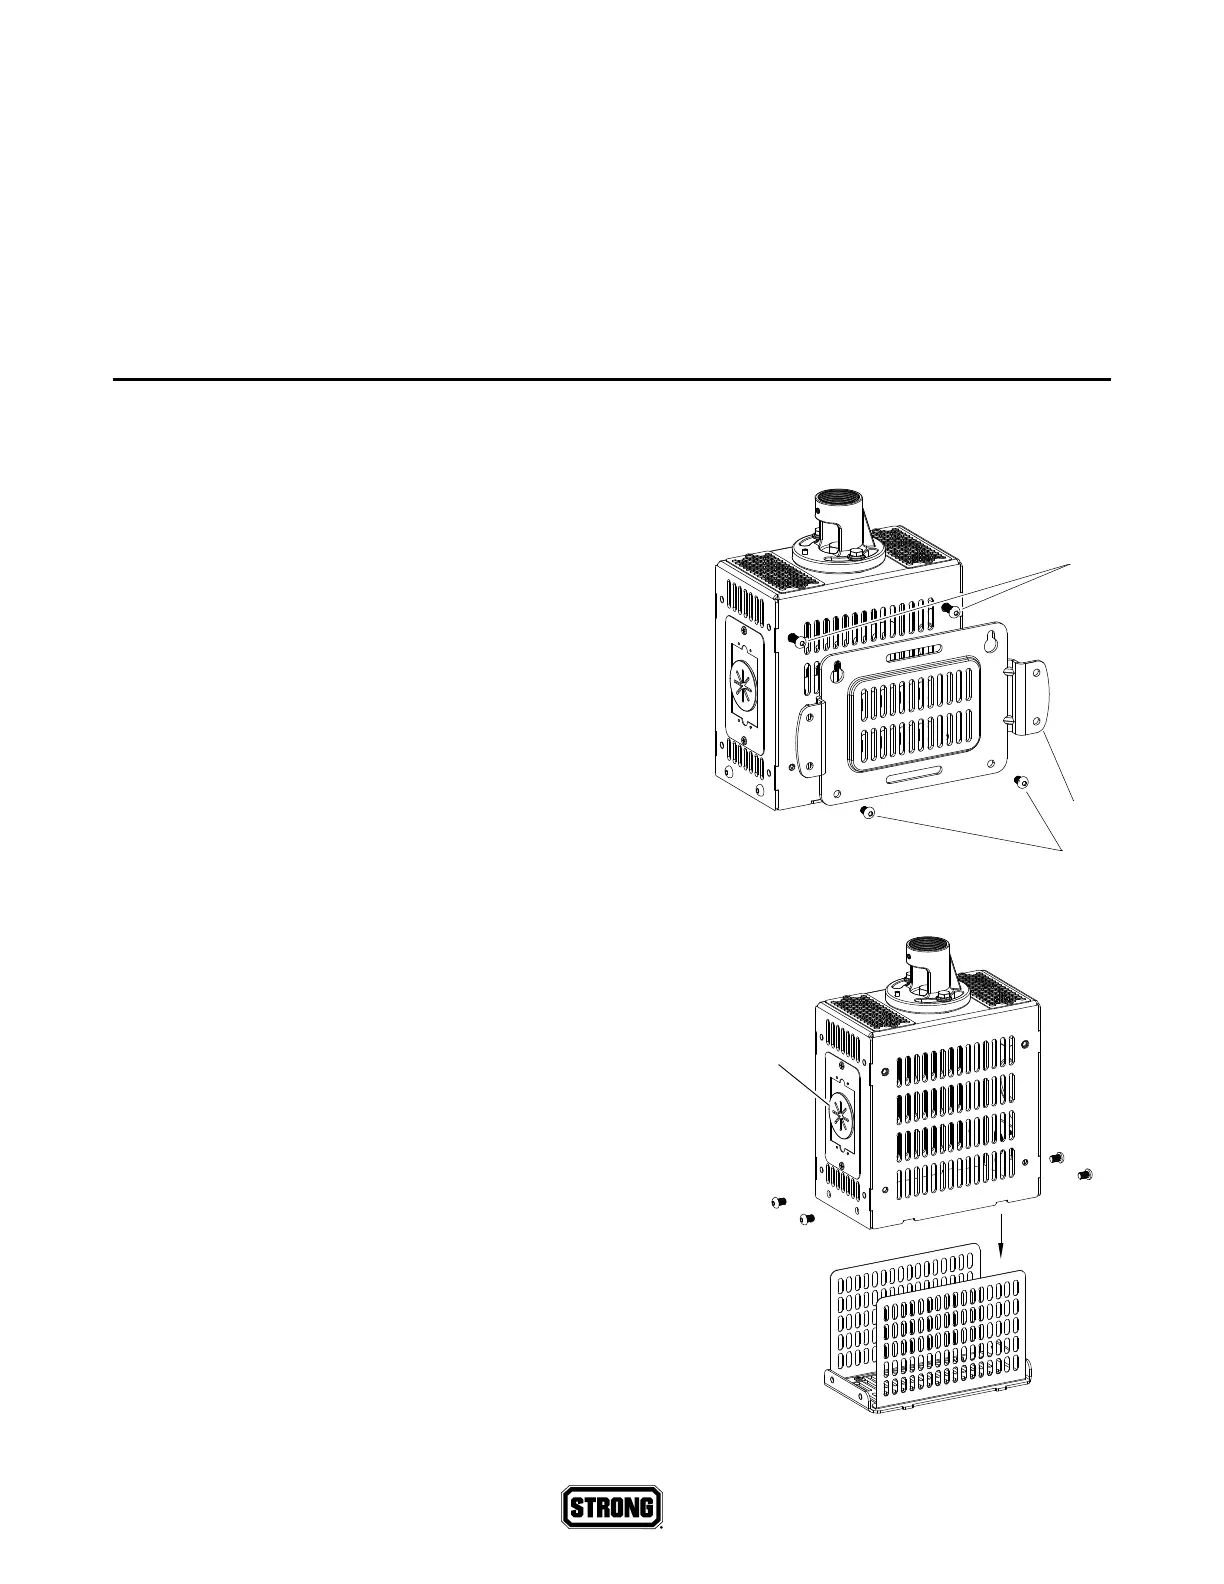
Remove the Plates
There are four screws that secure each adapter
plate
. Remove the bottom two
, and loosen
the top two
(leaving them still in place), so
that you can remove the adapter plate.
If you have a double-sided utility box, repeat
this for the other side.
Insert Equipment into the Cage (Optional)
If you have additional equipment to be placed inside
the utility box (for example, a WattBox compact power
conditioner), undo the screws at the bottom of the ends
.
Remove the cage from inside the utility box
. Place your
gear inside the cage, and secure it with a wire tie (not
included).
If you have wiring, either slit the grommets on the sides of
the utility box in an X shape, or else remove the grommet
entirely
. Thread any wiring through the cable access
ports on the sides of the utility box, then reinsert the cage
and secure it with the screws.
3
1
2
1
1
2
3
 Loading...