PART 1 • English
6
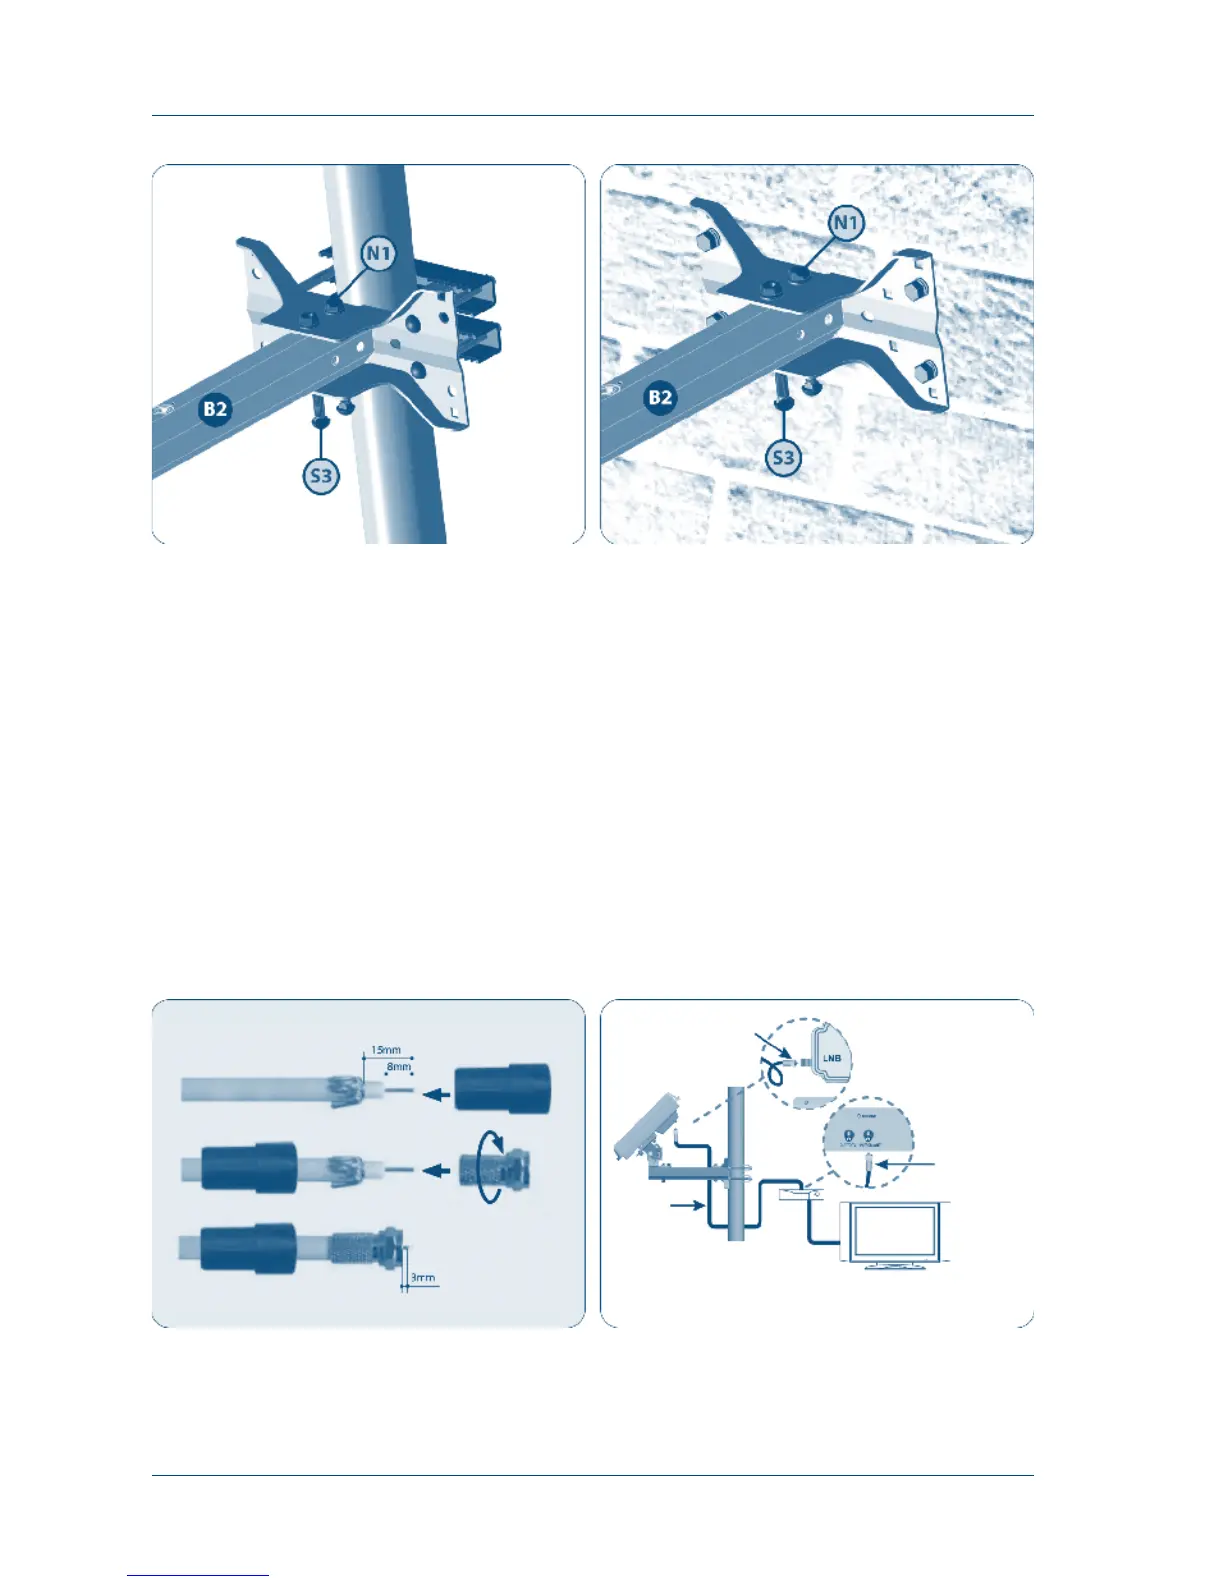
Wall
3.3 Step 3: Connecting the Antenna and the Set top box
Once you have installed the antenna in an open loop space and mounted the way you want it to be
the next step is to connect it all together.
In order to be able to watch your favourite satellite programs, you need to connect your satellite
antenna to a receiver by a cable.
The cable between the antenna and the Satellite receiver should not exceed 30m as it will decrease
the quality of the signal.
The use of a long or bad quality cable and not isolated jacks can cause a loss of the signal level,
it would be preferable to use an RG6 Coaxial cable (HF 17VATC or 19VATC cable), in order to
minimise a signal loss.
How to prepare the cable? How to connect the cable to the antenna and the
set top box?
Connector cover
One side
to Antenna
Cable
Other side
to Receiver
F-connector
It is important that the coaxial cable does not become damaged or kinked during the installation procedure.
3.4 Step 4: Fine Tuning and Fixing the Bracket
Once fine tuning for signal reception is completed, please tighten all bolts and nuts.