Do you have a question about the Studer A 67 and is the answer not in the manual?
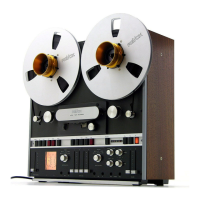
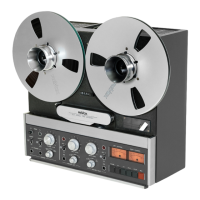
Lists available tape speeds: 15 ips, 7.5 ips, 3.75 ips.
Specifies wow and flutter limits, e.g., 0.06% or less at 15 ips.
Details S/N ratio in dB for CCIR and NAB equalization across various tape speeds and track widths.
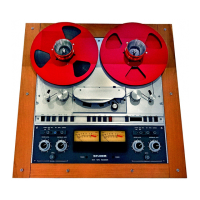
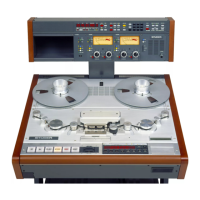
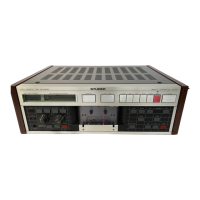
Lists and identifies numbered controls from 1 to 13 on the front panel.
Details controls like REC button, Tape counter reset, Tape speed buttons (3 3/4, 7 1/2, 15 ips).
Explains mains voltage selector, fuse rating, and frequency switch.
Instructions on how to power on the device using the POWER button.
How to select tape speed using dedicated buttons (3 3/4, 7 1/2, 15 ips).
Information on tape spool compatibility (NAB, DIN, Ciné) and threading.
Instructions for Playback (Press PLAY) and Recording (Press PLAY and REC simultaneously).
States to disconnect from mains and lists necessary tools: Allen keys, screwdrivers.
Step-by-step instructions for removing the back panel, lower rear panel, upper rear panel, and top panel.
Steps to remove the top and rear panels to access the connector socket units.
Steps to loosen screws and hinge down or remove the lower front panel.
Detailed steps for removing the front panel, including removing rollers and tape head cover.
Steps to disconnect connectors, unscrew, and remove the speed control unit.
Steps to disconnect connectors, unscrew, and remove the transport control unit.
Detailed steps to remove the transformer and power supply unit, including handling cables and screws.
Instructions to remove tape head cover, pinch roller, plate, then unscrew and remove the head assembly.
Steps to remove the front panel and two screws to access the sensor prints.
Steps to remove spool turntables, centre screw, lift drums, and disconnect wires.
Steps to remove brake assembly, disconnect motor connectors, remove screws, and lift out the motors.
Instructions for placing the unit horizontally, removing connectors and screws, and loosening the sensor arm.
Similar to the left sensor, with instructions to place horizontally and unplug connectors.
Steps to disconnect cables, pull plugs, remove screws, and carefully extract the capstan motor.
Steps to remove panels, carrying handle, then unscrew and remove the motor controllers.
Procedure to measure braking force using a spring balance, referring to specific values shown in Fig. 3.2.-1.
Notes on cleaning brake linings, checking brake bands, and readjusting mechanism after parts replacement.
Important notes regarding brake springs installation and releasing brakes manually.
Steps to adjust the brake solenoid for quiet operation by moving it until no slipping noise is heard.
Instructions for controlling the brake system by pressing PLAY and checking tape tension sensors.
Procedure to measure pinch roller force using a nylon thread and spring balance, noting the required force.
Steps to detach tape head assembly, loosen solenoid, adjust air gap, and secure solenoid.
Detailed circuit description explaining voltage regulation and overcurrent protection.
Explains the use of an IC for frequency division, phase comparison, and motor speed regulation.
Detailed procedure to adjust the capstan motor speed for synchronous running using potentiometer R32.
Steps to adjust potentiometers R3 to set specific distances (a1, a2) for left and right sensors.
Procedure to adjust tape tension using a measuring instrument and controls R3 for left and right sides.
Procedure to measure DC voltage at the photo-transistor under illuminated and tape-present conditions.
Specific steps for FAST speed: setting output level to 1.55V, adjusting azimuth, and frequency response.
Specific steps for SLOW speed: setting output level, adjusting azimuth, and frequency response.
Specific steps for MEDIUM speed: setting output level, adjusting azimuth, and frequency response.
Procedure to adjust crosstalk to minimum using CROSSTALK controls for all tape speeds.
Detailed steps for pre-adjusting Channel 1, involving removing the board, using an extension board, AF generator, and millivoltmeter.
Similar pre-adjustment steps for Channel 2, referencing the same controls and connections.
Specific steps for MEDIUM speed: setting output level, azimuth, bias, and frequency response.
Specific steps for FAST speed: setting output level, azimuth, bias, and frequency response.
Specific steps for SLOW speed: setting output level, azimuth, bias, and frequency response.
Steps for FAST speed crosstalk adjustment and frequency response calibration.
Steps for SLOW speed crosstalk adjustment and frequency response calibration.
Lists brake solenoid and the complete plunger assembly.