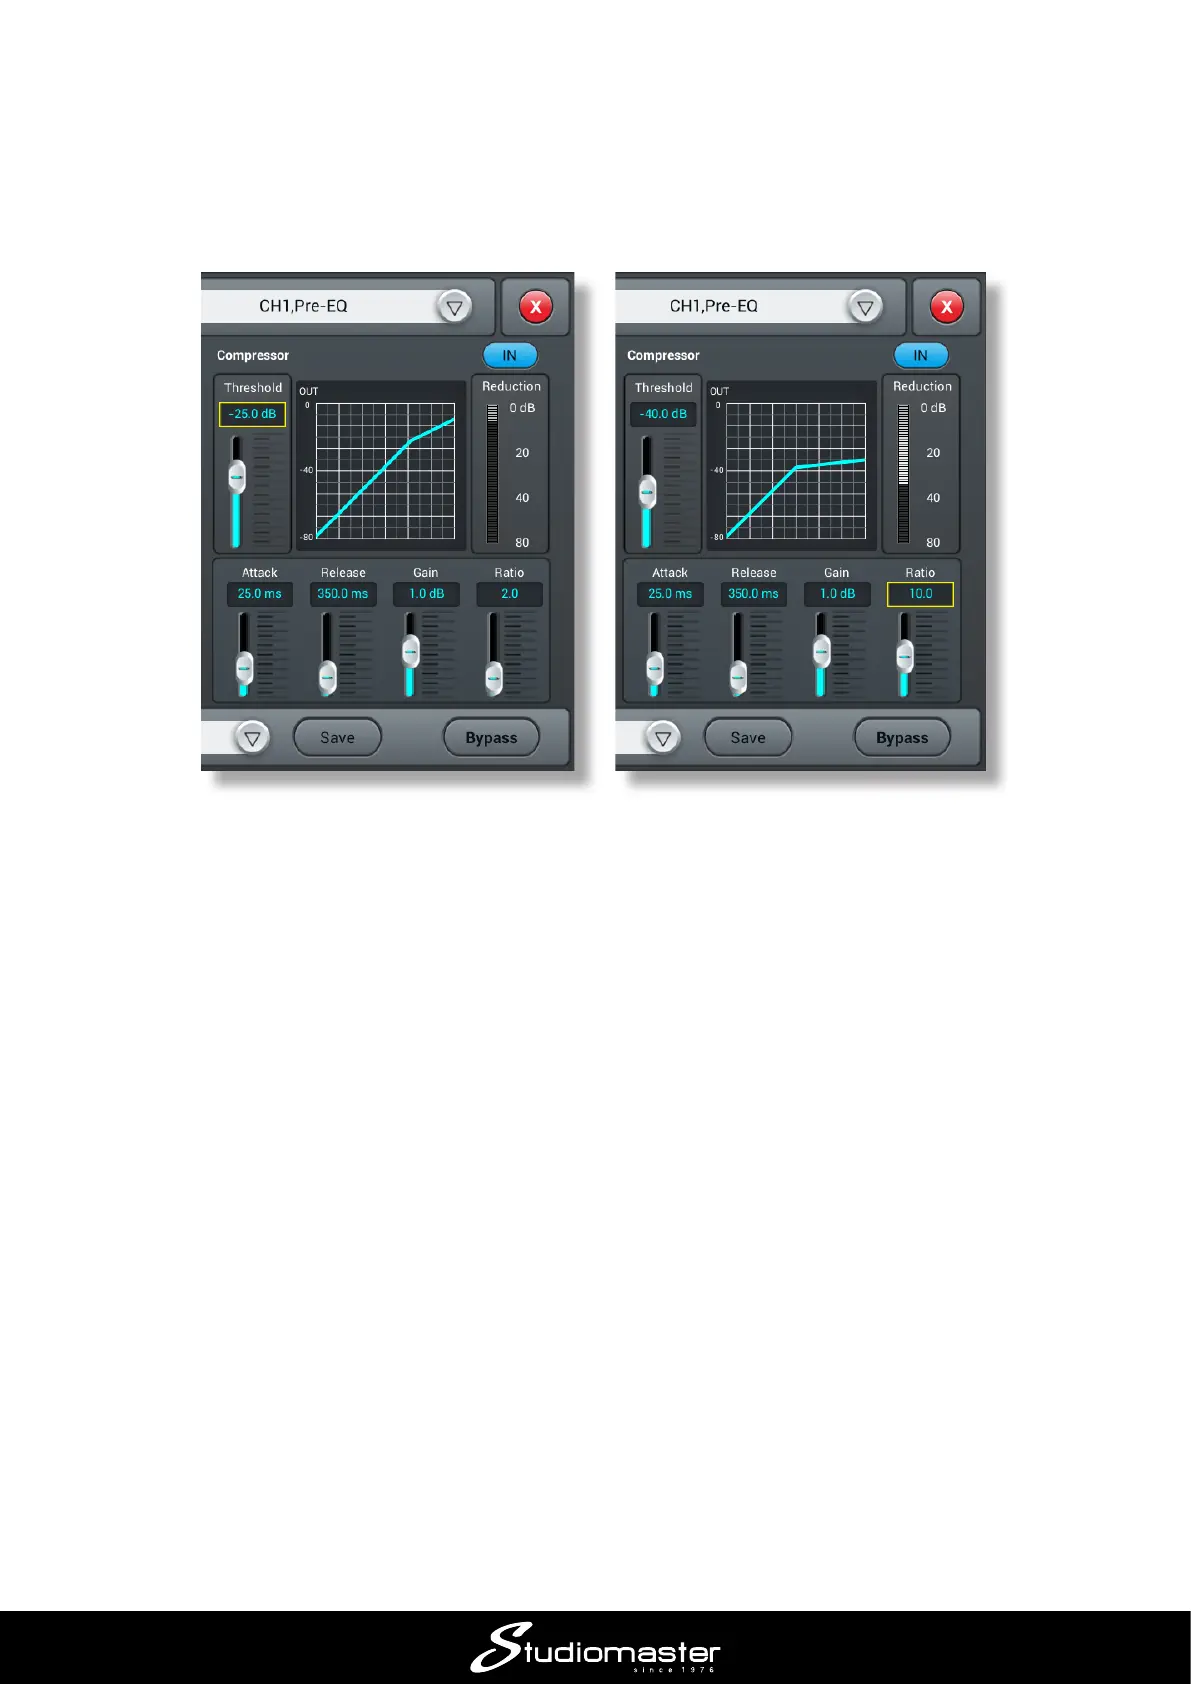
To enable the compressor section, tap its IN button. The two main controls for adjusting how much
compression is applied are Threshold and Ratio. You can either tap a control and then use the
ADJUST knob, or just use your nger to move the on-screen slider. In general terms, the lower the
Threshold and the higher the Ratio, the more the signal will be compressed. The graph depicts
output level (vertical axis) against input level (horizontal) and shows you how the compressor is
currently set up.
The Reduction meter to the right of the graph gives you an idea of how hard the compressor is
working; as you increase Ratio, lower Threshold or increase the input signal (either by turning
the channel GAIN control up or just singing louder), more Reduction will be indicated.
When Ratio is more than 10 or so, the Compressor eectively becomes a Limiter, and the output
level will not exceed the value set with the Gain control.
The Attack and Release controls control how fast the compressor operates and are best adjusted
by ear: their optimum settings will depend on the type of vocal.
Depending on the various settings, compression can have the eect of making the signal sound
quieter; use the Gain control to bring the level back up to where it needs to be in the mix.