TACT
LOCK
PLAY
CUE/
SERIAL NO.:
MADE IN CHINA
YA 0907 00001
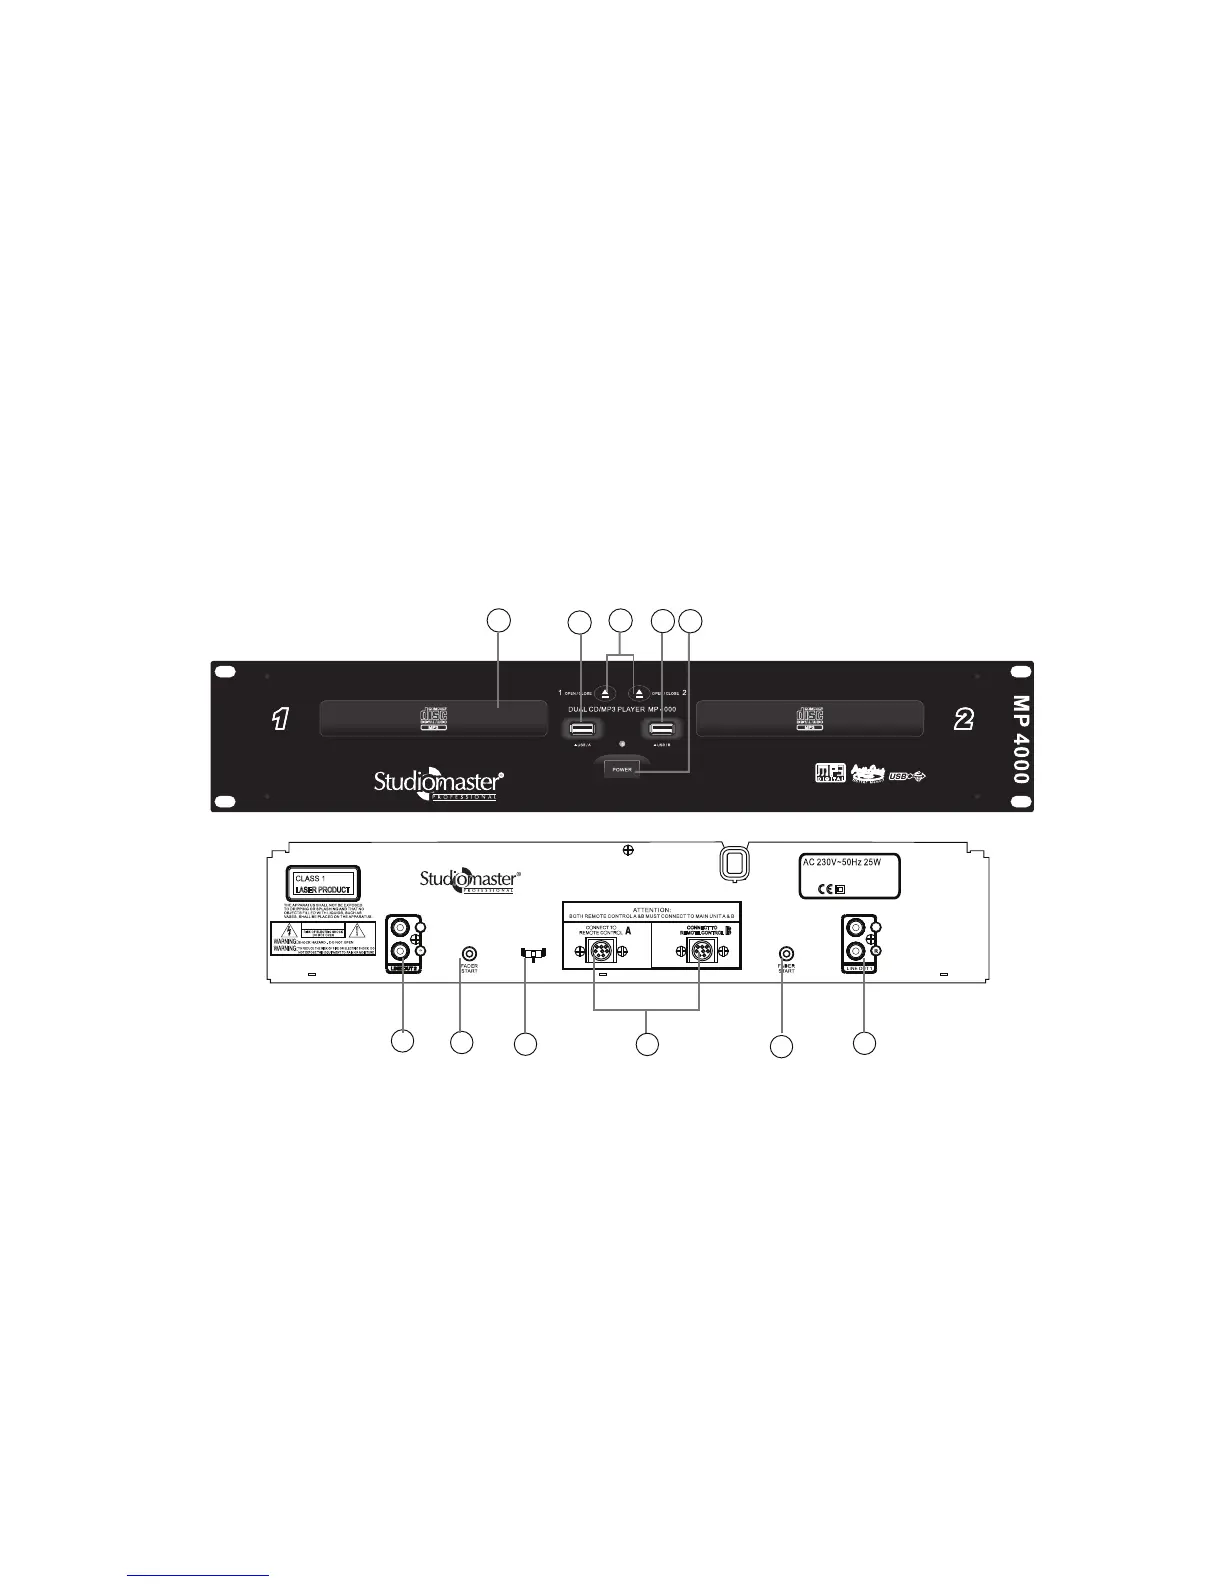
Function of the Main Unit (CD player):
1
2
4
4
3
5
5
6
6
7
8
2. OPEN/CLOSE: Press to load or eject the disc. Each press will open or close the disc tray.
21. BPM/TAP: Use it to switch between Auto BPM and Manual BPM. In manual mode, press it with the beat to get the
BPM value. The value will calculate and change by 4 times tapping.
22. MT: When this function is activated, the key of the song will be locked even though the pitch fader is adjusted.
23. CONNECTION PORTS: Connect from this port to the main unit.
• The port has to be connected correctly to its relative port and both ports (A&B) have to be connected to activate
all functions
• TRIM: In loop playback, press it to enlarge or shorten the loop length double.
20. TRACK/TRIM: This knob selects the track to be played and can skip forward or backward one track.
18. PLAY/PAUSE: Pressing this knob will cause the operation to change between PLAY and PAUSE modes.
19. PITCH BEND: Using this function, the speed can be changed to keep up with the other playing one.
3. POWER ON/OFF: This knob is used to switch the unit On/Off.
4. USB Port A & B: Connect a USB storage device to load audio files. It supports MP3 files format only.
- USB A: When playing the audio file from USB A, the USB text will illuminate stably on the display.
- USB B: When playing the audio file from USB B, the USB text will flash on the display
• The maximum current of each USB port provides 500mA only.
• If you connect a hard drive which needs the current more than 500mA, using a duo USB connector
cable to connect two USB ports to get the sufficient power supply.
• If you connect a hard drive which needs the current more than 1A, please get the power from
external power supply.
1. Disc Tray: Place the disc on this tray.
4