22
Recommendations
Tools (Pic. 5)
Unpacking
Recommandations
Outils à prévoir (photo 5)
Déballage
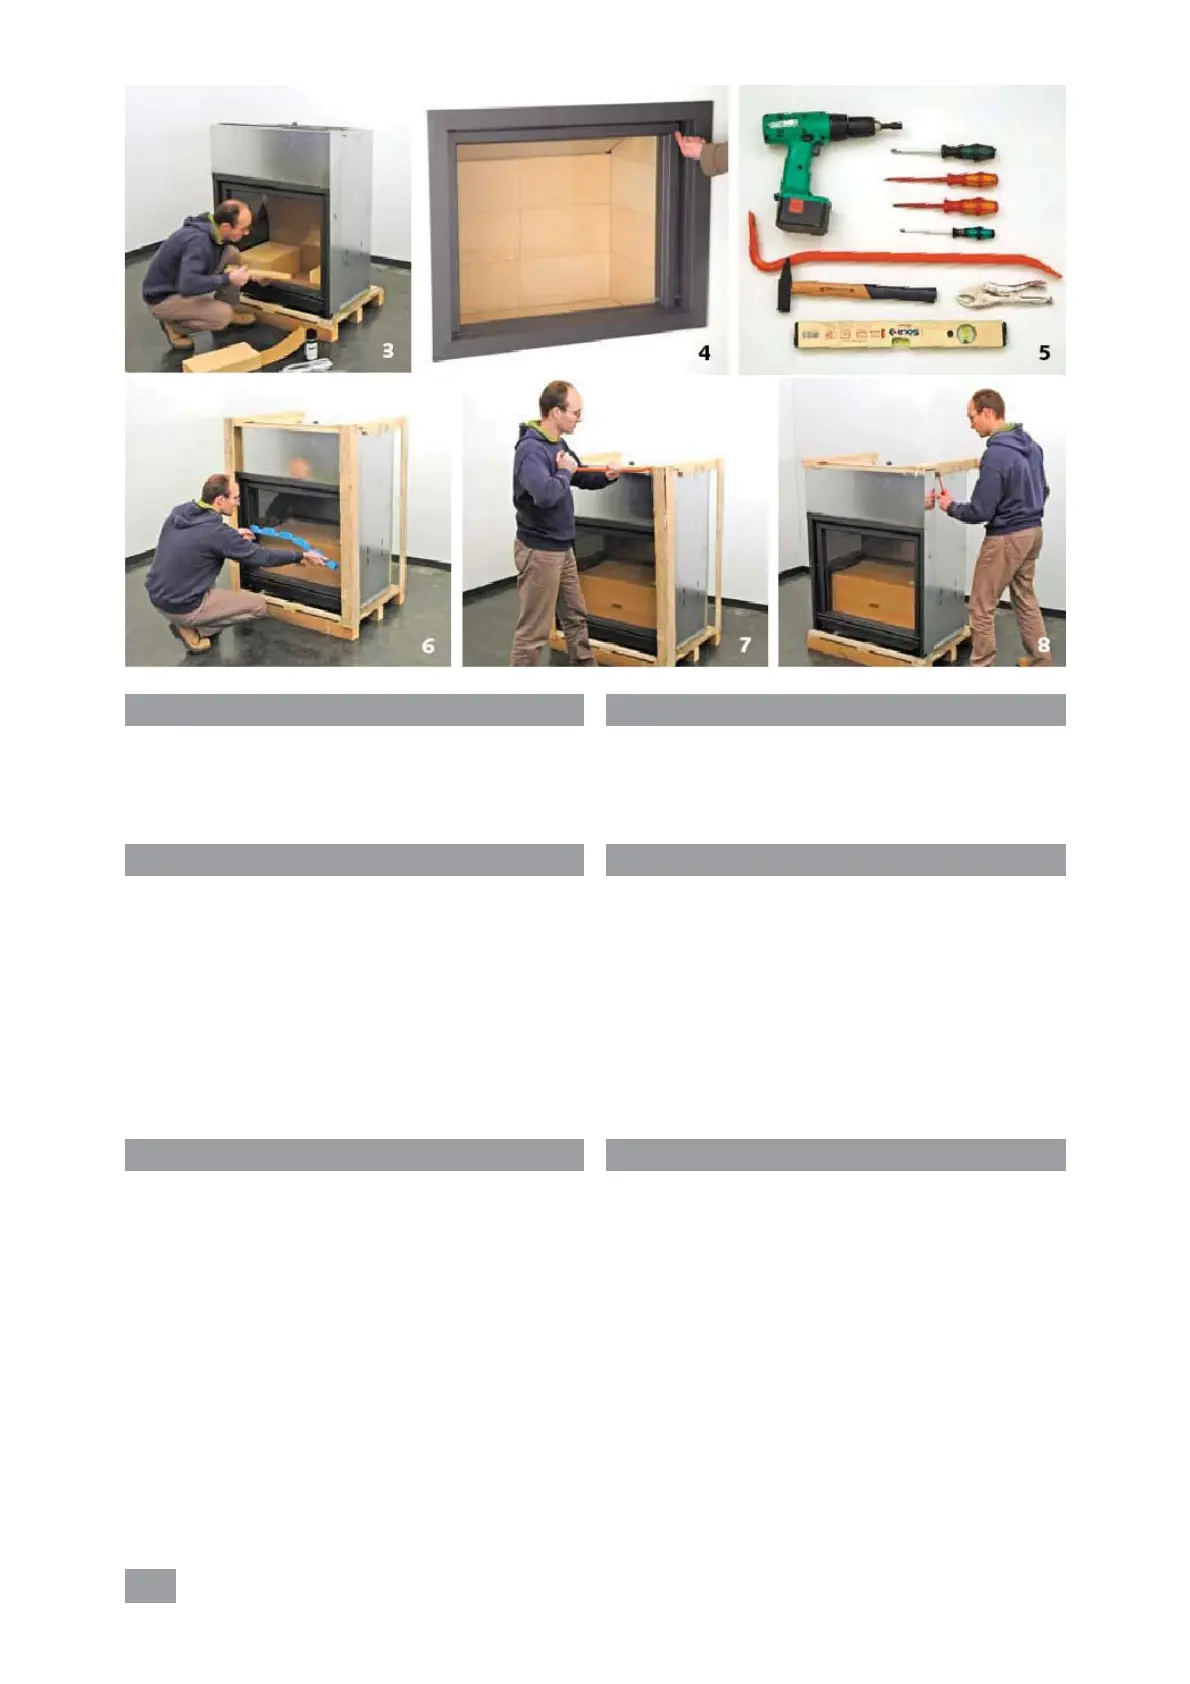
En cas de réclamation, communiquez toujours le n° de
série du foyer visible sur la partie supérieure droite de la
devanture, dans le retour (photo 4).
– Un pied de biche
– Un niveau
– Un marteau
– Une visseuse (douille de 10 mm et embouts cruciformes)
– Un tournevis plat
– Un tournevis cruciforme
– Une clé Allen de 3 mm et de 5 mm
– Une pince
– Ensemble de tournevis Torx
Remarque :
– Pour le transport, la vitre est immobilisée en position
intermédiaire.
– La peinture n’est pas cuite au four ; elle est donc
relativement fragile mais elle durcira lors des premières
chauffes ; par conséquent, manipuler l’appareil avec
précaution lors de son installation.
– Retirer la bande de protection de la vitre (photo 6).
– À l’aide du pied de biche, retirer les lattes verticales avant
(photo 7).
– Retirer la coiffe supérieure de l’emballage (photo 8).
For warranty coverage, please provide the manufacturer’s
serial number, which is visible on the upper-right section of
the opening (photo 4).
- Crowbar
- Level
- Hammer
- Screw gun (10 mm socket and Philips bits)
- Standard screwdriver
- Phillips screwdriver
- 3 and 5 mm Allen keys
- Pliers
- Torx screwdrivers kit
Note :
- For transport, the window is secured in its intermediate
position.
- The paint is not oven-baked and is therefore relatively
fragile, but it will harden when heated. Care should be
taken when handling the unit during installation.
- Remove protective strip from window (photograph 6).
- Remove vertical front slats with crowbar (photo 7).
- Remove top section of packing (photo 8).