3
ASSEMBLY INSTRUCTIONS
3
4
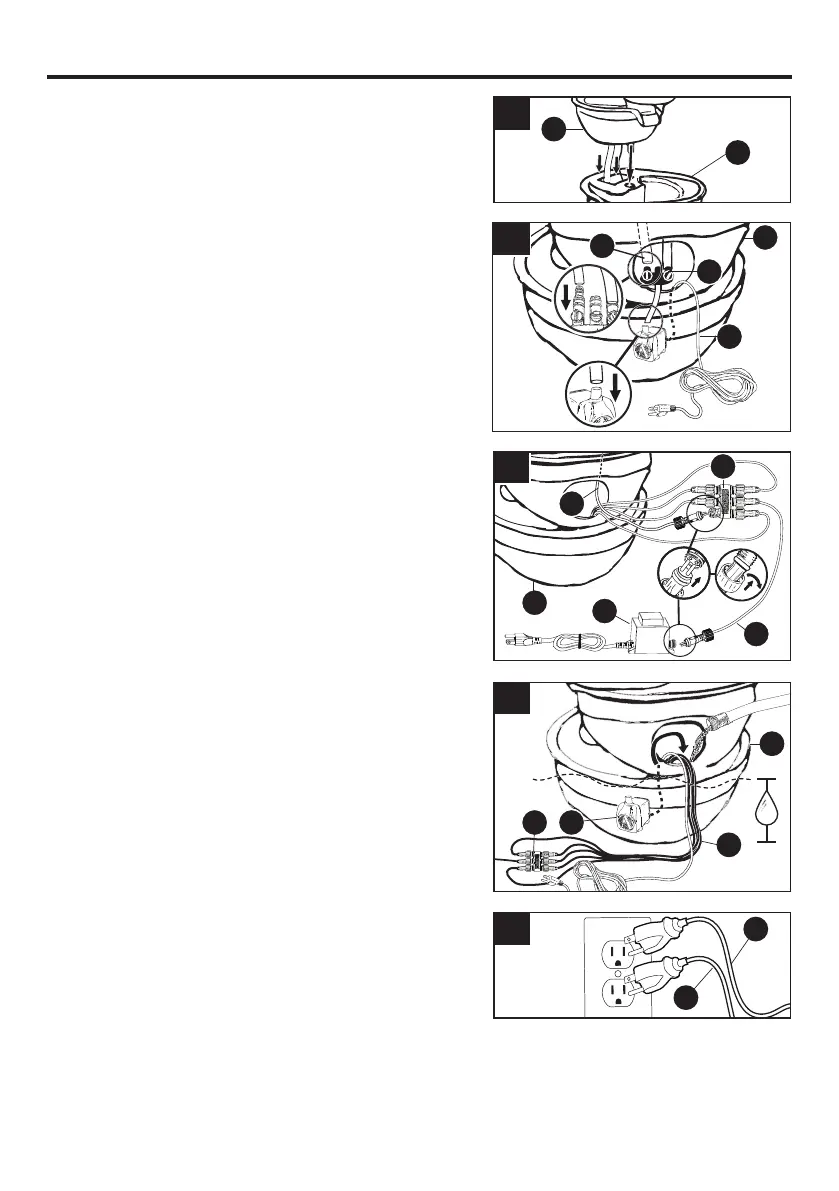
1. Align and lower the top with tubing (B) onto the
fountain (A). Position the top with tubing so the water
ow will spill into the middle of the next bowl when
operational.
2. Using the access hole located at the rear of fountain
(A), locate the tubing from top with tubing (B). Attach
the tubing to the open output on diverter (D). Attach
the pre-installed tubing from the base of diverter (D) to
pump (C). Place pump (C) inside fountain (A).
3. Using the access hole located at the rear of fountain
(A), locate the tubing from top with tubing (B). Locate
the power cable from top with tubing (B) and connect
to the open input on 5-1 connector (F). Connect
power cable (G) to transformer (H).
4. Drape 5-1 connector (F) out the rear of the fountain
(A). To prevent the risk of water loss during operation,
create a drip loop with the cords from the pump (C) and
the LED light (E). The 5-1 connector (F) should not be
submerged. Fill the fountain (A) with enough water to
completely submerge the pump (C).
5. Connect the power cords into an electrical socket to
run the fountain.
F
F
1
2
C
C
G
H
B
D
E
A
A
A
A
C
H
B
B
5
 Loading...