7-5
Built-In
Built-In
(600-
(600-
2
2
)
)
Series
Series
Component Access / Removal
#3758407 - Revision B - August, 2006
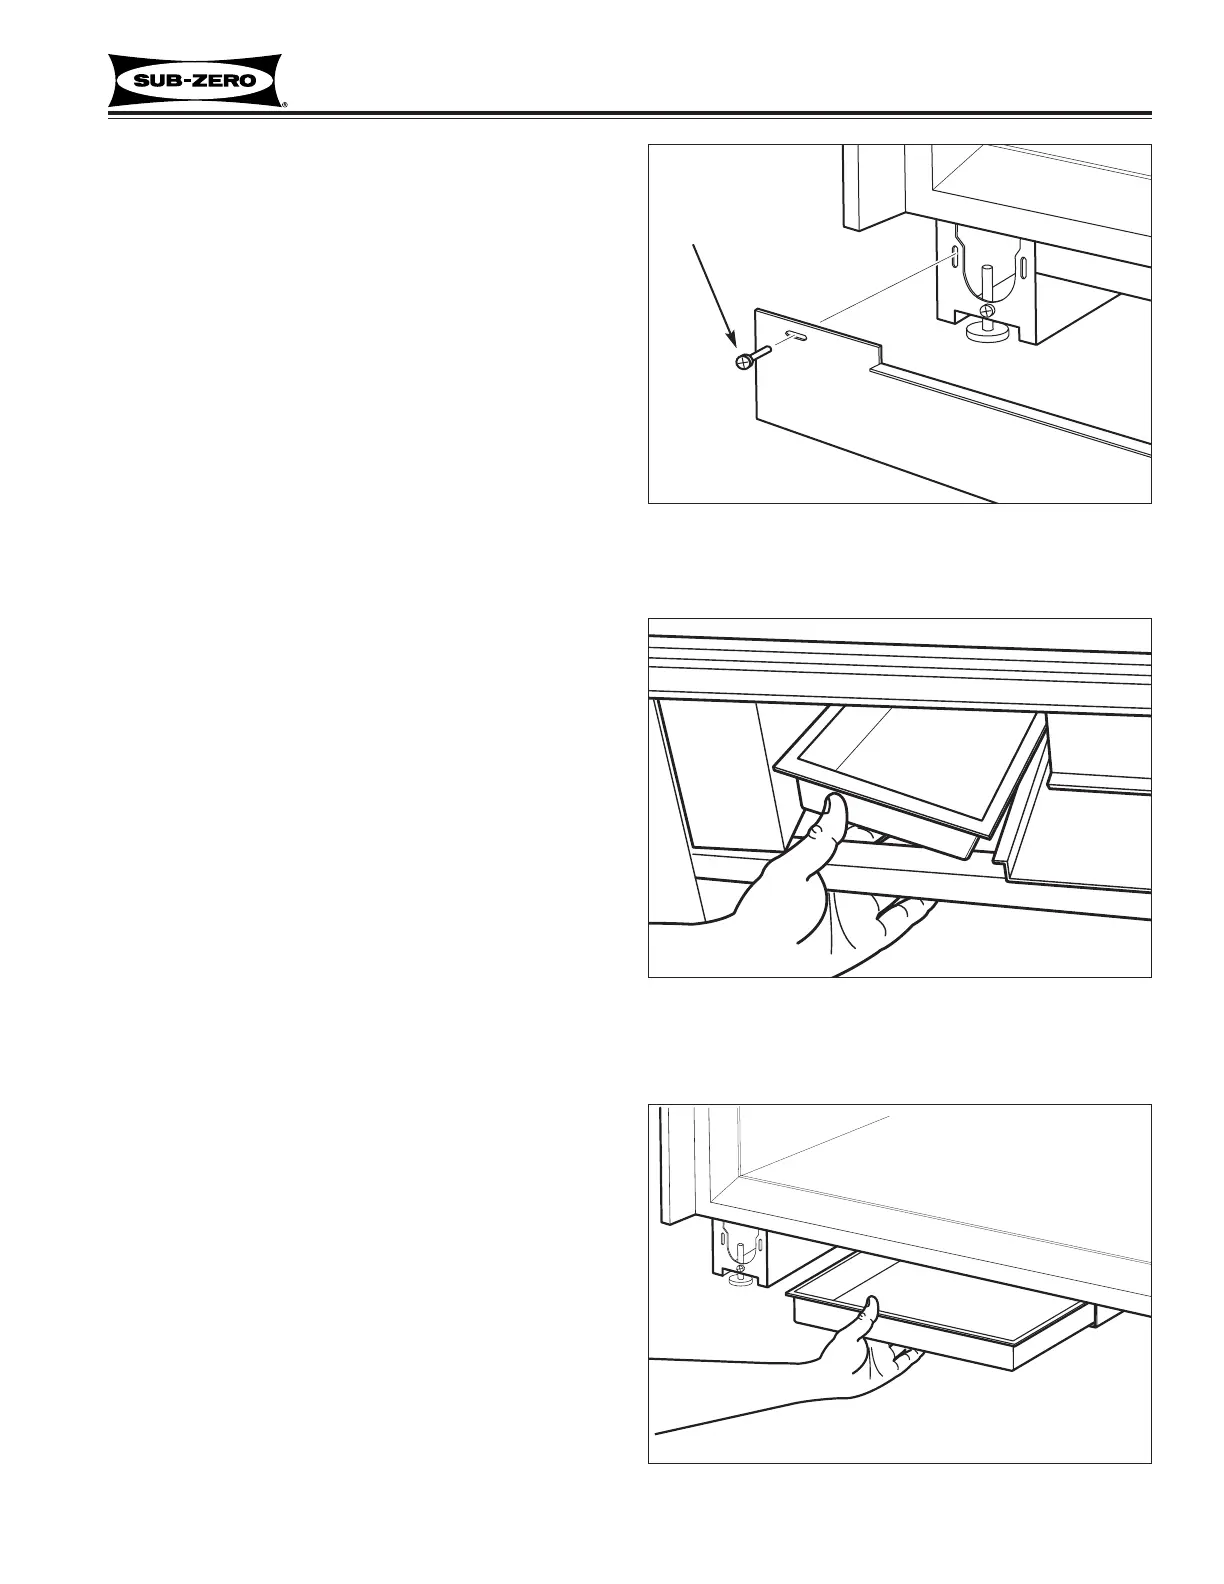
Kickplate (All Models)
Extract screws at bottom left and right corners of kick-
plate and pull kickplate forward (See Figure 7-6).
Drain Pan (601R-2, 601RG-2, 601F-2)
The side flanges at the top of the plastic drain pan rest
on top of metal flanges behind the kickplate. Z-clamps
are used to secure the drain pans top flange to the unit
tray side flange.
To remove a drain pan (See Figure 7-7):
1. Remove lower grille section.
2. Remove kickplate.
3. Push drain pan up and out from underneath.
Drain Pan (All models except 601’s)
The drain pan slides in from the front of the unit on two
side brackets, coming to rest on a rear bracket. A lock-
ing feature was built into the drain pan in the form of
detentes at the bottom front that drop into notches at
the front of the side brackets.
To remove a drain pan (See Figure 7-8):
1. Remove kickplate.
2. Push front of drain pan up slightly and pull forward.
Figure 7-6. Kickplate
Kickplate
Screw
Figure 7-7. Drain Pan (601’s)
Drain Pan
Figure 7-8. Drain Pan
Drain Pan