7-8
Component Access / Removal
Built-In
Built-In
(600-
(600-
2
2
)
)
Series
Series
#3758407 - Revision B - August, 2006
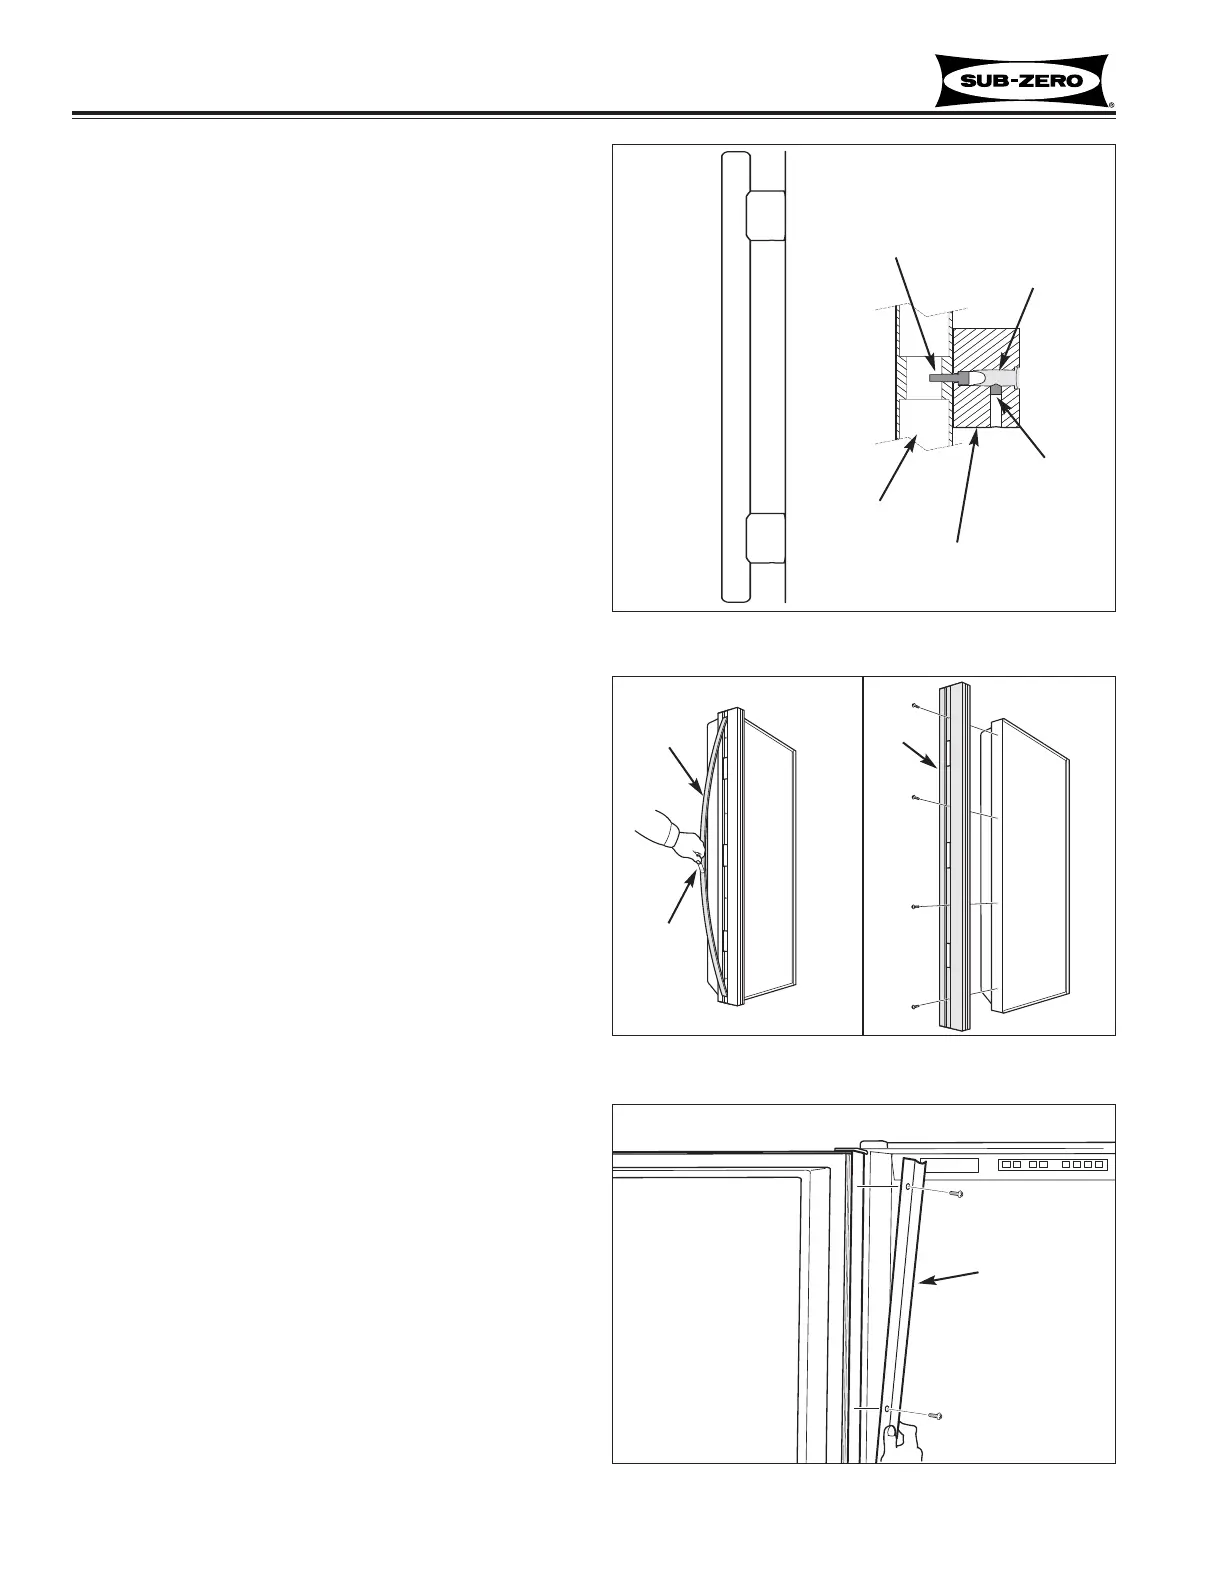
Tubular Stainless Steel Door Handle Assembly
(All Stainless Steel Models)
A screw inserted through the handle standoff into the
handle secures the handle to the standoff. The standoff
then slides over a threaded insert that is attached to the
door shell, and a socket head set-screw inserted
through the side of the standoff secures the standoff to
the insert.
To remove a stainless steel handle assembly, use a
3/32” Allen-wrench to loosen the set-screw in each han-
dle standoff and pull handle assembly off of the thread-
ed insert. (See Figure 7-14)
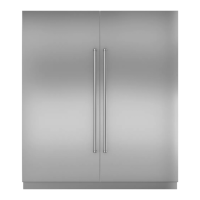
Full Length Door Handle/Handle-Side Trim
(All Models)
A Full length handle and/or handle-side trim is secured
to the door with screws. The screw heads are then
concealed by a magnetic trim strip.
To remove a full length handle or handle-side trim (See
Figure 7-15):
1. Press a sticky piece of tape to center of magnetic
trim strip.
2. Pull tape so that trim strip bows away from door,
disengaging both ends of trim strip from the end-
caps.
3. With mounting screws exposed, extract the screws,
then pull handle (or handle-side trim) from door.
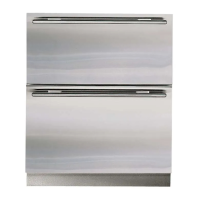
Hinge-Side Door Trim (All Models)
Hinge-side door trim is held to the door with screws.
To remove hinge-side door trim (See Figure 7-16):
1. Open Door fully.
2. Extract trim mounting screws.
3. Pull trim from door.
Figure 7-14. SS Handle w/Cut-Away View