FRAMEDPANELINSTALLATION
PANEL INSTALLATION FRANED PANELS
FRAMED
PANELS
IRefe_ to tt_e
Sp e_)ifii_::atio_ s o_
_)ages 14,15 fo_
_)awA diimew)ib_s
Before you begin installing panels, refer to the
Panel Specifications for framed or overlay
models and be sure you are working with the
panel design called for in your installation. If
your customer has chosen the stainless steel
design, the unit has been shipped complete
with a finished stainless steel look. It will not
be necessary to install panels or handle
hardware. In your final preparation for stain-
less steel units, use a stainless steel cleaner to
remove any marks. Abrasive cleaners should
not be used, as they may scratch the surface.
If your customer has ordered either a framed
or overlay model, you will be installing panels
to give the unit the custom Sub-Zero look.
If your customer has chosen a framed design
application, make sure that the panels you are
about to install match dimensions listed in the
Framed Panel Specifications on pages 14-15.
If the thickness of the custom panel is less
than a 1/4" (6), back it up with a sheet of shim
material to build the total thickness to a V£' (6}.
If the pane[ is thicker than a V4" (6}, rout an
edge around the panel to get a proper fit.
IMPORTANT NOTE: The weight of each panel
cannot exceed 50 ibs (23 kg),
IMPORTANT NOTE: On aii Built-in models,
routing, recessing or optional extended
Bandies may be required on raised panels for
finger clearance under the handle, See Raised
Panels, page 13.
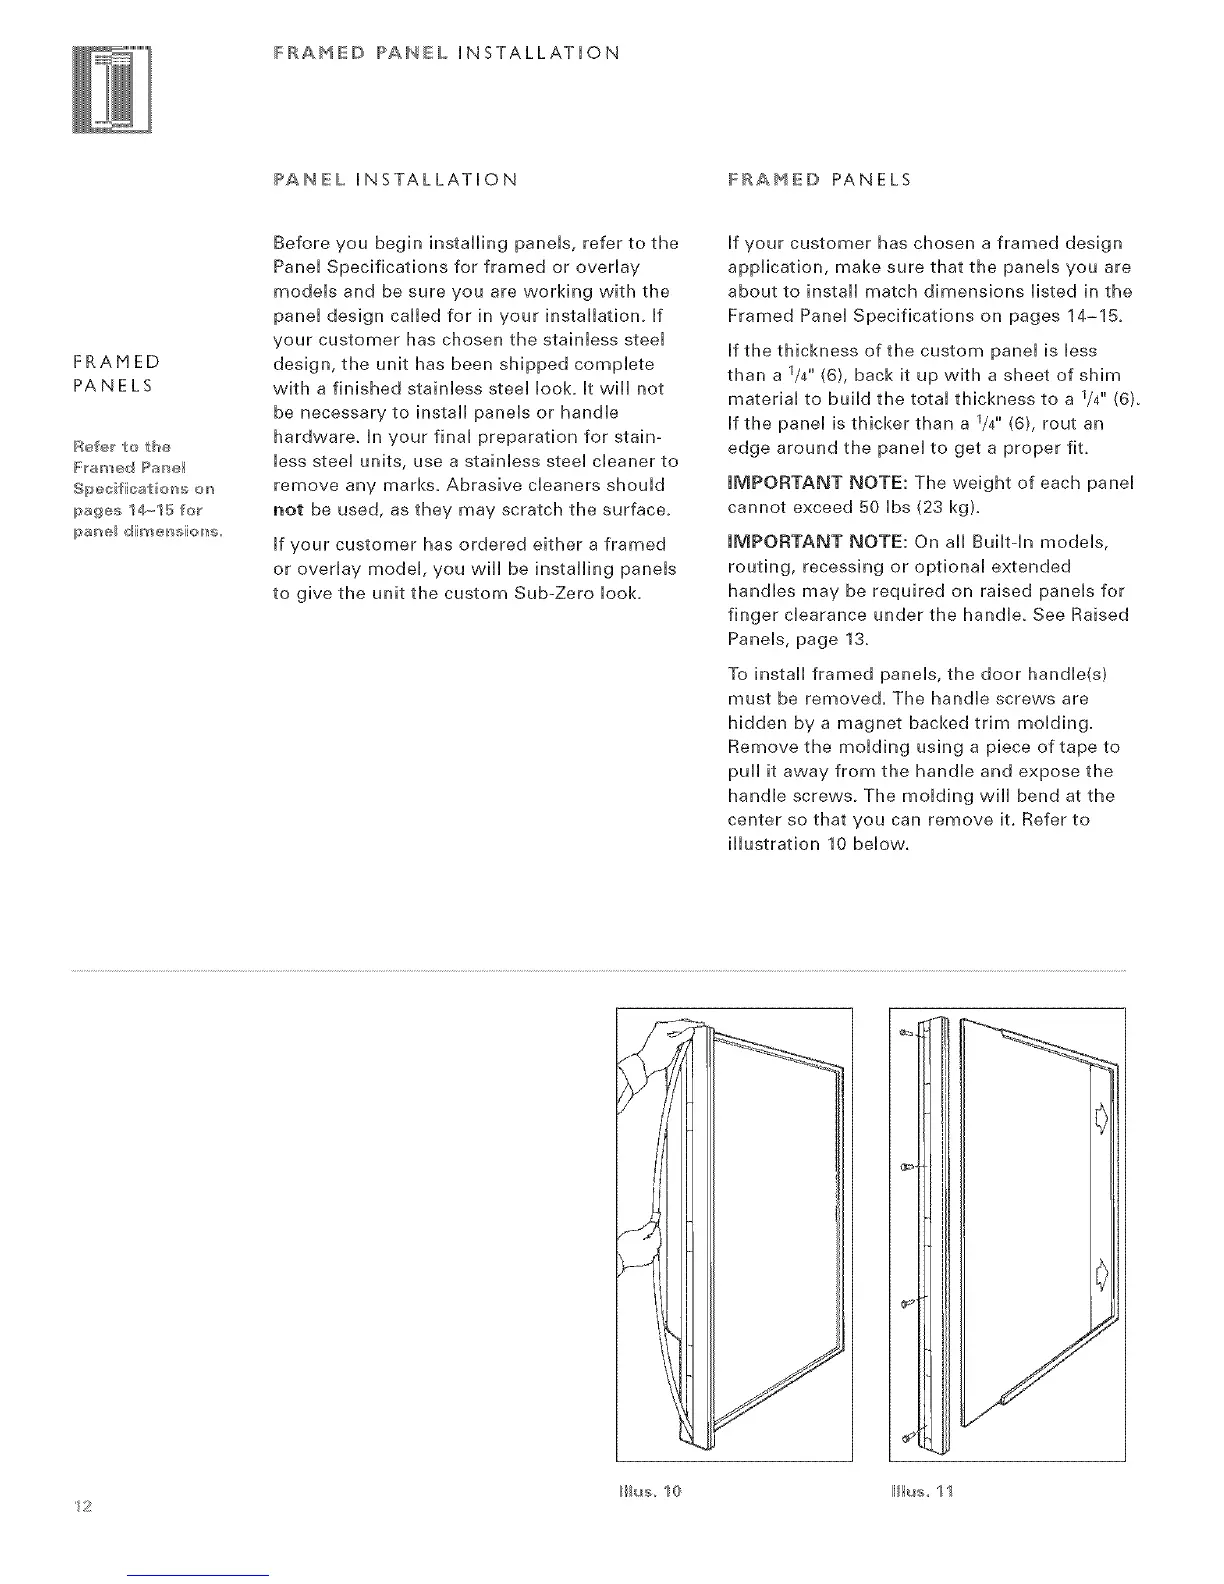
To install framed panels, the door handle(s)
must be removed, The handle screws are
hidden by a magnet backed trim molding.
Remove the molding using a piece of tape to
puii it away from the handle and expose the
handle screws. The molding will bend at the
center so that you can remove it. Refer to
illustration 10 below.
Y
/<,
'12
llh_s 10 llIlus 11