7-38
Component Access / Removal
Built-In
Built-In
(600-
(600-
2
2
)
)
Series
Series
#3758407 - Revision B - August, 2006
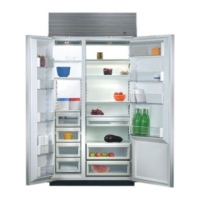
Figure 7-96. Ice Bucket Carriage Assy
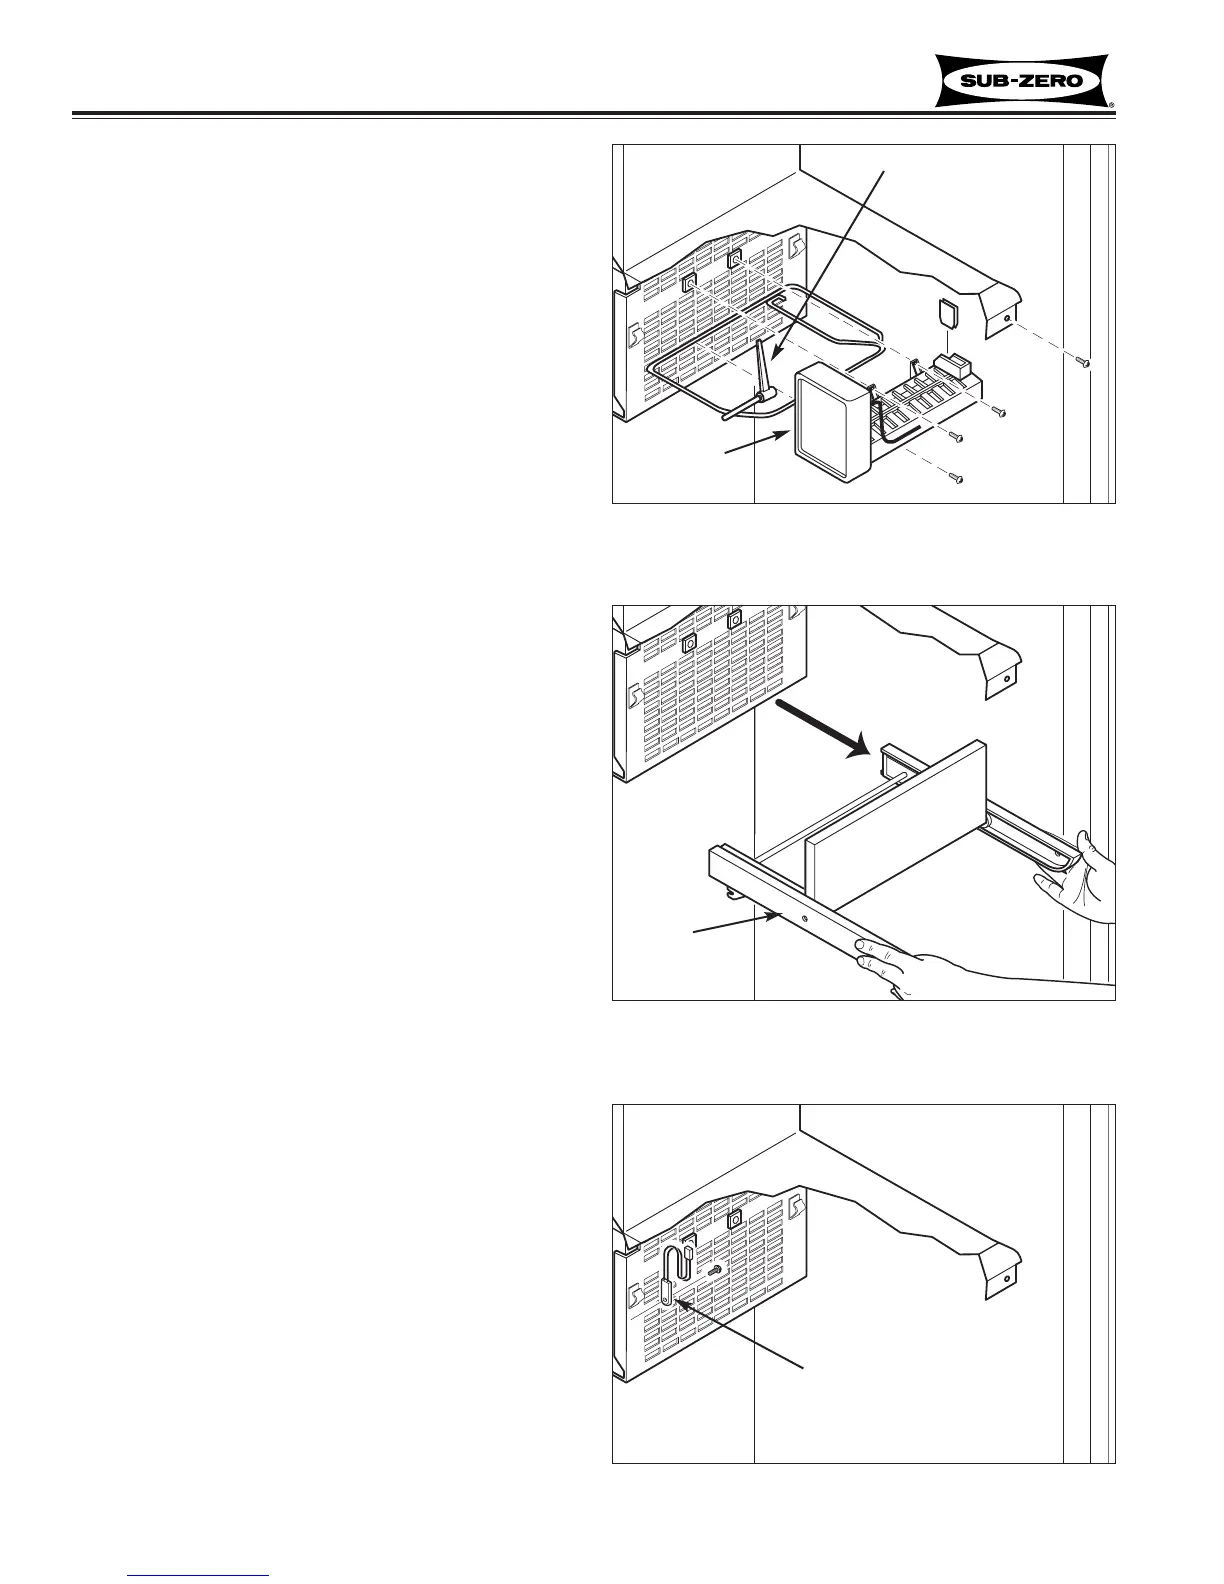
Icemaker Assembly (632-2, 642-2, 661-2)
The icemaker assembly attached to the evaporator
cover with two screws at top and one at bottom.
To remove the icemaker assembly, remove the freezer
shelves and ice bucket first. Push the ice bucket car-
riage assembly back in, then (See Figures 7-95):
1. Extract screws from evaporator shelf front.
2. Pull freezer duct/shelf forward slightly to allow
greater access to icemaker assembly.
3. Disconnect ice level mechanism by sliding connect-
ing rod to right, off of shut-off arm, allowing ice level
arm to drop out of the way.
4. Extract screws from bottom left & top of icemaker.
5. Lift icemaker up slightly to clear ice level arm, then
pull forward and disconnect electrical leads.
Ice Bucket Carriage Assembly (632-2, 642-2, 661-2)
The ice bucket carriage assembly rollers are captivated
by the ice bucket slides attached to each side wall.
To remove the ice bucket carriage assembly, remove
the ice bucket first and push the ice bucket carriage
assembly back in, then (See Figures 7-96:
1. Extract the two front most screws from each ice
bucket slide.
NOTE: It is not necessary to remove the screws
that fit into slots at the bottom rear of each slide.
2. Pull slides and carriage assembly forward and out.
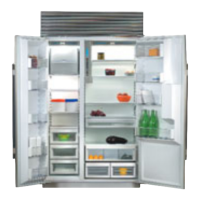
Compartment Thermistor (632-2, 642-2, 661-2)
The freezer compartment thermistor is attached to the
left side wall with a screw, in the icemaker area.
To remove the thermistor, remove the ice bucket and
icemaker first, then (See Figures 7-97):
1. Disconnect thermistor electrical leads.
NOTE: On newer models the thermistor is hard-
wired to the control board, so it will be necessary to
cut the thermistor wires to remove it.
2. Extract mounting screws an pull thermistor from
unit.
Figure 7-97. Compartment Thermistor
Figure 7-95. Icemaker
Connecting rod
Icemaker
Duct/Shelf
Carriage Assembly
Ice
Bucket
Slide (2)
Compartment Thermistor