2-12
7040127 - Revision C - May, 2015
Installation Information
Built-In (BI) Series
Built-In (BI) Series
(SWS #4250000)
(SWS #4250000)
Door and Drawer Panels
Regardless of the installation application, it may be necessary to remove and/or install a door or drawer panel. To
do this, the handle or handle-side trim will need to be removed first. The handle or handle-side trim is attached to
the door or drawer with screws, and these screws are concealed by a screw cover. Follow the procedures below to
access the mounting screws and remove a handle or handle-side trim in order to remove and/or install a door or
drawer panel.
IMPORTANT NOTE: The weight of a door or drawer panel cannot exceed 50 lbs (23 kg).
IMPORTANT NOTE: Depending on the thickness of a wood panel used on a framed application, it may be neces-
sary to router a recessed area into the panel for proper finger clearance under the door handle. Optional extended
handles are also available that offer an additional 3/4” (19 mm) of clearance under the handle.
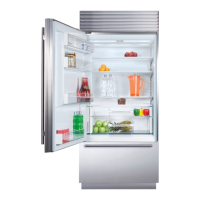
Door Handle / Handle-Side Trim Removal Procedure:
1. At the top of the door, insert a flat blade screwdriver into the channel of the screw cover and push the cover
away form the handle or handle-side trim, disengaging the screw cover from the clips (See Figures 2-15A and 2-
15B).
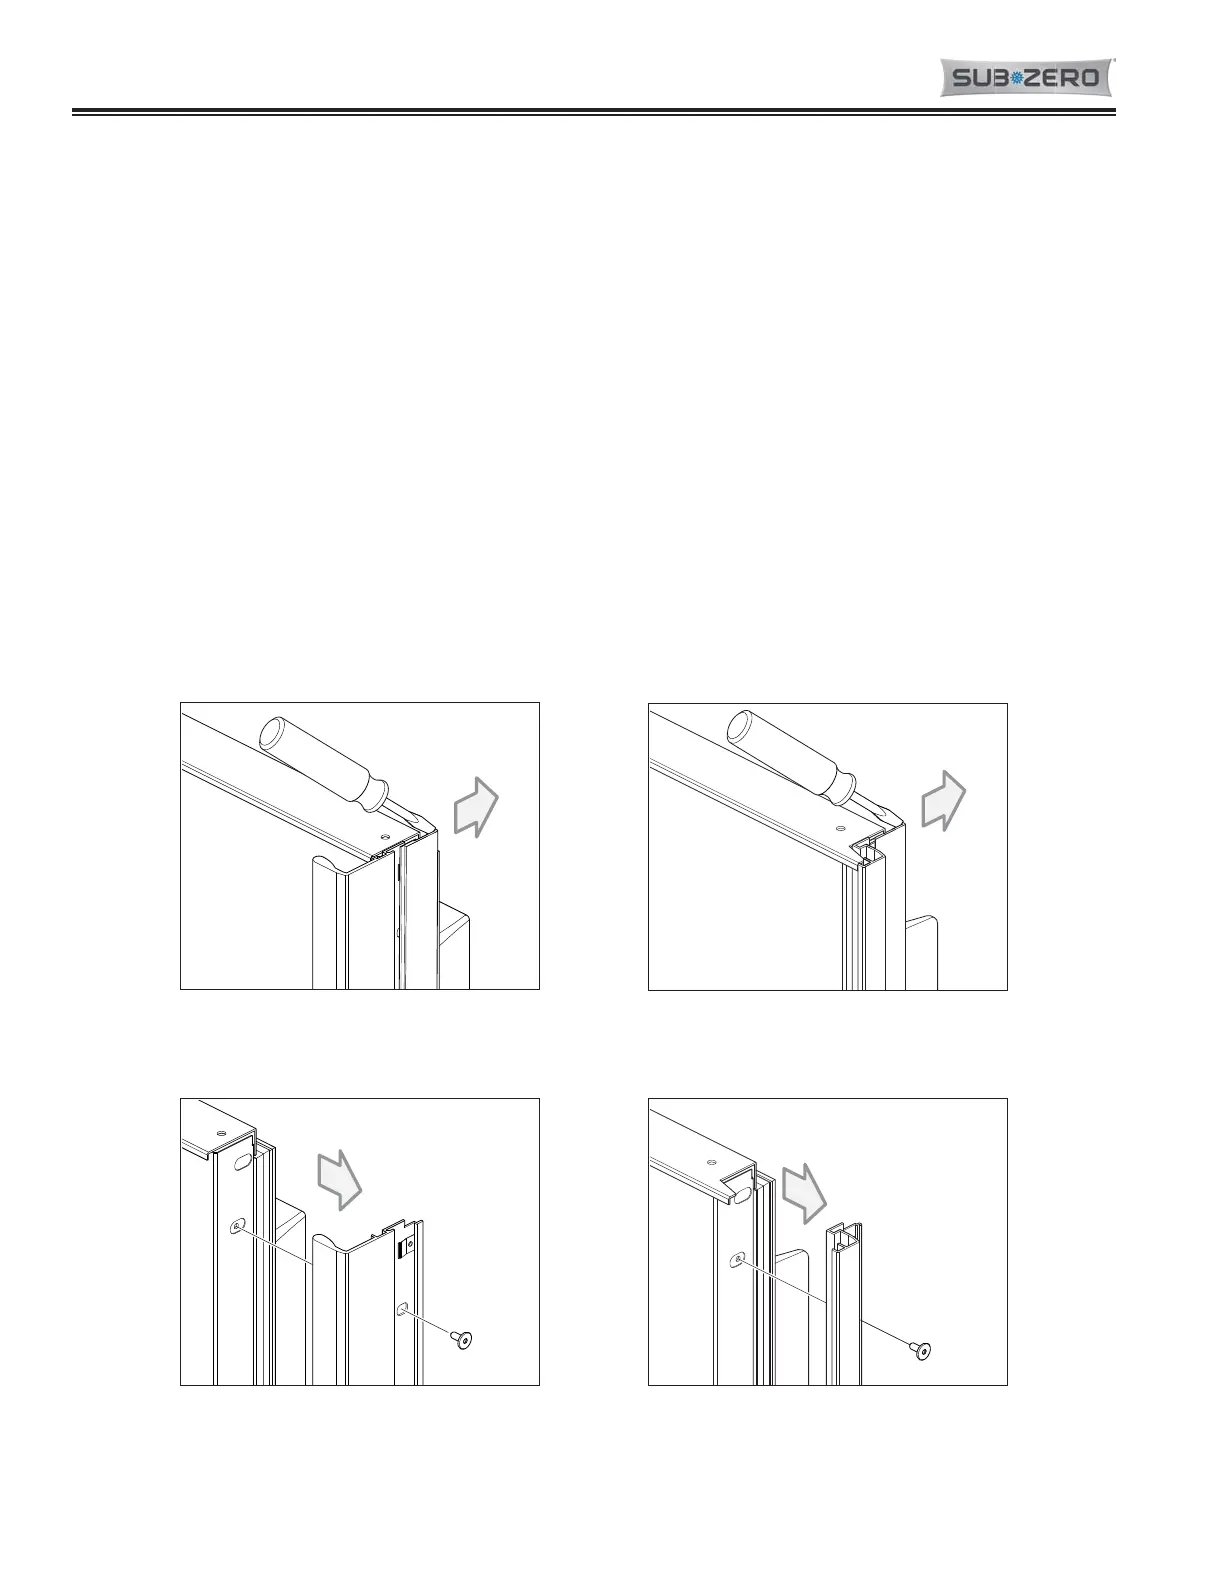
2. With a T-20, 6-lobe Torx type bit, extract the handle or handle-side trim mounting screws and pull the handle or
trim from the door (See Figures 2-16A and 2-16B).
 Loading...