Do you have a question about the Sulky Xeos TF and is the answer not in the manual?
The Sulky Xeos TF is a seed drill designed for efficient and precise sowing across various soil conditions. This manual provides comprehensive instructions for its operation, maintenance, and technical specifications.
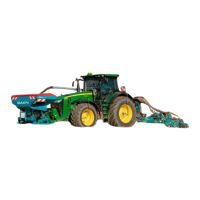
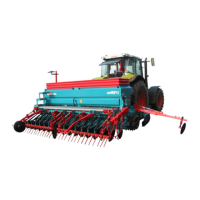
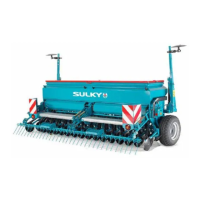
The Xeos TF is primarily used for sowing a wide range of seeds. It features a pneumatic transport system for seed distribution, ensuring consistent application across the working width. The machine can be used with different coulter bars, including rigid and folding options, and can be adapted for various soil cultivation tools, such as power harrows. The seed drill's metering mechanism is designed for accurate seed placement, with adjustable settings for different seed types and desired application rates. It also incorporates a tramlining system for creating passages for subsequent crop treatments.
The Xeos TF offers various configurations, impacting its technical specifications. Hopper Capacity:
Coulter Bar Configurations (Rigid Unidisc):
Coulter Bar Configurations (Folding Unidisc):
Coulter Bar Configurations (Rigid Cultidisc):
Coulter Bar Configurations (Folding Cultidisc):
Hydraulic System: The fan requires a single-acting spool valve with free return, delivering 45 L/min at 100 bar for a rotation speed of 4400 rpm. Folding coulter bars, markers, and hydraulic depth modulation require double-acting spool valves. The hydraulic selector (optional) also operates with a double-acting spool valve.
Electrical System: The electrical bundle integrates functions for lighting, power, Pilot unit controls, and electro-hydraulic functions. Direct battery connection is recommended to prevent micro-interruptions.
Pre-operation: Before use, ensure the seed drill is complete, free of foreign bodies in the hopper, and undamaged from transport. The machine should only be used for its intended tasks by qualified and trained personnel. Handling: When manipulating the Xeos TF, use only the welded rings provided. For coulter bars, ensure they are not connected to any other elements during handling. The distribution head must be fixed to the coulter bar using designated supports. The seed drill should only be lifted when the seed box is empty, and no one should be around the machine during handling. Pipe Alignment: Proper alignment of the Xeos TF pipes is crucial to prevent blockages. Ensure a constant downward slope of at least 1.5° towards the rear for the side pipe. Hitching/Unhitching: Perform these operations on level ground with the seed drill stable. Disconnect the side pipe, hydraulic, and electrical connectors. Use the tie rod to lift the head and release it from its support. The tie rod must be 640mm long. Road Transport: Always comply with road traffic regulations. Ensure all compulsory markings are visible and in good condition. Position marker locks and ensure the cultivator is within the maximum road transport width. Headlight lenses should be adjusted on level ground, with the lighting limit not exceeding half the light's height at 15m from a wall. Activation/Deactivation: The metering mechanism can be activated/deactivated by raising or lowering the front hopper via a position sensor on the top link, or through a hydraulic spool valve. The length of the chain for the top link mechanism affects system sensitivity. Cultivating without Drilling: Distribution can be stopped from the PILOT console. Hydraulic lift for the coulter bar is recommended in this scenario. End of Field Manoeuvres: Fold markers, reduce engine speed, deactivate the metering mechanism or raise the hopper, then raise the machine (disengaging PTO if necessary). Turn around, lower the machine (gradually re-engaging PTO), and reactivate the metering mechanism. Loading: Only load the seed drill when the hopper is resting on the ground. Do not load or climb onto the platform while the machine is in motion. Filling the Hopper: Open the protective cover, check for foreign bodies, and ensure the adjustable low seed level sensor is correctly positioned. Close and fasten the cover after filling to prevent water ingress. Do not leave seeds in the hopper to prevent rodent damage. Application Rate Setting: Only reduce the rate (fluted seed metering wheel width) if the mechanism is turning or the hopper is empty to avoid damage. Use the calibration table and threaded rod to set the desired value. The red lever should be switched to calibration test position, and a test sack placed under the metering mechanism. The screen must always be in place during calibration tests. Markers: Markers are installed on the Sulky power harrow. Depth Limiter: For loose soil, remove H10 nuts from the share, fit the limiter, and adjust its height relative to the share point. A block corresponding to the desired sowing depth can be used for setting. Increase depth control pressure on coulter units in difficult soil conditions. Packer Wheels (40mm): Adjust working depth with wheels in floating position, ensuring the drill is horizontal and set to the correct row height (325mm). After setting, gently press on the wheel and position the square washer. Check screw torque after initial use. Front Packer: Designed to roll the ground, its maximum permissible weight equals the hopper's weight and load. Use the front lift in floating position. Lubricate regularly. A steering lock is available for road transport but not recommended for work. The front packer must not contact the road during transport. Green Drilling Kit (Optional): A distribution head kit is available, with installation being the dealer's responsibility.
General: Before any maintenance, servicing, or repair, disengage the PTO, turn off the engine, and remove the key. Regularly check and tighten nuts and screws. Use appropriate supports when working on a raised machine. Wear protective gloves and use appropriate tools when replacing working parts. Environmental Protection: Do not dispose of oil, grease, or filters in the environment. Give them to specialist recycling firms. Do not store, abandon, dump, or burn tires in nature. Work in favourable weather conditions for phytosanitary products to minimise environmental impact. Hydraulic Circuit: The hydraulic circuit is pressurised. Ensure correct connection of cylinders/motors. Before connecting hoses, ensure circuits are not pressurised. Identify hydraulic couplings to avoid reversing functions. Check hoses annually for damage, porosity, deformation, and seal condition. Hoses have a maximum life of 6 years. Use manufacturer-recommended hoses for replacement. Take precautions to avoid accidents from leaks. Pressurised hydraulic fluid can cause serious injury; seek medical attention immediately if skin contact occurs. Before any hydraulic work, lower the machine, release pressure, turn off the engine, and remove the key. User Protection: Do not walk on covers or other machine parts except designated access zones. Ensure the machine cannot be accidentally started before any work. Keep a first aid kit nearby. Avoid skin/eye/mouth contact with lubricants, solvents, anti-freeze, cleaning, and phytosanitary products. Seek medical attention immediately if an incident occurs. Follow safety label instructions on products. Wear appropriate PPE (overalls, gloves, glasses, safety shoes, mask) during loading, adjustment, servicing, and washing. Doser Removal/Reinstallation: Disconnect power sources and turn off the tractor. Disconnect drive and speed information plugs. Open the gearbox hatch and remove the clip pin from the agitator axis. Loosen the nut and slide the motor support outwards. Remove gearbox casing screws and the casing itself (attached to the drive motor). Remove the 18-tooth sprocket. Open the groove to maximum. Place the 15-tooth (red) sprocket in the large seed position (left). Remove the bearing pin. Lower the plate using the bottom ring to free it from the main body. Remove all parts. Doser Inspection: Clean the bearing dry (never use water). The bearing must turn freely; replace with original parts if not. Check four-lobe seals and their position; replace with original parts if necessary, ensuring correct placement. After each removal, check the free rotation of elements by hand. Clean the entire machine before reassembly. Cleaning: Clean the inside of the hopper and metering system. Wash the drill. Avoid excessive use of high-pressure cleaners on electrical circuits and bearings. Wear safety glasses and gloves. If seeds remain, wear a dust mask. Ensure the distribution head is clean daily. Lubrication: Lubricate the machine at the start and end of each campaign, and after cleaning. Grease markers (every 50 hours), depth crank shaft bearing (every 50 hours), and front packer (every 50 hours). The plastic metering device does not require lubrication; lubricating its gears will cause rapid and irreversible damage. Sticker Positions: Warning notices are affixed to the machine. Review them for safety and to know the machine. Check the stickers' condition and legibility; replace if faded or lost. Storage: Before storing, ensure the machine is clean and all connection points are complete. The hopper should be empty. The seed drill should be properly washed, avoiding water on electrical elements and bearings. Protect the seed drill with an oil/diesel mix. Store the seed drill in a dry, level location. Plastic parts will last longer if not subjected to extreme weather conditions. Hopper Emptying: Empty the hopper by opening the emptying shutter. Place a tray or sack underneath. Open the shutter, remembering to empty the metering mechanism flutes by turning the wheel. Never leave seed in the hopper for long periods. Leave shutters open during storage. If the screen is not in place when emptying, disconnect all electrical power supply cables.
| Brand | Sulky |
|---|---|
| Model | Xeos TF |
| Category | Farm Equipment |
| Language | English |