Do you have a question about the Sulzer DP 400-85 and is the answer not in the manual?
Explains safety symbols and CE marking for proper operation.
Defines the designated purpose of the dispenser for 2-component adhesives.
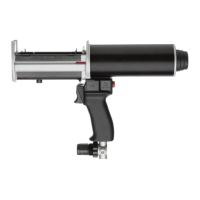
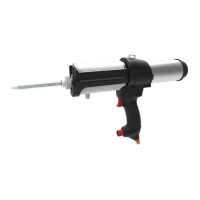
Component that holds the adhesive cartridge in place.
Identifies the specific model and unique serial number of the dispenser.
The component that pushes the adhesive out of the cartridge.
Visual marker showing the amount of adhesive dispensed.
Provides the force to move the plungers via compressed air.
Rods that transfer the force from the pneumatic drive to the adhesive.
Button used to release the cartridge from the dispenser.
Part that holds the cartridge within the dispenser body.
Actuates the dispensing mechanism when pressed.
Regulates the maximum air pressure supplied to the dispenser.
Connection point for the pneumatic hose.
Ergonomic part for holding and operating the dispenser.
Button used to retract the piston rods after dispensing.
Lists the items included with the dispenser: dispenser, cartridge sleeve, mixer, and manual.
Emphasizes reading and understanding the manual before first use.
Explains how compressed air drives piston rods to dispense adhesive through a mixer.
Instructions for inserting the adhesive cartridge correctly into the dispenser.
Steps for connecting the dispenser to the compressed air source.
How to start and stop dispensing, and control dispense volume.
Procedure for safely removing the cartridge from the dispenser.
Diagnoses and resolves issues with plunger discs not entering the cartridge.
Troubleshoots problems preventing the cartridge from being removed.
General guidelines and warnings for maintenance and repair procedures.
Details required when ordering replacement parts for the dispenser.
Specifications including operating pressure, air supply, sound level, and weight.
Lists relevant directives and standards such as Machinery Directive and ISO.