9
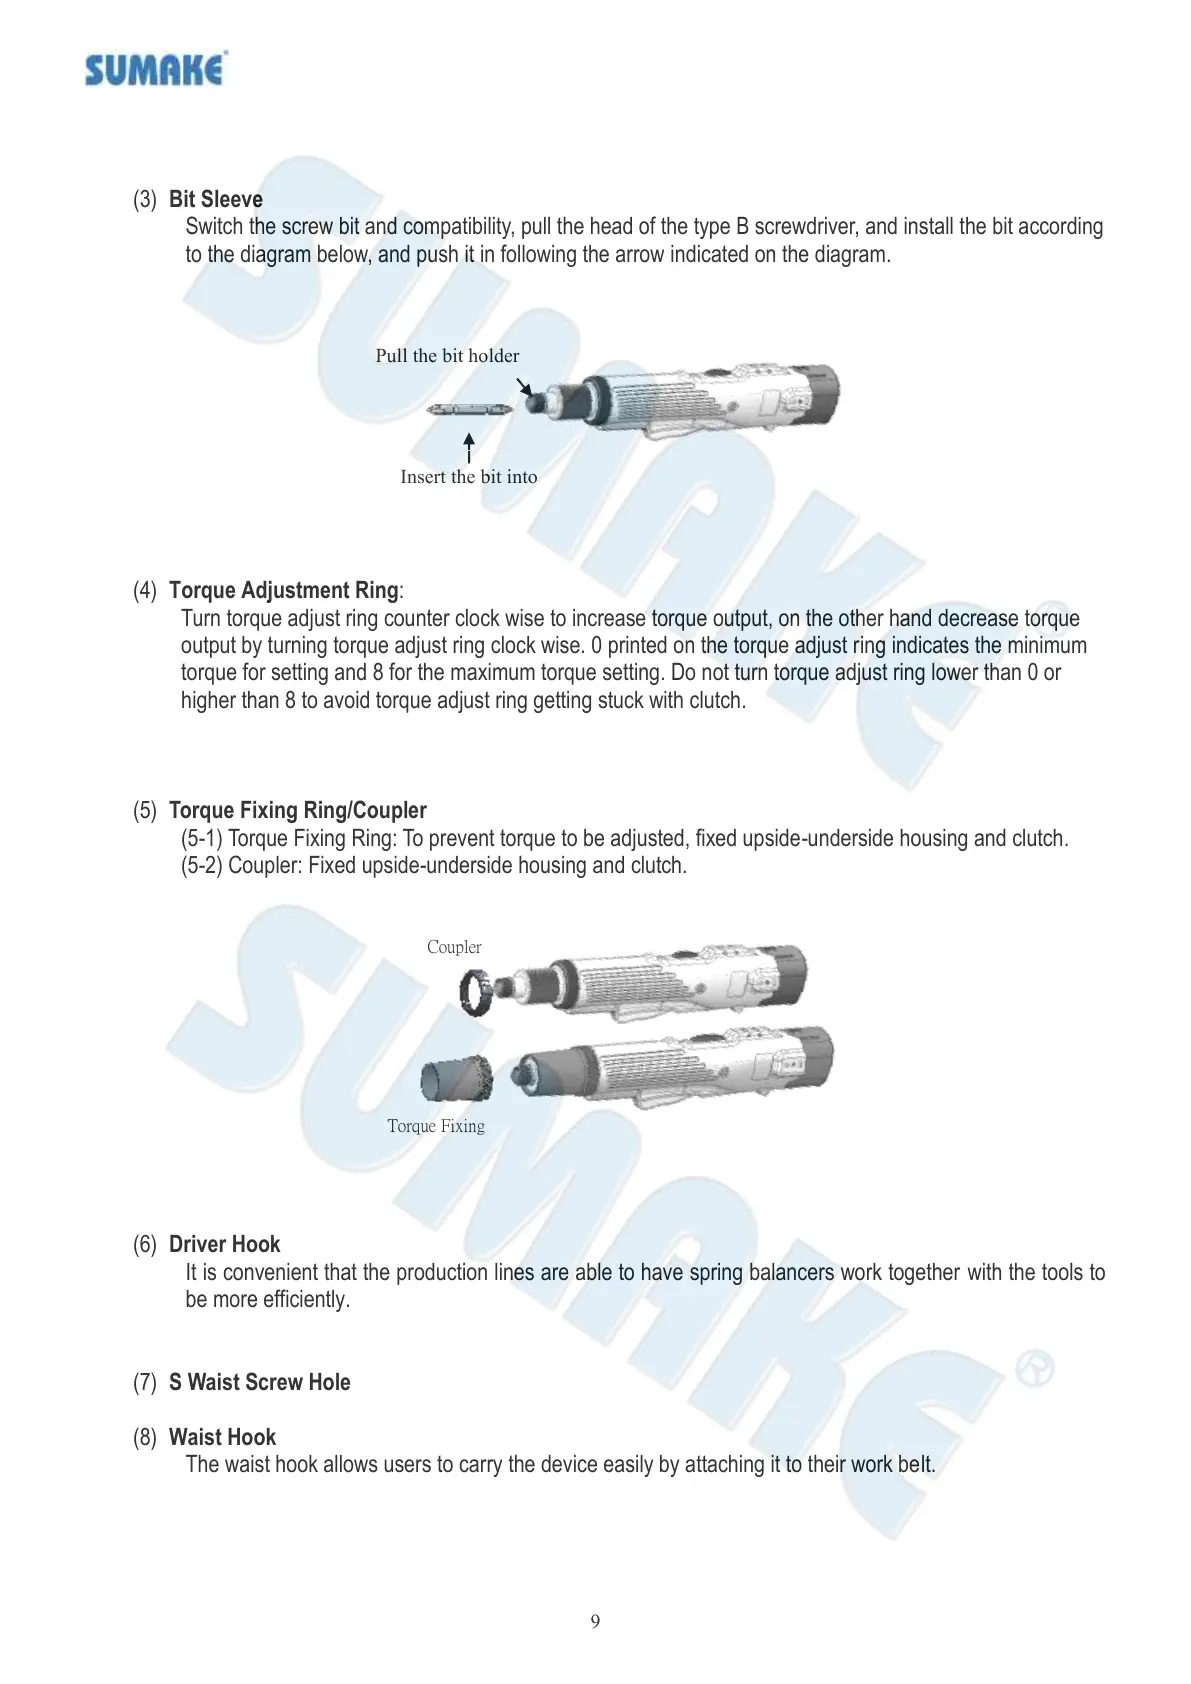
(3) Bit Sleeve
Switch the screw bit and compatibility, pull the head of the type B screwdriver, and install the bit according
to the diagram below, and push it in following the arrow indicated on the diagram.
(4) Torque Adjustment Ring:
Turn torque adjust ring counter clock wise to increase torque output, on the other hand decrease torque
output by turning torque adjust ring clock wise. 0 printed on the torque adjust ring indicates the minimum
torque for setting and 8 for the maximum torque setting. Do not turn torque adjust ring lower than 0 or
higher than 8 to avoid torque adjust ring getting stuck with clutch.
(5) Torque Fixing Ring/Coupler
(5-1) Torque Fixing Ring: To prevent torque to be adjusted, fixed upside-underside housing and clutch.
(5-2) Coupler: Fixed upside-underside housing and clutch.
(6) Driver Hook
It is convenient that the production lines are able to have spring balancers work together with the tools to
be more efficiently.
(7) S Waist Screw Hole
(8) Waist Hook
The waist hook allows users to carry the device easily by attaching it to their work belt.