Do you have a question about the SummaSign Pro SL T-series and is the answer not in the manual?
Key information and registration instructions before operating the cutter.
Compliance with FCC Rules for digital devices.
Warning against unauthorized modifications voiding user authority.
Compliance with Canadian DOC regulations for radio noise.
Summa's right to modify manual and prohibition of unauthorized copying.
Lists trademarks of companies referenced in the manual.
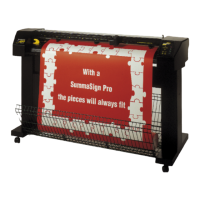
Overview of the SummaSign Pro SL T-series cutters.
Introduces the SummaSign Pro SL T-series cutters and their capabilities.
Lists the main features of the SummaSign Pro SL T-series cutters.
Outlines the information provided in the user manual.
Details technical specifications of the cutters and media.
Physical specifications for different models.
Media handling capabilities: width, margins, tracking.
Lists supplied knives, pens, and pouncing tools.
Details communication interfaces (USB, Serial, Parallel).
Firmware language, character sets, fonts, and plot types.
Cutting performance metrics: speed, resolution, pressure.
Certifications obtained by the cutters.
Operating voltage and fuse requirements.
Lists available accessories and consumables.
Identifies components on the rear panel.
Identifies front panel controls and components.
Instructions and safety for powering on the cutter.
Guide for installing knives, pens, and pouncing tools.
Procedures for loading media, focusing on roll media.
Detailed media loading, width measurement, and origin setting.
Covers the operational aspects of the SummaSign Pro SL cutters.
Explains LCD and control panel keys.
Describes the LCD, its characters, and status display.
Functions of RESET/LOAD key for origin, load, reset, abort, recut.
Toggles between online and offline operation.
Accesses menus for cutter configuration.
Selects the currently displayed item on the LCD.
Keys used for various operations, usage shown on LCD.
Used for menu navigation and value adjustment.
Raises or lowers the tool offline.
Selects the active tool (knife, pen, pounce).
Covers online, offline, and local operation types.
Explains online/offline concepts and LCD indicators.
Operating the cutter directly from the control panel.
Configures cutter operating parameters and saves settings.
Sets or modifies cutting pressure for the knife.
Sets or modifies distance between knife tip and axis.
Sets or modifies pressure for the pouncing tool.
Sets or modifies tool velocity.
Enables overcut to facilitate weeding.
Modifies distance between pounced holes.
Accesses submenus for initial setup and computer communication.
Configuration settings for system parameters.
Improves speed/quality for high-res data cutting.
Smooths vectors in curved graphics.
Selects cutter's active language (DM/PL, HP-GL).
Selects default tool for power-up.
Selects English or metric units for menus.
Selects DM/PL user-addressable resolution.
Sets baud rate for RS-232-C serial communication.
Sets byte format and parity for serial communication.
Controls RTS/DTR signals for hardware handshaking.
Determines if DM/PL errors are reported or ignored.
Determines if HP-GL errors are reported or ignored.
Sets HP-GL origin point (Right Front or Center).
Activates or deactivates media sensors.
Controls automatic vinyl pulling from roll.
Determines if pen/knife-select commands are accepted.
Controls media loading with DM/PL Window-command.
Sets Flex-Cut mode for alternate pressure cutting.
Modifies distance between graphics for multiple recuts.
Accesses internal tests for cutter diagnostics.
Corrects concentricity problems of tangential knife blade.
Procedure to test and correct knife origin alignment.
Procedure to test and correct knife lateral alignment.
Procedure to test and correct knife longitudinal alignment.
Cuts media border to verify exact cutting area.
Produces hard copy of current cutter configuration settings.
Performs electrical/mechanical test to ensure cutter is operational.
Tests cut quality and provides feedback on settings.
Calibrates sensitivity of the Optical Positioning System (OPOS) sensor.
Calibrates the Optical Positioning System (OPOS).
Allows changing OPOS parameters.
Accesses settings for adjusting the cutting process.
Special procedures not for normal operation, used by service.
Sets or modifies the LCD dialogue language.
Displays ROM revision information for diagnostics.
Provides cutter information for service requests.
Checks if the OPOS sensor is functioning properly.
Checks media sensors and switching levels.
Calibrates by cutting and measuring perpendicular lines.
Verifies RS-232-C serial communications circuits.
Checks the RAM bit for bit.
Restores factory-defined menu settings.
Calibrates knife/pen pressures and sets landings.
Adjusts the LCD contrast (intensity).
General information related to maintenance procedures.
How to maintain and clean the SummaSign Pro SL cutters.
Procedures for cleaning drive sleeves for proper media traction.
Instructions for cleaning front and rear media sensors.
How to clean the nose piece to prevent poor cut quality.
How to clean the OPOS sensor hole.
Changing cutter voltage and fuses.
Describes signal connections for cutter-computer communication.
Introduces signal connections and cabling recommendations.
Notes and setup for the RS232 serial interface.
Configures computer serial port for cutter communication.
Pinout of the RS-232C serial interface connector.
Essential signals for custom serial cable connection.
Notes and specifications for the USB interface.
Details USB interface standards, cable length, and connectors.
Step-by-step guide to install USB drivers on Windows.
Guide to install USB drivers and utilities on Macintosh.
Details pinout for the parallel interface connector.
Lists duly certified media types for SummaSign Pro SL cutters.
Alphabetic list of certified media manufacturers and product types.
| Model | SummaSign Pro SL T-series |
|---|---|
| Contour Cutting | Yes |
| Interface | USB |
| Power Requirements | 100-240 VAC, 50/60 Hz |
| Dimensions | Varies by model |
| Weight | Varies by model |
| Repeatability | 0.1 mm |
| Resolution | 0.01 mm |