Coaster Brake (if equipped)
Riding, coasting and stopping are all controlled by the foot operated crank. To slow the bicycle down for better control or
to stop it, just pedal backward to apply the brake. The brake should be applied smoothly and evenly to prevent the rear
wheel from skidding. When you stop pedaling, the bicycle will coast.
Pedal Installation
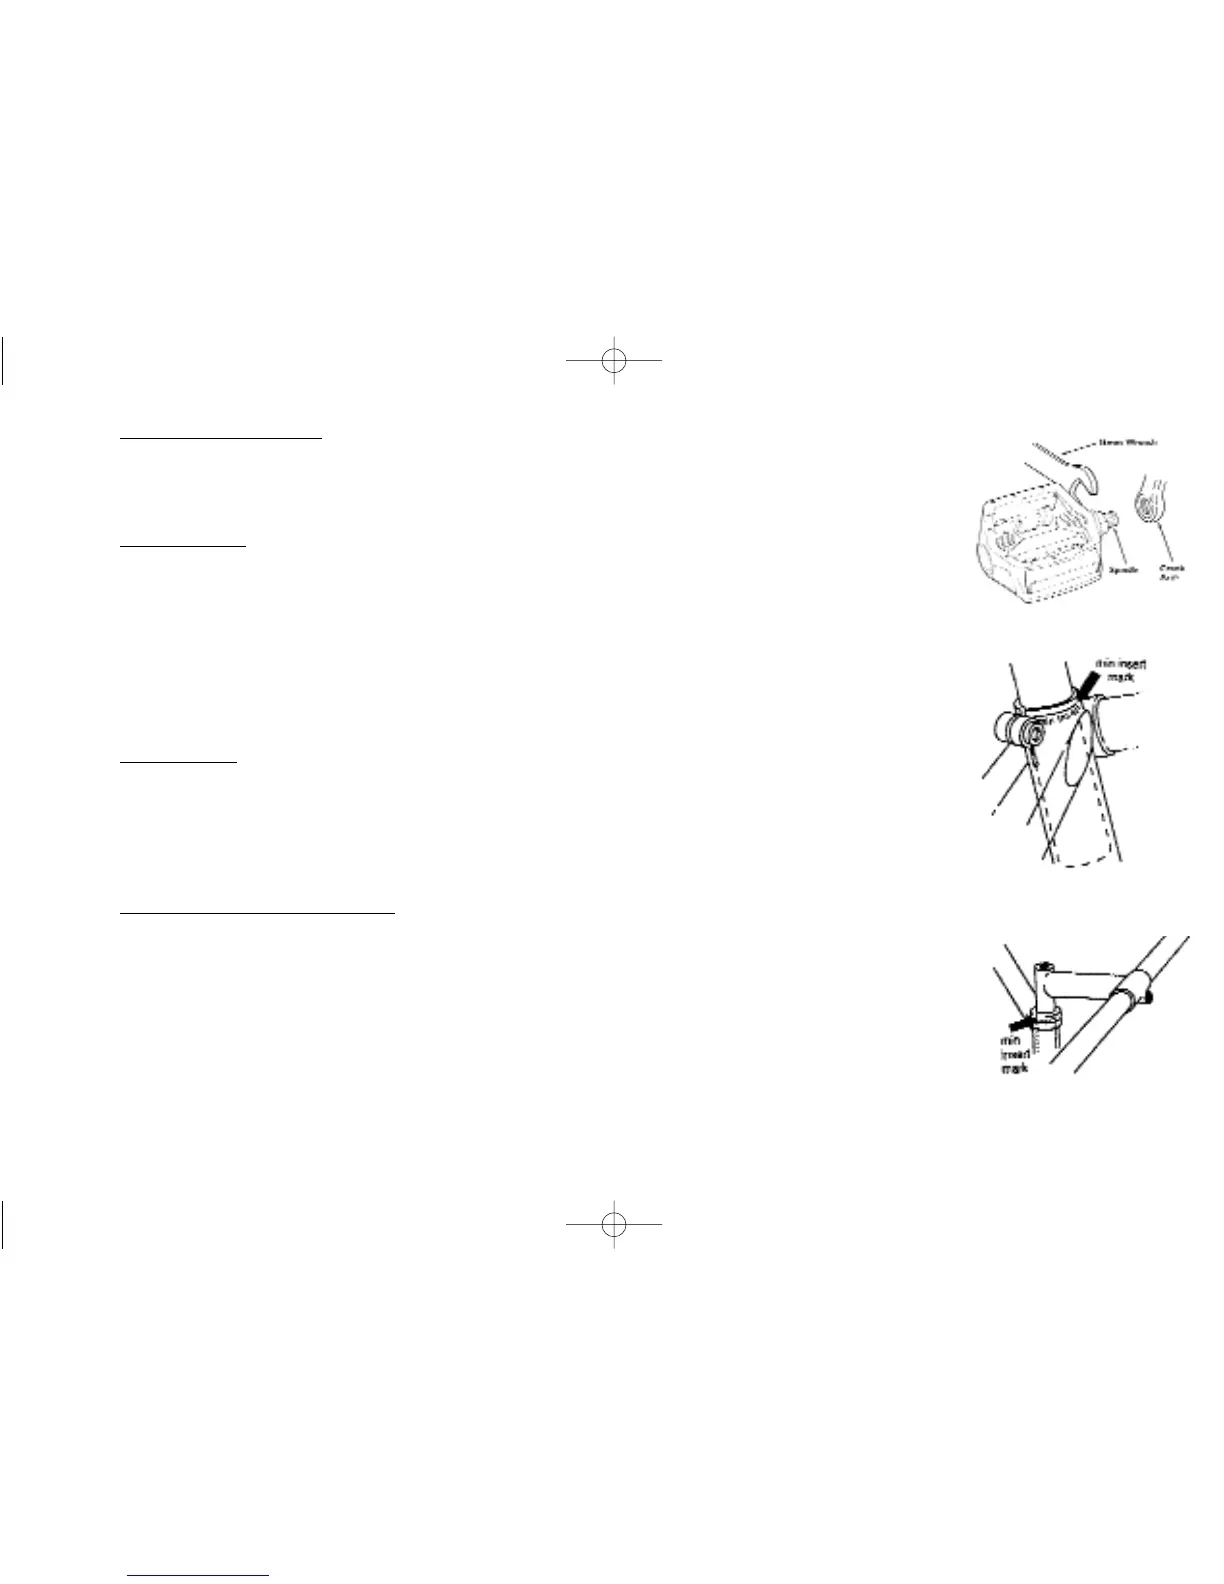
The pedals are stamped "R" and "L" on the threaded end of the pedal.
1. Put a small amount of grease or lubricant on the pedal threads.
2. Screw in the right ("R") pedal (right side of bike with chain) by turning it clockwise as you face the bike.
3. Screw in the left ("L") pedal by turning it counter-clockwise as you face the bike.
4. Tighten both pedals with a 15 mm open-ended wrench. (fig. a)
WARNING: Make sure each pedal is tightened securely. Failure to do so could result in a serious accident.
Note: Pedals and crank arm bolts should be re-tightened after the first 25 miles.
Seat Installation
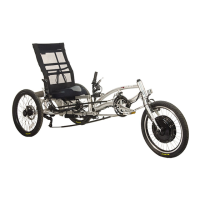
1. Install seatpost into seat.
2. Insert seatpost into seat tube of bike.
3. Adjust height and seat angle. Make sure minimum insertion mark on seatpost is inserted into frame and not visible.
(fig. b)
4. Secure seat binder and saddle clamp.
Handlebar
Adjustment and Alignment
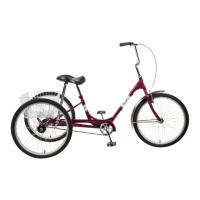
The handlebars may be raised or lowered for best arm comfort.
1. Using a 6 mm hex wrench, loosen the expander bolt.
2. Raise or lower the handlebars according to your needs. Your arms should be in a relaxed, comfortable position and
your knees should clear the bars. Be sure the maximum insertion line marked on the stem is not visible. (fig. c)
3. Align the handlebars perpendicular to the front wheel. To do this, stand with the front wheel between your legs and
look at the alignment of the handlebars in relation to the front wheel.
4. Tighten the expander bolt.
5. To check the tightness, hold the front wheel between your legs and try to turn the handlebars with your hands. If
there is any slippage, tighten the bolt more securely.
Page 5
(Fig. a)
(Fig. b)
(Fig. c)