Internal Geared Hub Adjustment (Shimano Nexus)
1. Put shifter into highest gear position (4 for 4 four speed and 7 for seven speed).
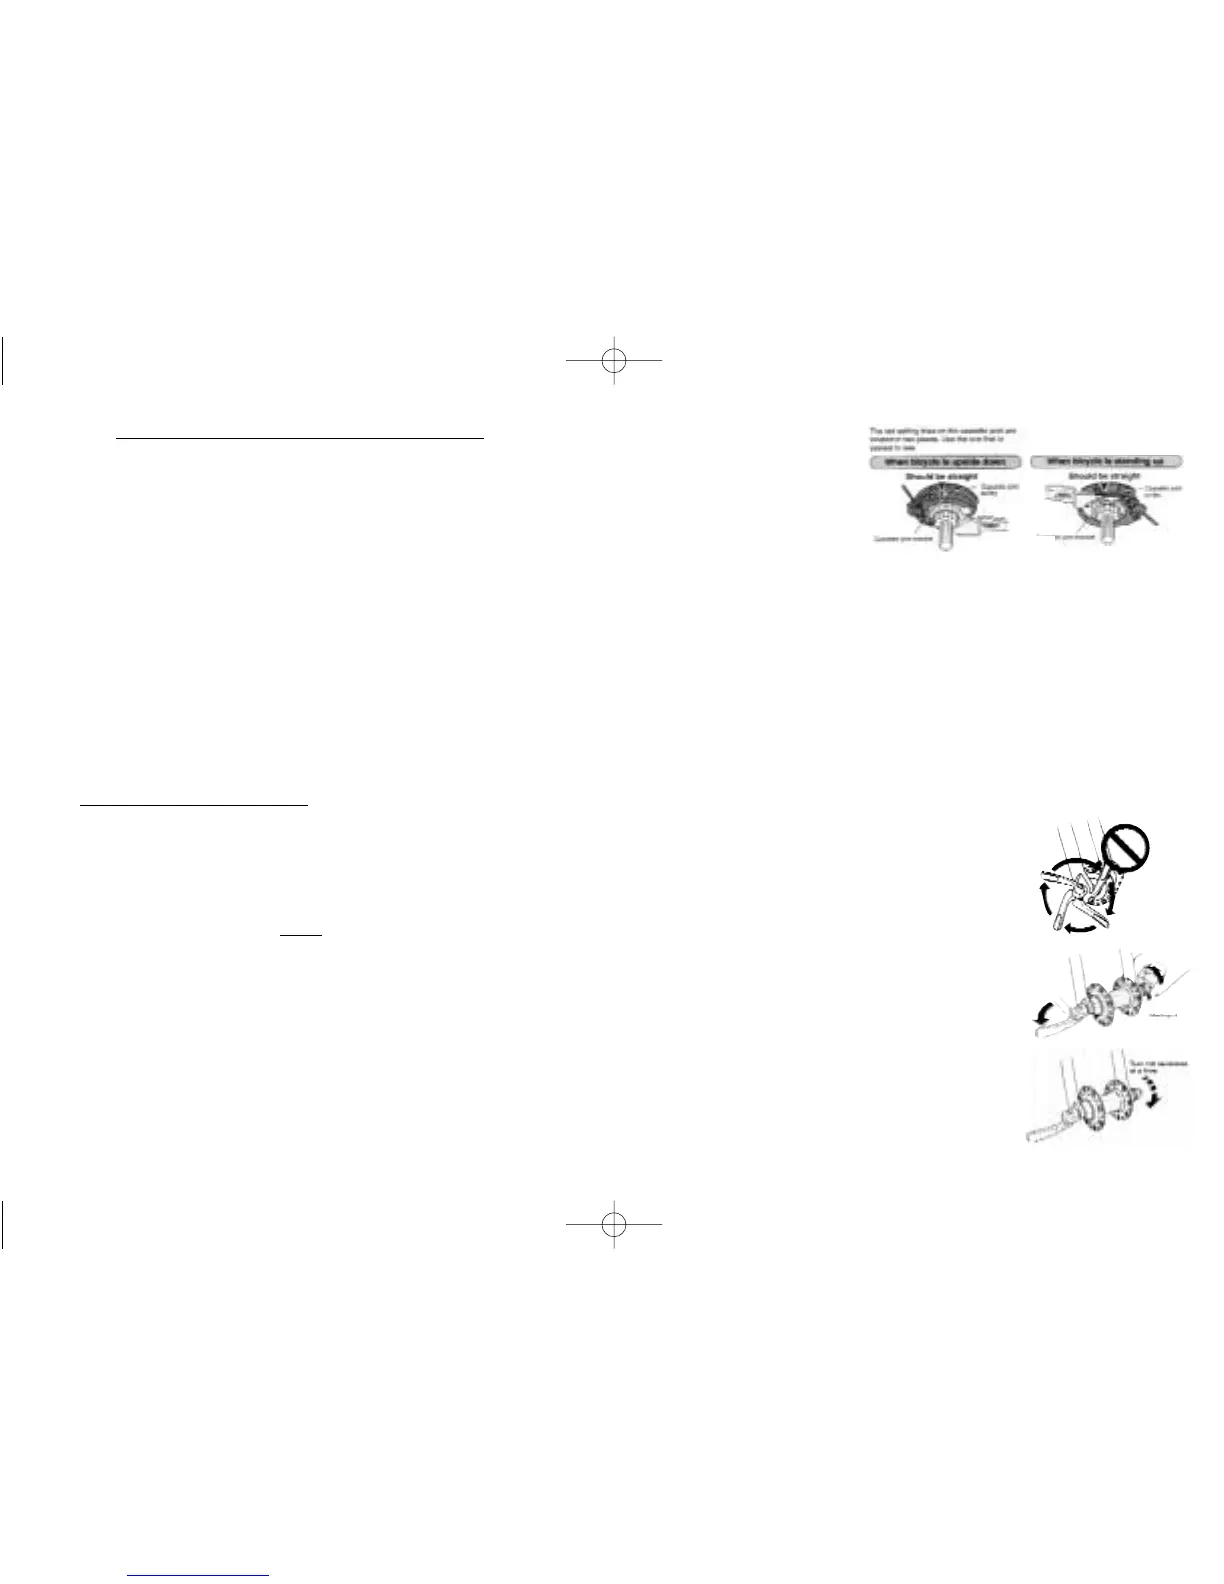
2. If the red setting lines are not aligned (Fig. a), turn the cable adjustment barrel on the shifter to align the
setting lines. After this, move shifter once more from 4 (or 7) to 1 and back to 4 (or 7), then check to be
sure that the red setting lines are aligned.
CARE AND MAINTENANCE
WARNING: Do not ride your Sun Bicycle until both front and rear brakes have been checked and are functioning properly. Keep all nuts, bolts and quick
release levers well tightened. Lubricate cables occasionally to prevent binding. Failure to do so may cause a malfunction, resulting in a serious or fatal acci-
dent. (See Front & Rear Brake Adjustment page-4)
WARNING: Adjustment of the brake lever in too narrow a position may cause the lever to hit the handlebar before full braking action is achieved. This is a
dangerous situation. Recheck the brake lever position and make appropriate adjustments before riding. Failure to do so may result in inadequate or loss of
brake power, resulting in a serious or fatal accident.
Quick Release Le
ver Operation
CAUTION: Never fasten a wheel to a frame by rotating the quick release lever as shown in the diagram on the left (Fig. b). Simply
rotating the lever in a circular motion will not fasten the wheel to the frame. Detachment of the wheel as a result of improper hub
installation can result in serious bodily injury.
NOTES
If the quick release lever can be easily
pushed to the CLOSE position, this means the clamping strength is insufficient. Return the
quick release lever to the position perpendicular to the bicycle frame. And again turn the adjusting nut clockwise to increase the
clamping strength. Push the quick release lever back to the CLOSE position. (Fig. c)
If the clamping strength is adjusted too strong and the quick release lever cannot be pushed to the CLOSE position, turn the adjusting
nut in a counter-clockwise direction to reduce the clamping strength. When doing this, do not fully release the adjuster nut. Turn it 1/8
of a revolution, and then try to push the lever to CLOSE, to set the maximum clamping strength with which you can push the quick
release lever to the CLOSE position. (Fig. d)
Page 7
(Fig. b)
(Fig. c)
(Fig. d)
(Fig. a)
 Loading...