Document No. 8128000560
Software Revision – N1B (07 Oct 04)
7-17
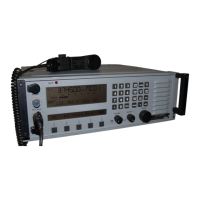
RT-9000 B
7.3.2.6 DISPLAY ILLUMINATION
The Front Panel display will illuminate when the RT-9000 B is first powered up. If no keyboard activity is
detected for about 30 minutes, the display illumination will automatically turn OFF. Depressing the ‘PNL LT’
key will cause both the Operational and Feature Menu Display illumination to turn back ON. A second
depression turns it OFF. The user may also turn OFF the display illumination immediately at power up.
NOTE: The backlighting components for both the Operational and Feature Menu
Display LCD displays gradually lose luminescence over time. If the
display illumination is not needed, the display illumination Panel Light
(‘PNL LT’) should be turned OFF to prolong the life of the backlighting
components. See Section V for replacement of backlighting components.
7.3.2.7 OPERATING WITH PRE-SET CHANNELS
Operation using Pre-set Channels requires that the desired operating frequencies and their related settings
have been previously entered into the RT-9000 B Transceiver’s memory. If this has not been previously done,
refer to section 7.3.2.9 ahead before continuing.
Refer to Figure 7.3.2.5. Depress the Channel (‘CHAN’) key at 2. The numerical portion of the Channel
Number at 3 will go blank. Key in desired Channel Number from ‘0’ to ‘127’ using the Numeric Keypad at 4 .
The Channel Number may be one, two, or three digits long; no leading zeros are required. The keyed in
Channel Number will appear on the display at 3 .
Depress the Enter (‘ENTR’) key at 5. The operating frequency stored for the Channel Number entered will
now appear on the display at 6 .
NOTE: If the entered Channel Number has been set up for Half-Duplex
operation (different Transmit and Receive frequencies), the Receive
frequency will be displayed when using these steps. To confirm the
Transmit frequency, depress the Read Transmit (‘READ XMT’) key at
7 . The Transmit frequency will display at 6 for about four (4) seconds
and then revert back to the Receive frequency.
If an Antenna Coupler is present in the system, an Antenna Coupler “Tune Cycle” may now be started by
depressing the Coupler Tune (‘CPLR TUNE’) key at 8 . If the Antenna Coupler successfully tunes the
Antenna, a ‘SYSTEM READY’ message will briefly appear and automatically clear. If any other messages
appear, the User should refer back to section 7.3.2.4 for guidance.
If the Antenna Coupler has Pre-set Channel capability, the coupler will record into its memory its internal
settings for a successful “Tune Point”. This permits the coupler to quickly return to this “Tune Point” when this
particular Channel Number is selected in the future.
If the user has reason to believe the Antenna is no longer properly tuned or Antenna conditions materially
change, the User may depress the Coupler Tune (‘CPLR TUNE’) and start a new “Tune Cycle”. Every new
“Tune Cycle” is treated as an update to any tuning information currently stored in the Antenna Coupler’s
memory for any given Channel Number.
THE SYSTEM IS NOW FULLY OPERATIONAL ON THE SELECTED CHANNEL
 Loading...