the thrust cap. If motor is put on the Mixmaster stand, both hands will be
left free for this adjustment. When the rubbing noise is heard, pull wall plug
out immediately, turn thrust cap and try again. When a point is found where
the rubbing noise is not heard, leave wall plug in outlet so motor will run
continually. Then, very slowly advance thrust cap (107), by turning it to the
left until rubbing noise is just heard. At this point back up thrust cap from
1/16 to 1/4 turn to the right and lock in this position by bringing up lock
nut (106) tight against the thrust cap. Pull wall plug from outlet and untape
the two lead wires that were connected temporarily for this adjustment.
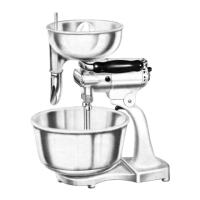
B-9. Put governor assembly (100) In position - with resistor (143) and condenser
(140) mounted in place - and align keyway at edge of Bakelite disc with key in
motor housing. Have the two lead wires pass up through the two slots at edge
of Bakelite disc. Fasten governor in place with three round head mounting
plate screws (91). Fasten the two clips at ends of lead wires with two binder
head screws (122), one to the fixed end of bronze switch lever (105) and the
other to the fixed end of the governor diaphragm. This last screw also holds
fast the looped end of the wire coming through from the governor condenser
(140). At this point the motor should run at high speed when the wall plug on
the cord is connected to an electrical outlet and the bronze switch lever
(105) is pressed down with an insulated piece of material (wood, etc.).
B-10. To complete the assembly of the rear of the motor, proceed as follows:
Place thin rubber insulating ring gasket (116) around Bakelite governor disc
(100), and push it back against motor housing. Remove switch knob (70) from
rear cover (120) if not already taken off, then put rear cover on the end of
the motor and fasten in place with the two round head rear cover screws (65)
at top (long screw) and bottom (short screw). Turn
these two screws to the
right
until they are tight, then turn the screws back to the left one full
turn
- important! Fit speed adjustment cam pin (l37) into square hole in rear
cover, Bakelite end first. Also put round switch pin (125) in round hole. Now
place switch knob (70) on rear cover, first making certain that knob is turned
so that white arrow points upward - that is, so arrow points to any position
between one and ten. Fasten switch knob with screw (119) using washer (88)
underneath the head.
B-11. Adjusting
the Speed Control: The speed control is adjusted by inserting
special 3/32 in., long screw driver blade through small hole in switch knob
(70) near center of knob; and turning speed adjustment cam pin (137) to the
right or left with the screw driver. When turned to the right the speed of the
motor is slowed. When turned to the left, the motor speed is increased. Before
attempting to adjust the speed control, see that upper and lower screws (63)
that hold rear cover in place are loosened about one full turn as described in
Section B-10. Then set the white arrow on switch knob at 1, the first and
lowest speed, and turn speed adjustment cam pin with thin screwdriver to left
or right as required, until whipper socket sleeves (13 and 20) revolve at a
speed of about 400 revolutions per minute. Do
not press in with screwdriver
when
making this adjustment - check speed with screwdriver entirely removed.
B-12. After speed has been adjusted according to Section B-11, turn switch knob (7)
to 10 - high speed - and tighten upper and lower rear cover screws (65) to a
point where the motor operates at maximum speed as