The felt wick (110) in the cover should feed oil to the governor slide
bearing.
14-A.If the parts referred to in the preceding section are all in good shape the
switch cover (71) may be put in place. First turn the Switch Knob
(70) to the “OFF” position, then governor slide (113) should be started on
the armature shaft in such manner that the forked shaped legs will
enter the slot provided in the governor disc (100) around the hub. The cover
should then slip into place and the two screws (90 and 65) can be inserted
and screwed in. The rear handle bracket (77) should be placed under screw
90. WARNING: Do not start mixer
when
back cover is on without first
adjusting
armature thrust screw, if thrust screw (26) and switch knob (70)
have been disassembled (see section 15).
15. Armature Thrust Screw Assembly (26
)
The armature thrust screw assembly consists of a piece of oil-less type
bearing material pressed into a hole in the end of a steel screw. The thrust
screw assembly (26) should be turned to the right with a screwdriver until
the bearing end presses against the end of the armature shaft, then the
thrust screw should be backed off (turned to the left) 1/8 of a turn. While
the thrust screw is held in this position with the screwdriver, the thrust
screw lock nut (25) should be tightened securely with the socket wrench
supplied for adjusting thrust screw lock nut. Thrust screw nut washer (88)
and switch knob (70) are also held in p1ace by thrust screw lock nut 25.
The motor bearings (45) may be checked at this point by plugging the cord
into a socket and turning the switch knob (70). All speeds should be
obtainable.
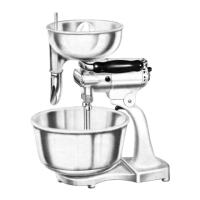
16. Fitting the Worm Gears (9) in the Gear Case (5)
Before installing worm gears, inspect the whipper spindle sleeve bearing
surfaces and if scored or rough, smooth the bearing, or if necessary replace
gear case (5). Next inspect the whipper spindle sleeves (13 and 20) and
remove scores or roughness with fine emery cloth or file. If scored too much
the sleeves should be replaced with new.
To start assembling the parts, hold gear (9) by the metal hub with the
special thin pliers and insert gear into right hand side of the gear
compartment, with the hub down. Also, hold gear so the setscrew hole in the
hub is to the front, facing the workman. This is important, because it
determines the timing of the whippers (21). Next, while holding gear (9) in
position as described above (use left hand for this purpose), take the
juicer spindle sleeve (20) in right hand, and push it up thru the gear case
(5) into the gear (9). While doing this, have the depression for worm gear
set screw (10), which is drilled on the sleeve, in line with, and visible
thru the set screw hole in the hub of the gear (9). Insert set screw (10)
using special “T” handled socket wrench and turn down set screw’ TIGHTLY.