Using your FoodSaver® Appliance –
How to vacuum seal
1. Begin with a FoodSaver
®
Vacuum Sealing
System Bag (or create a bag as described
on page 10).
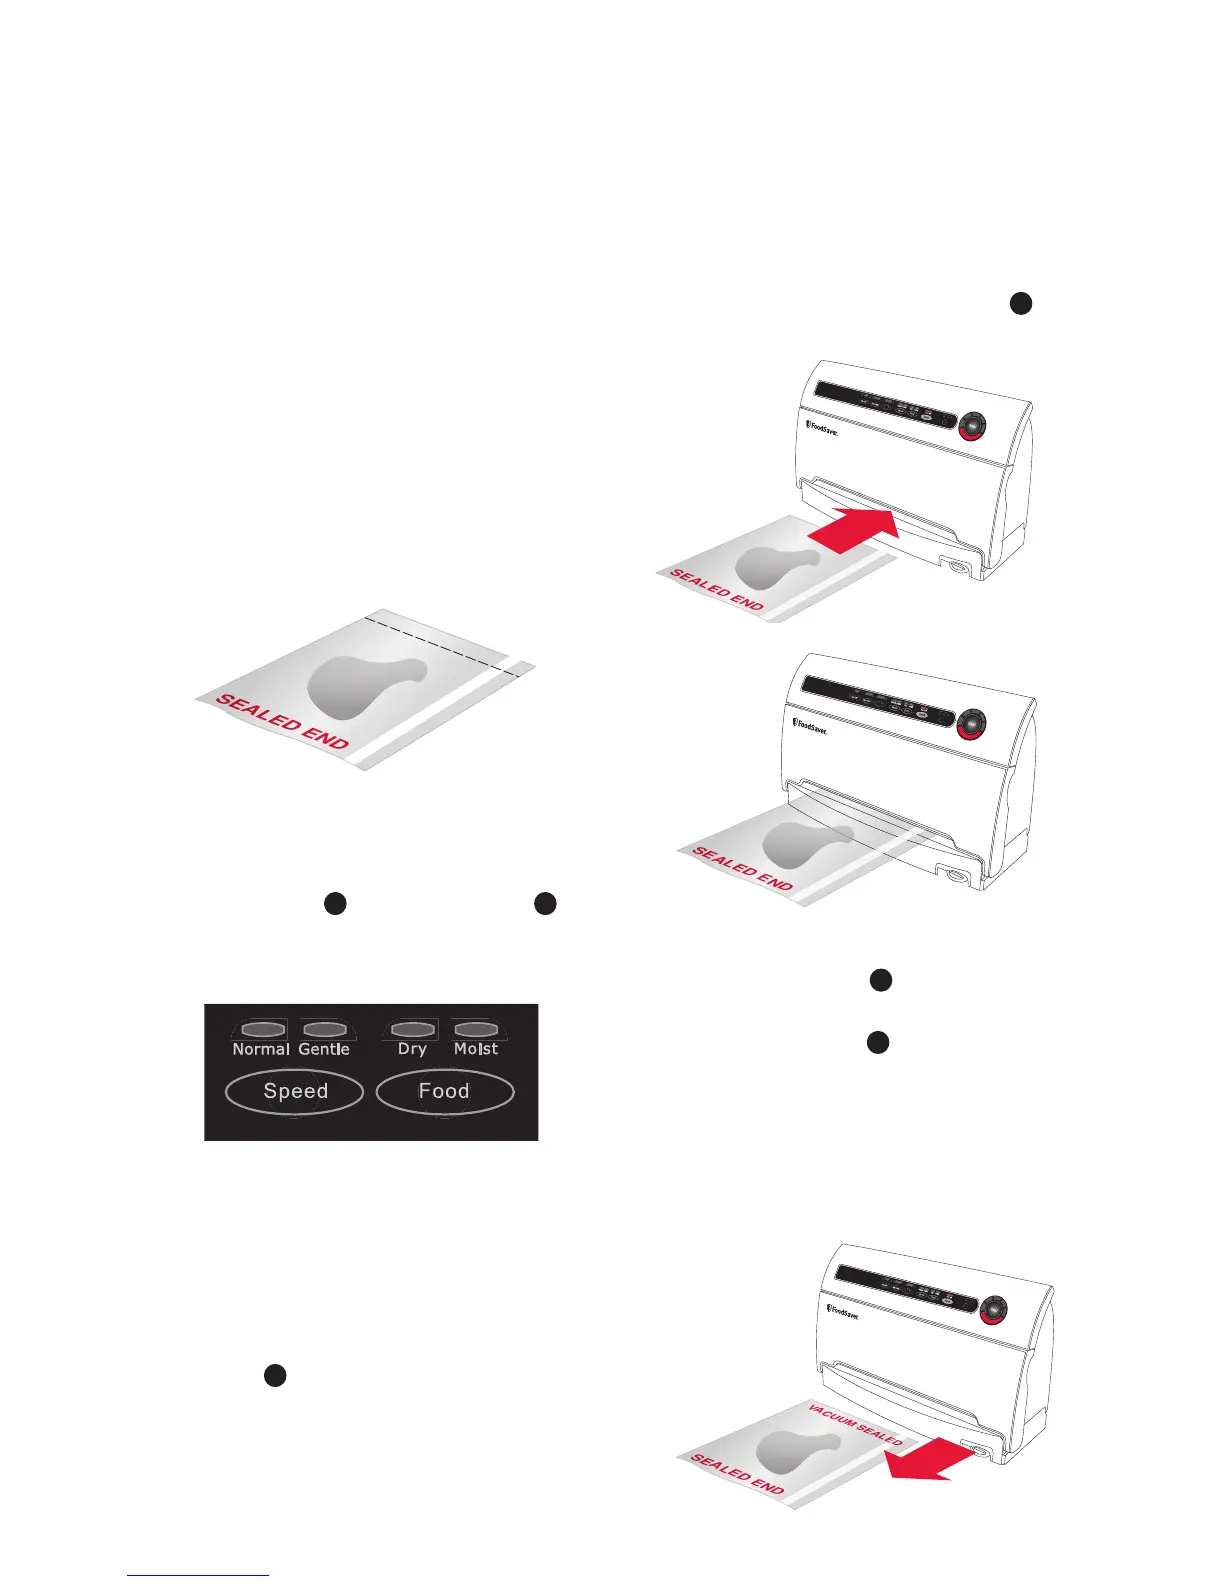
2. Place items in a bag, allowing at least
10cm of space between bag contents
and top of bag (Fig.1). The extra space
is required to allow the bag to seal
tightly around contents.
3. OPTIONAL: If you wish to customise the
vacuum sealing process you may select
Speed Setting
5
and Food Setting
6
(Fig. 2). Default setting is Normal Speed
and Dry Food.
4. Your new FoodSaver
®
System
Automatically Vacuums and Seals.
To Vacuum: DO NOT PRESS THE SEAL
BUTTON. Using two hands, insert open
end of bag, curl down, into Vacuum
Channel
E
(Fig. 3/4).
5. Continue to hold bag until vacuum pump
starts. The Vacuum Progress lights
9
will illuminate.
Note: To prevent crushing delicate items,
press Seal/Stop Button
C
at any time to
begin automatic sealing process.
6. When red Seal Light
10
turns off, remove
bag (Fig. 5). Refrigerate or freeze if
needed.
Note: Wait at least 20 seconds between
seals to allow appliance to properly cool.